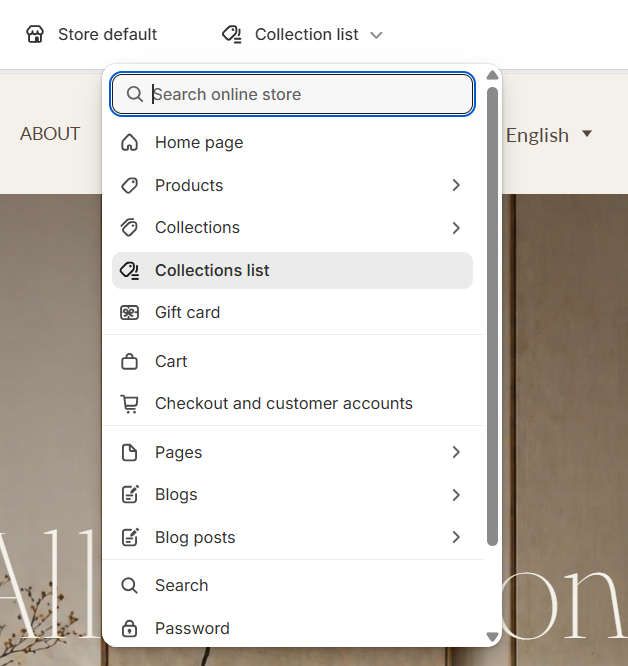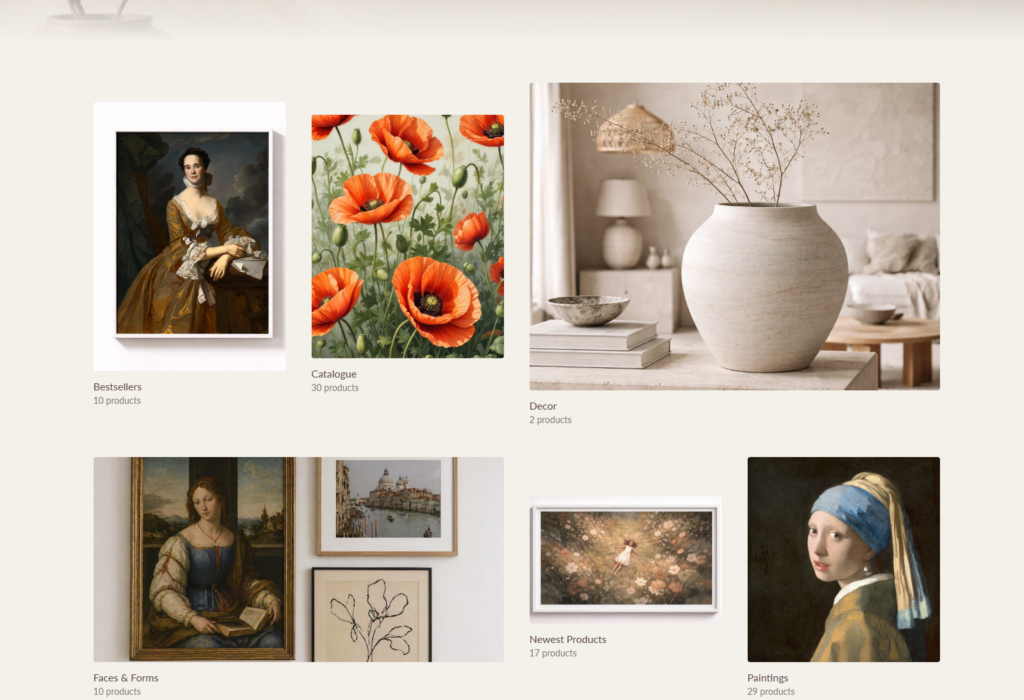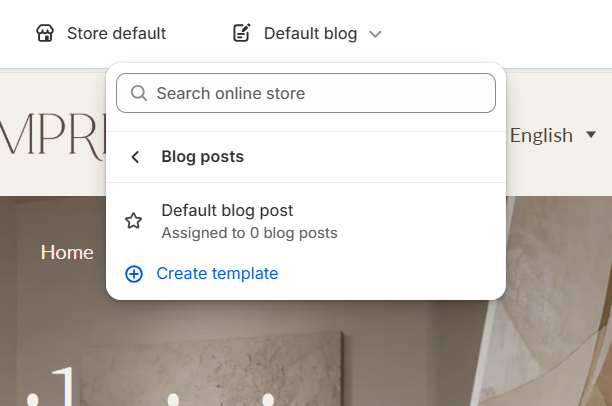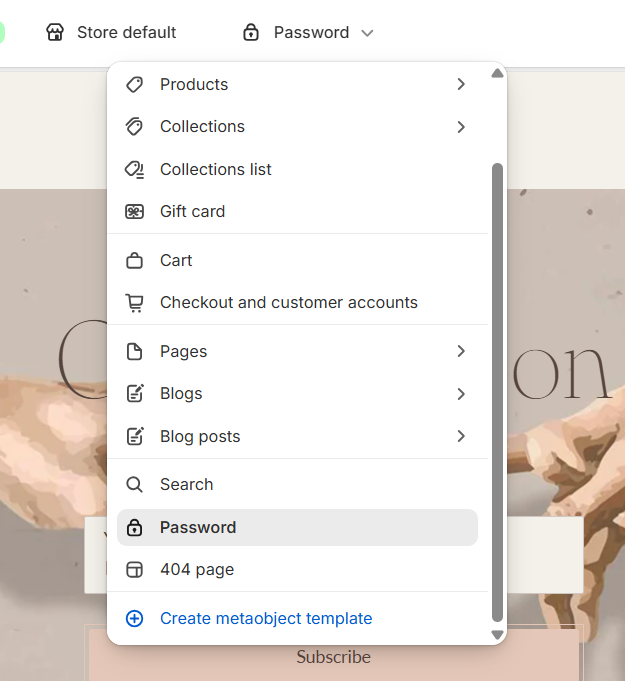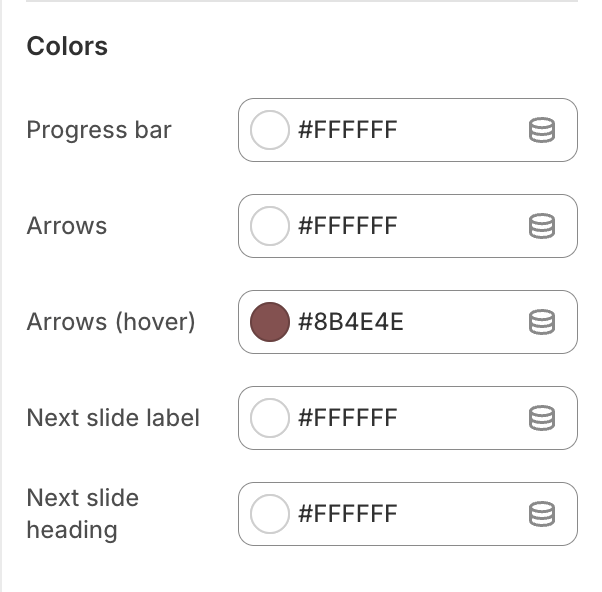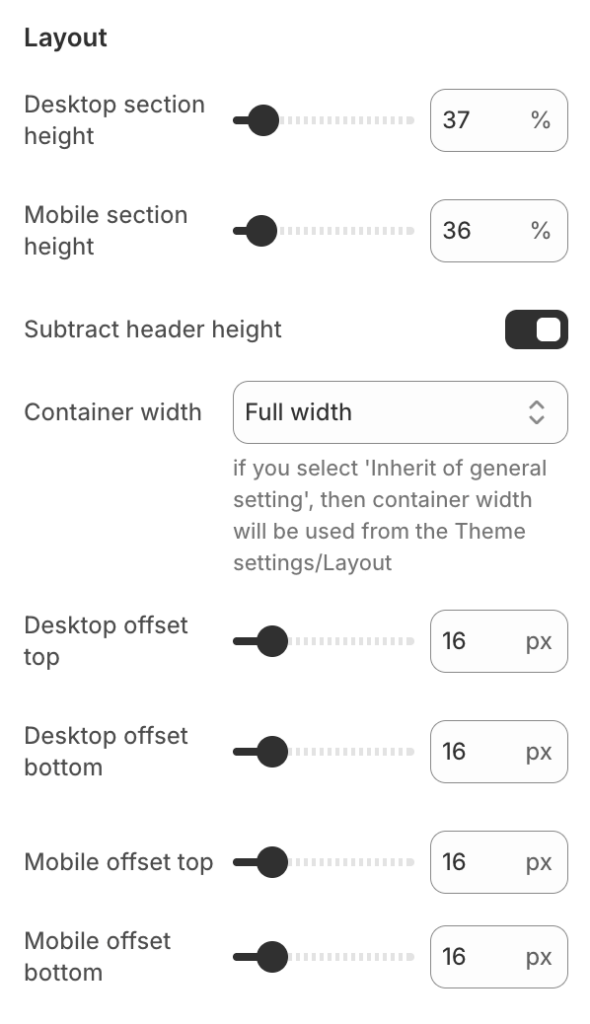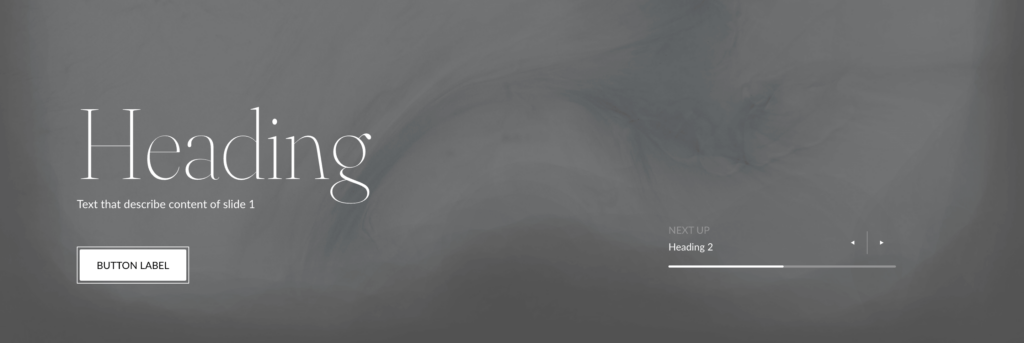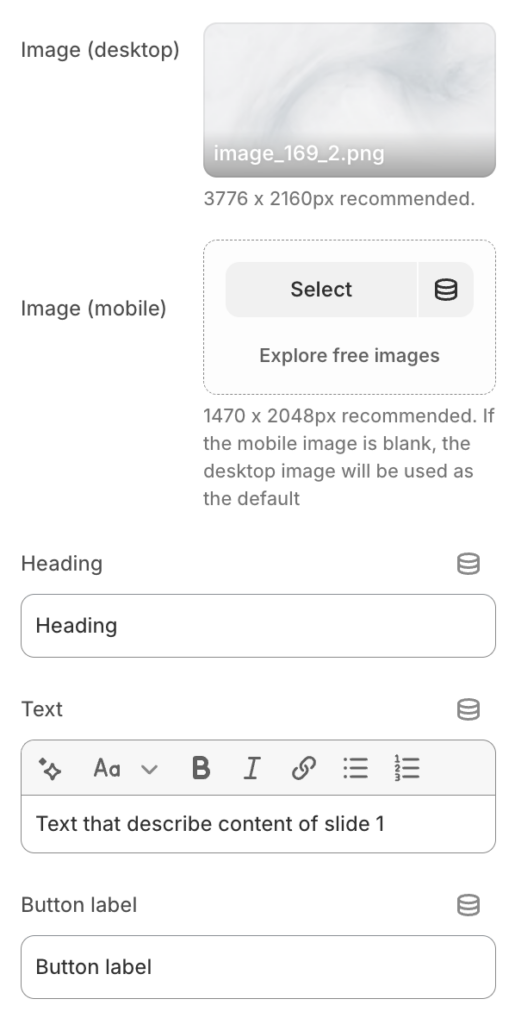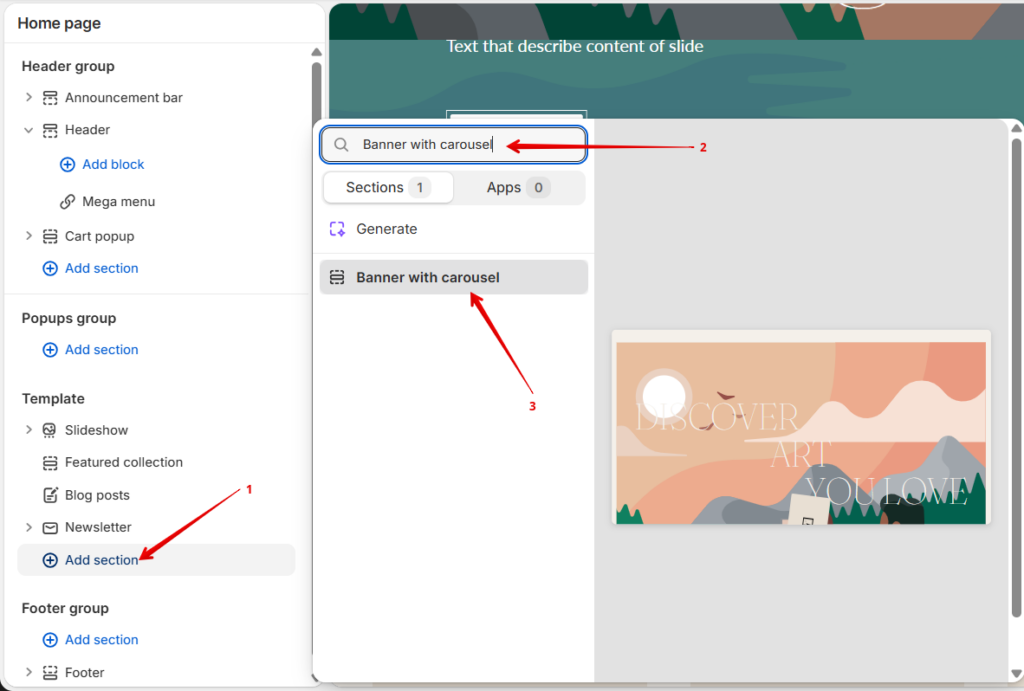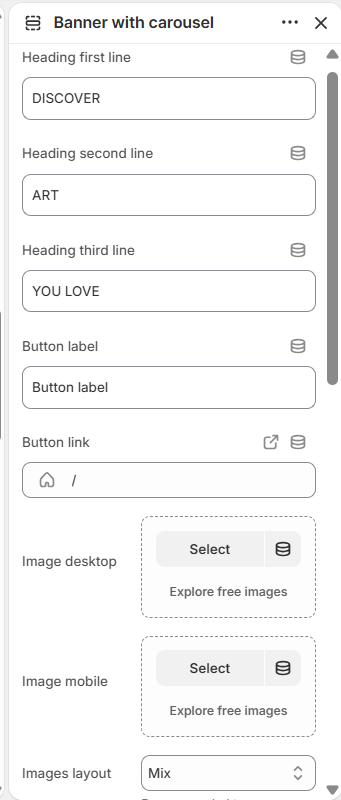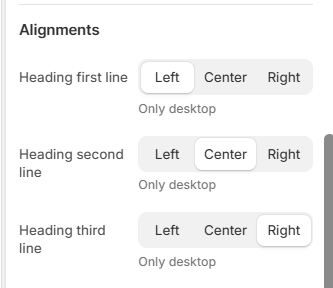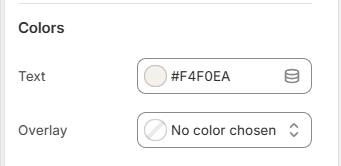
Typography

General

Typography

This settings block is intended for general Typography settings on the site.

In order to get to the Typography settings block, you need to go to Customizer → Theme Settings → Typography.

Typography

Settings

Base and heading fonts

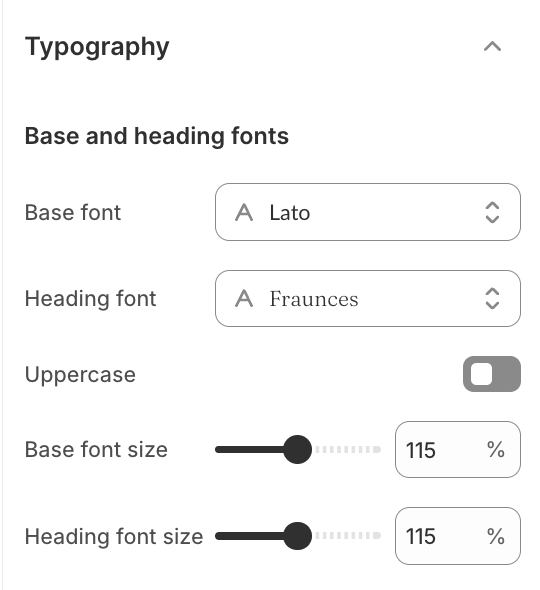
Typography settings

  1. Base font – font picker for plain text throughout the store;
  2. Heading font – font picker for the headings throughout the store;
  3. Uppercase – setting allows you to set text for headings in uppercase;
  4. Base font size – plain text size;
  5. Heading font size – heading text size.

Colors

General

Colors

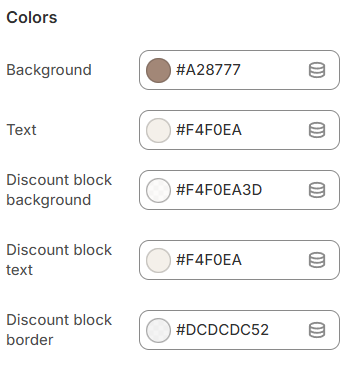
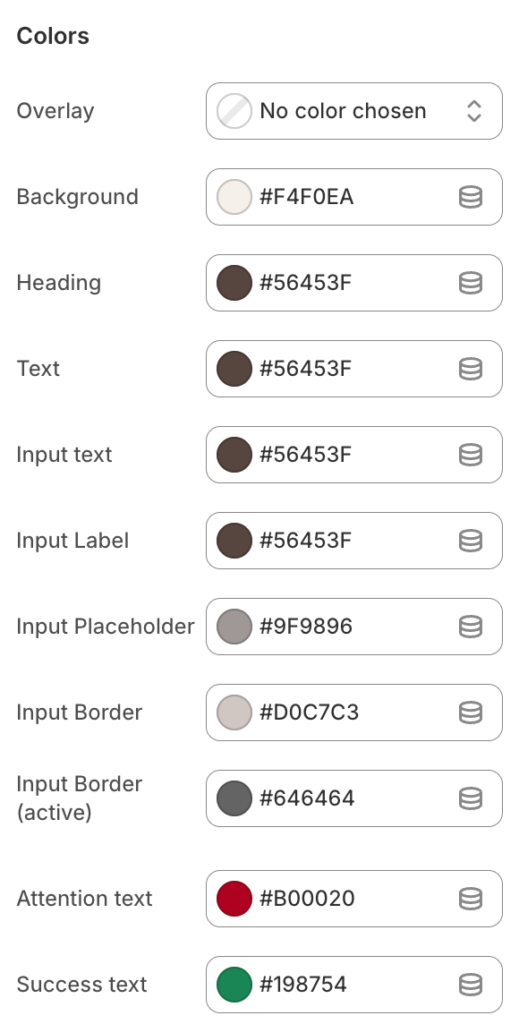
This settings block is intended for general Colors settings on the site.

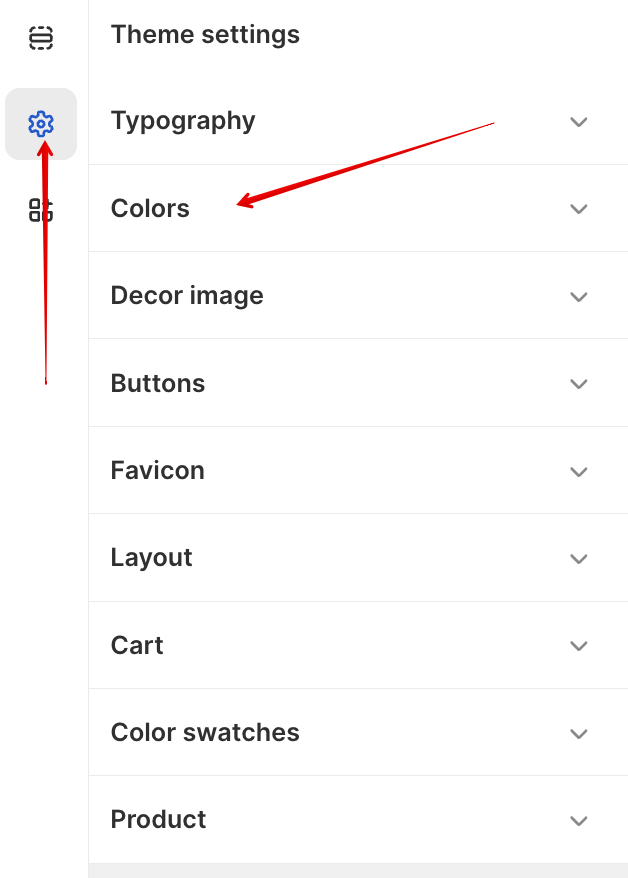
In order to get to the Colors settings block, you need to go to Customizer → Theme Settings → Colors.Colors

Text colors

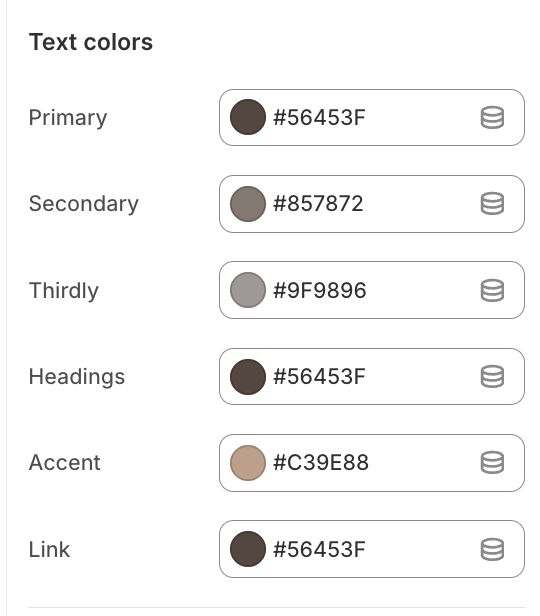
Text colors

  1. Primary – primary text color;

  2. Secondary – secondary text color;

  3. Thirdly – thirdly text color;

  4. Headings – text color for headings;

  5. Accent – accent text color;

  6. Link – color for links in RTE content;

Background

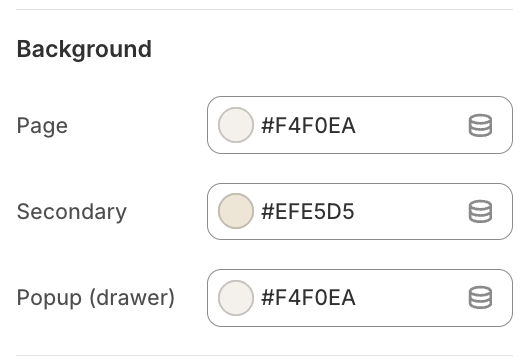
Background colors

  1. Page – page background color;

  2. Secondary – secondary page background color;

  3. Popup (drawer) – popups and drawers background color;

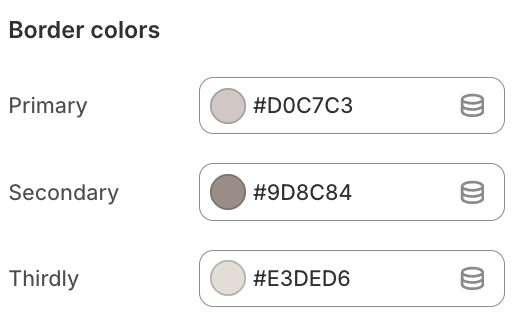
Border colors

Border colors

  1. Primary – color for primary borders;

  2. Secondary – color for secondary borders;

  3. Thirdly – color for third borders;

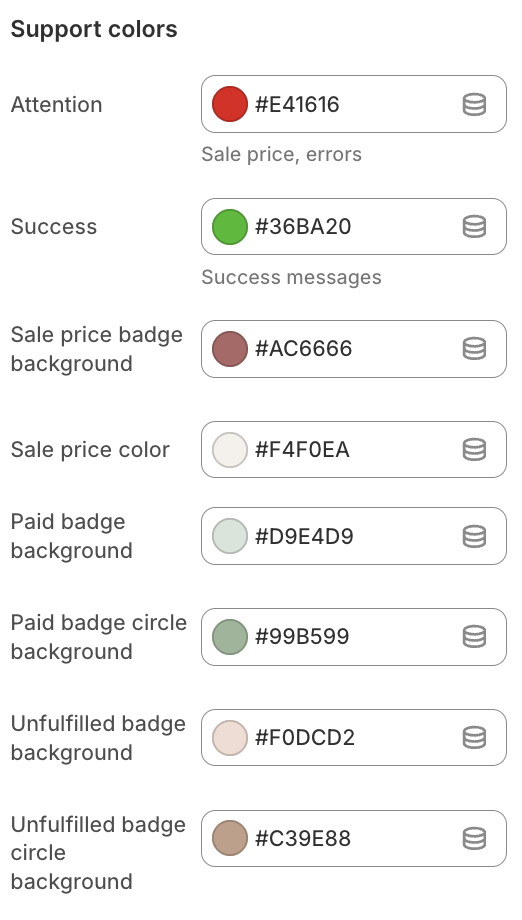
Support colors

Support colors

  1. Attention – auxiliary color: attention, error, etc.;

  2. Success – auxiliary color – success;

  3. Sale price badge background – background color of a sale badge;

  4. Sale price color – color of the on-sale price;

  5. Paid badge background – background color of the badge Paid;

  6. Paid badge circle background – background color of the Paid badge circle;

  7. Unfulfilled badge background – background color of the Unfulfilled badge;

  8. Unfulfilled badge circle background – background color of the Unfulfilled badge circle;

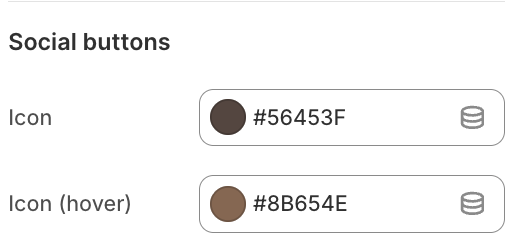
Social buttons

Social colors

  1. Icon – social media button icon color;

  2. Icon (hover) – social media button icon color on hover;

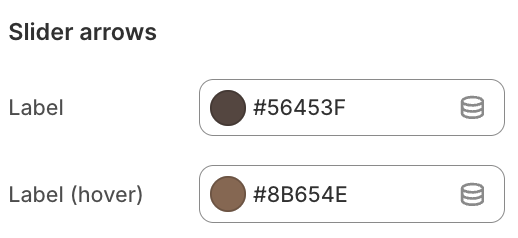
Slider arrows

Slider arrows color

  1. Label – color of the slider label;

  2. Label (hover) – color of the slider label on hover;

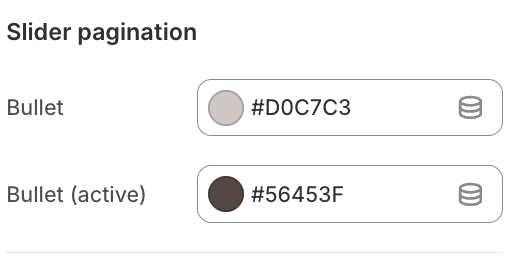
Slider pagination

Slider pagination colors

  1. Bullet – color of the pagination bullet;

  2. Bullet (active) – color of the pagination bullet on hover;

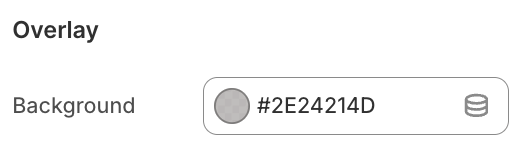
Overlay

Overlay colors

  1. Background – overlay background color;

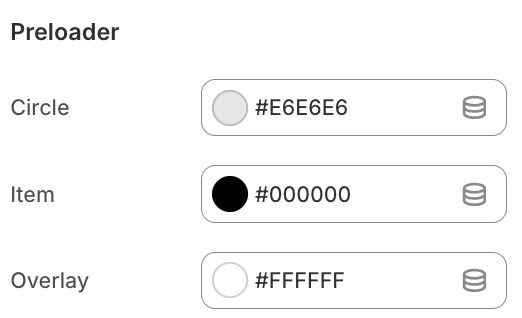
Preloader

Preloader colors

  1. Circle – color of the loader circle;

  2. Item – the color of the animated loader element;

  3. Overlay – overlay color when adding loader;

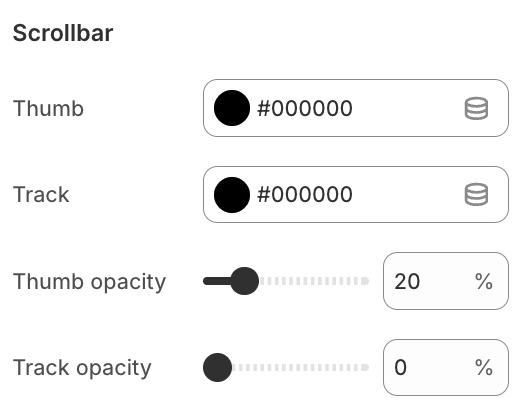
Scrollbar

Scrollbar colors

  1. Thumb – scrollbar thumb color;

  2. Track – scrollbar track color;

  3. Thumb opacity – transparency of the scrollbar thumb as a percentage of black;

  4. Track opacity – transparency of the scrollbar track as a percentage of black;

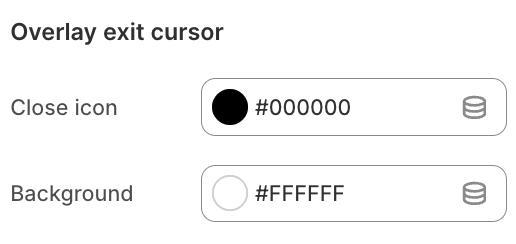
Overlay exit cursor

Overlay exit colors

  1. Close icon – color of the close icon in the overlay exit cursor;

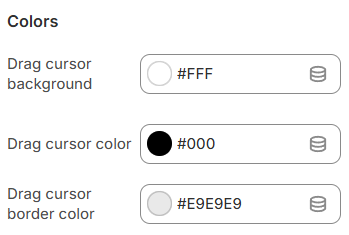
  2. Background – background color of the overlay exit cursor;

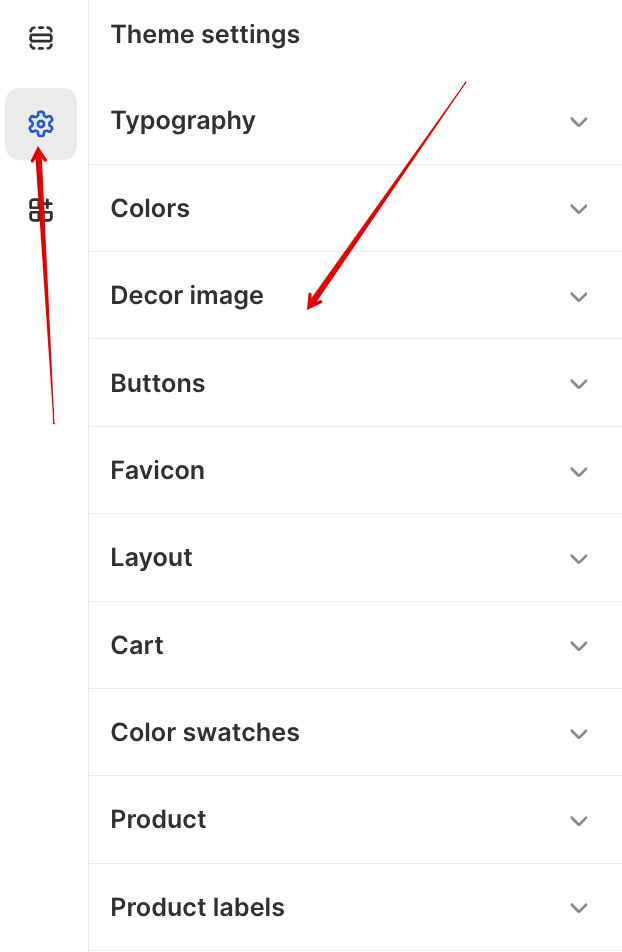
Decor image

General

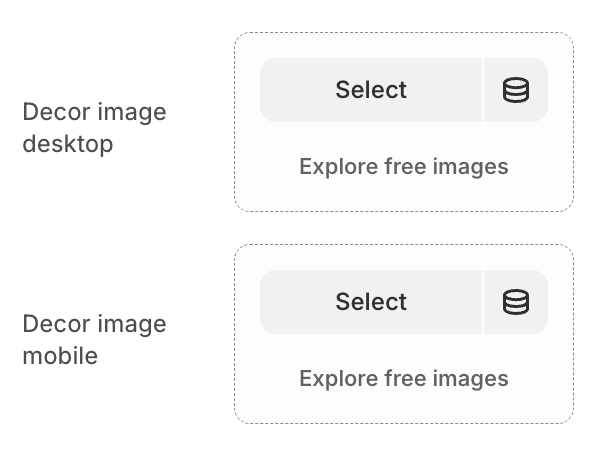
Decor image

This settings block is intended for general Decor image settings on the site.

In order to get to the Decor image settings block, you need to go to Customizer → Theme Settings → Decor image.

Decor image

Settings

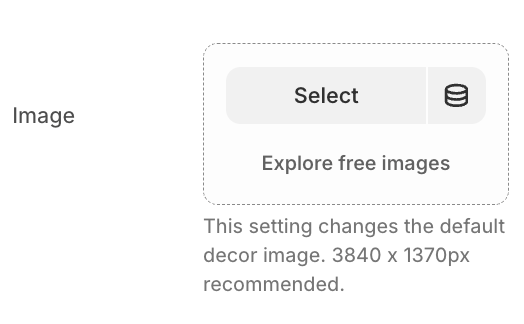
Decor image settings

  1. Image – this setting is responsible for adding a decor image;

Buttons

General

Buttons

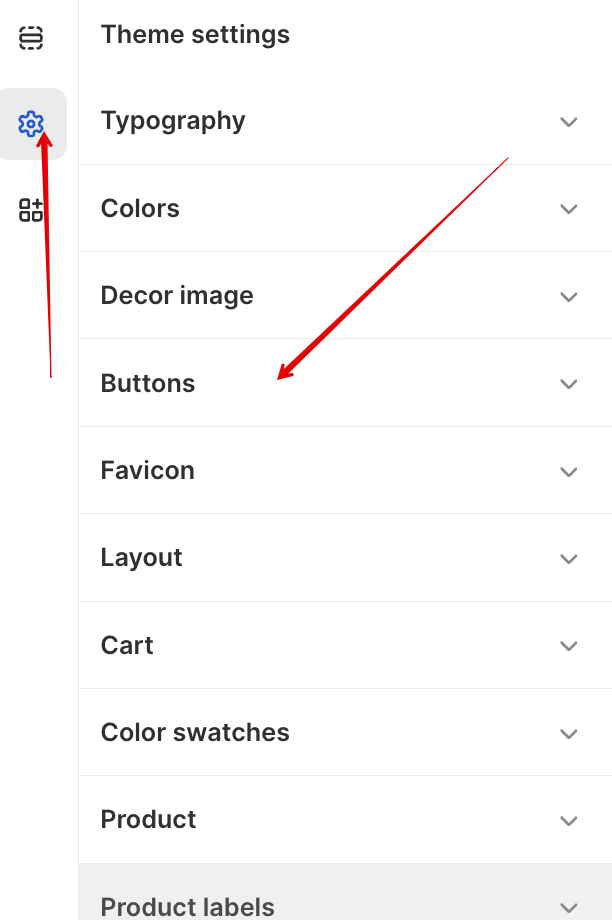
This settings block is intended for general Buttons settings on the site.

In order to get to the Buttons settings block, you need to go to Customizer → Theme settings → Buttons.

Buttons

Settings

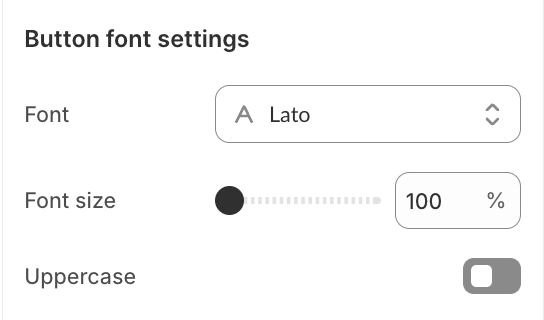
Button font settings

Button font settings

  1. Font – font family for all buttons, default: Inter;
  2. Font size – font size for all buttons, default: 16px;
  3. Uppercase – button text transform to uppercase.

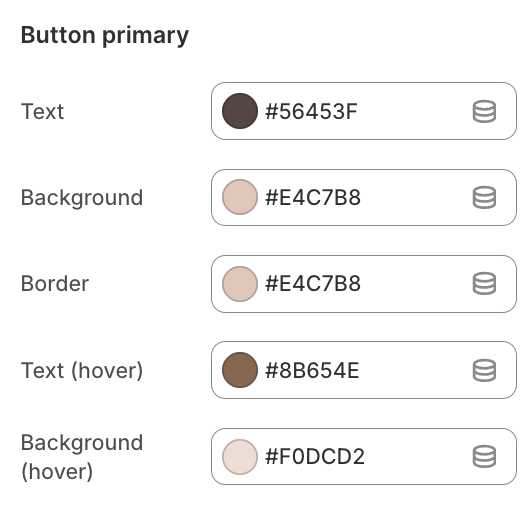
Button primary

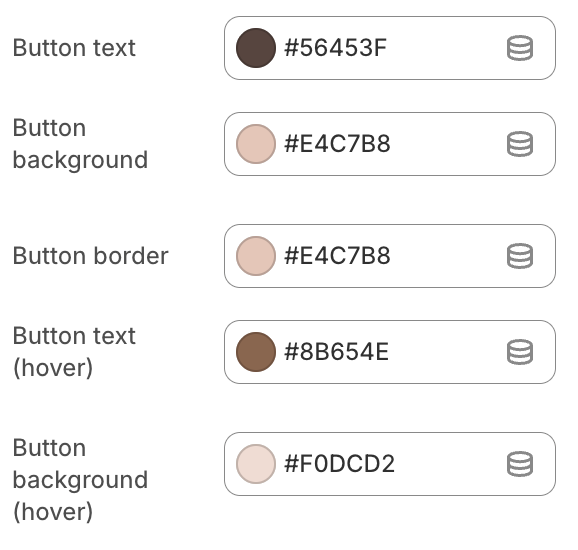
Button primary colors

  1. Text – main button text color;
  2. Background – main button background color;
  3. Border – border color;
  4. Text (hover) – button text color on hover;
  5. Background (hover) – background color of the main button on hover;

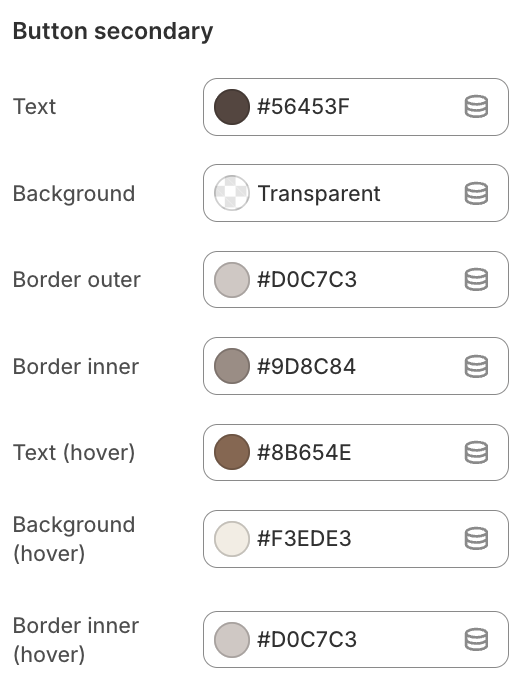
Button secondary

Button secondary

  1. Text – secondary button text color;
  2. Background – secondary button background color;
  3. Border outer – outer border color;
  4. Border inner – inner border color;
  5. Text (hover) – secondary button text color on hover;
  6. Background (hover) – secondary button background color on hover;
  7. Border inner (hover) – inner border color on hover;

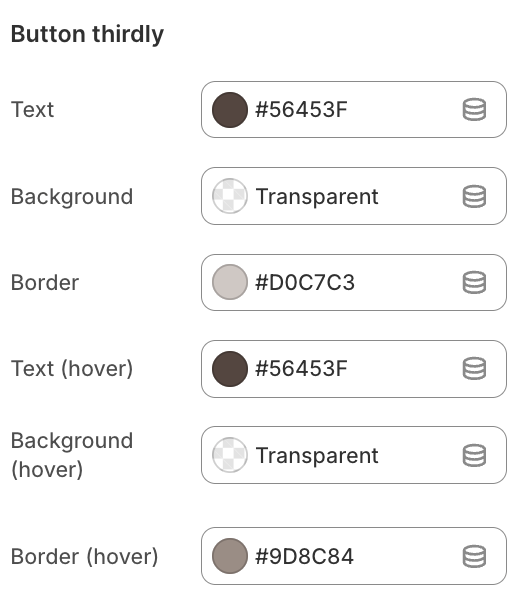
Button thirdly

Button thirdly

  1. Text – thirdly button text color;
  2. Background – thirdly button background color;
  3. Border – thirdly border color;
  4. Text (hover) – thirdly button text color on hover;
  5. Background (hover) – thirdly button background color on hover;

Favicon

General

Favicon

This settings block is intended for general Favicon settings on the site.

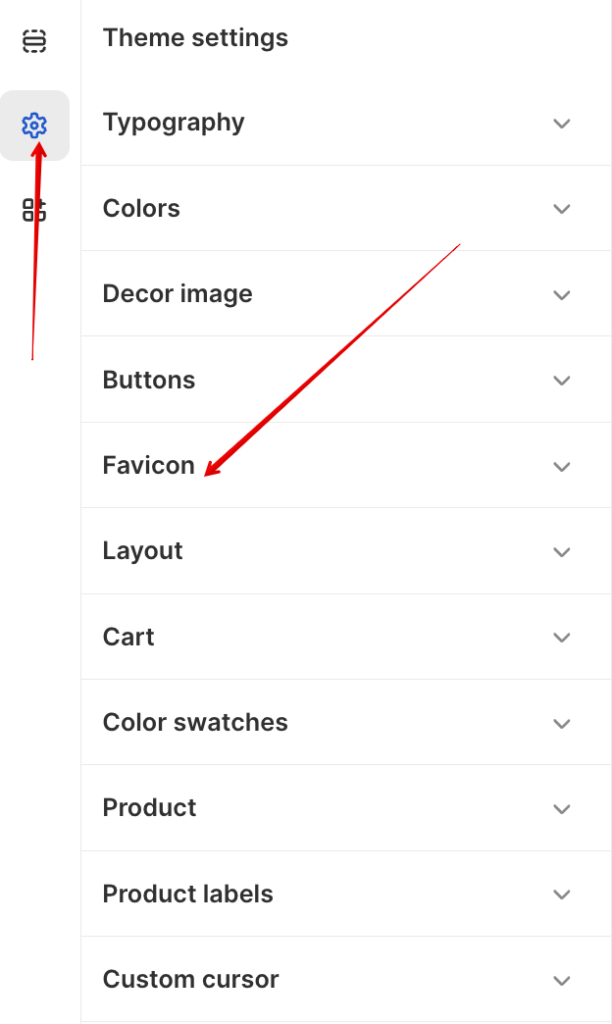
In order to get to the Favicon settings block, you need to go to Customizer → Theme Settings → Favicon.

Favicon settings

Settings

Favicon

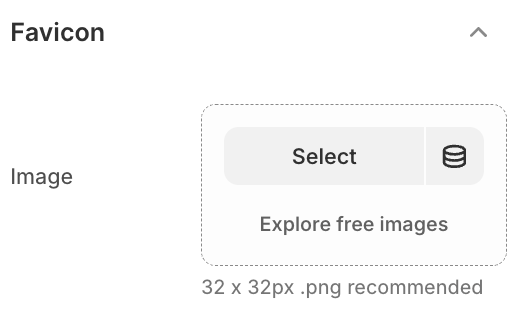
  1. Favicon image – the setting is responsible for the store icon that is displayed in the browser tab.

Layout

General

Layout

This settings block is intended for general Layout settings on the site.

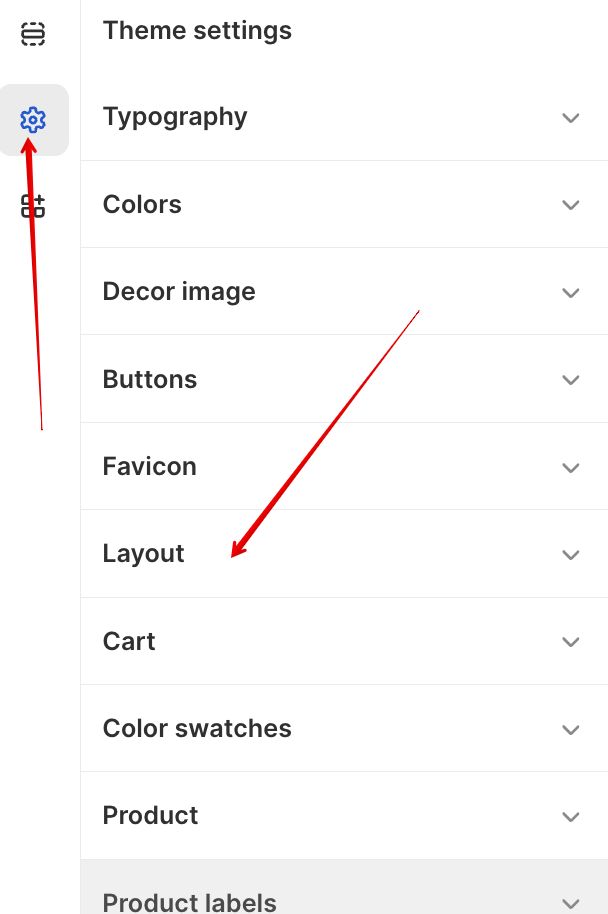
In order to get to the Layout settings block, you need to go to Customizer → Theme Settings → Layout.

layout

Settings

Layout settings

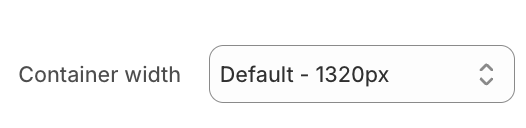
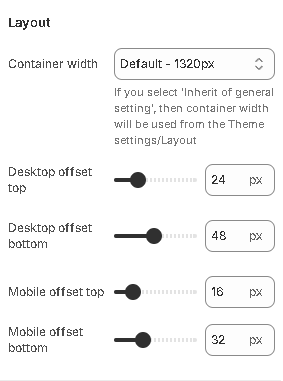
  1. Container width – by default, most sections use this setting to determine their width.

Cart

General

Cart

This settings block is intended for general Cart settings on the site.

In order to get to the Cart settings block, you need to go to Customizer → Theme Settings → Cart.

Settings

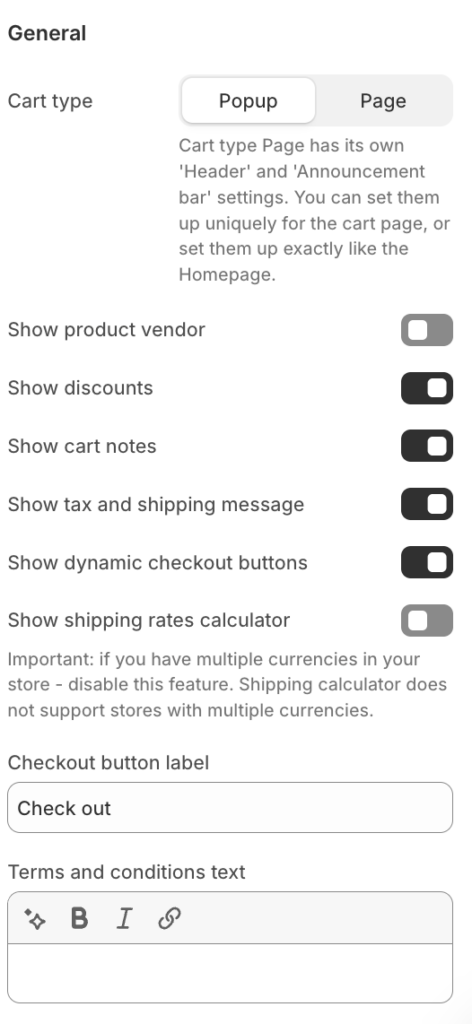
General

Cart

  1. Cart type – the setting is responsible for the type of cart. It has two values: drawer, page;
  2. Show product vendor – the setting is responsible for showing/hiding the product vendor;
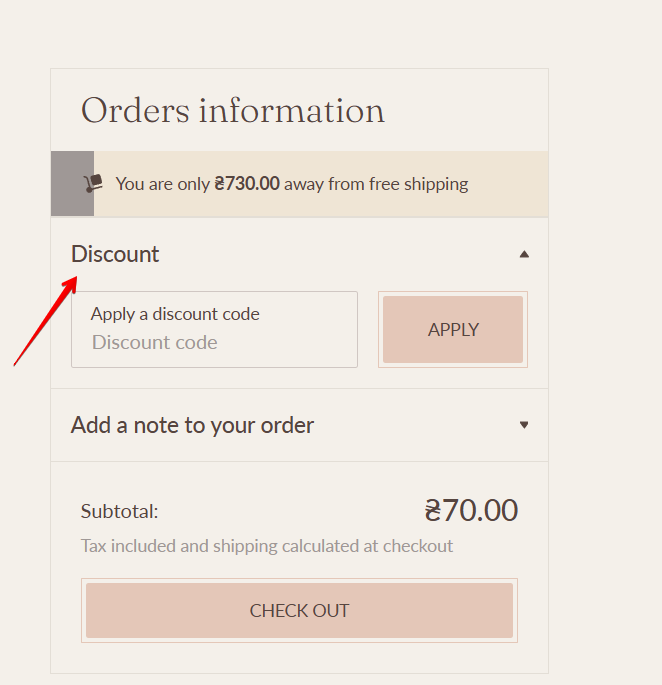
  3. Show discounts – the setting is responsible for showing/hiding cart discount form;
    Cart discounts
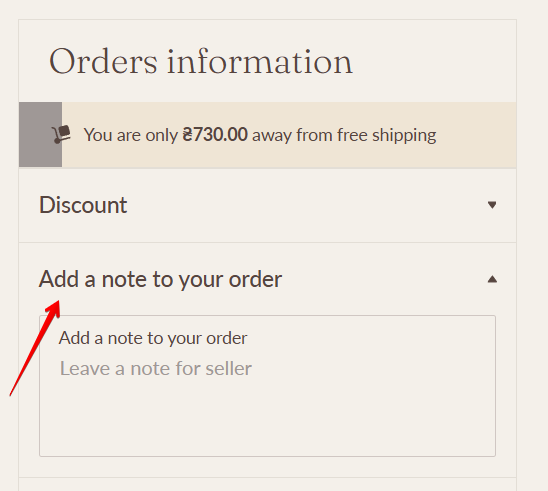
  4. Show cart notes – the setting is responsible for showing/hiding cart notes;
    Cart notes
  5. Show tax and shipping message – the setting is responsible for showing/hiding the tax and shipping message;
  6. Show dynamic checkout buttons – the setting is responsible for showing/hiding dynamic checkout buttons;
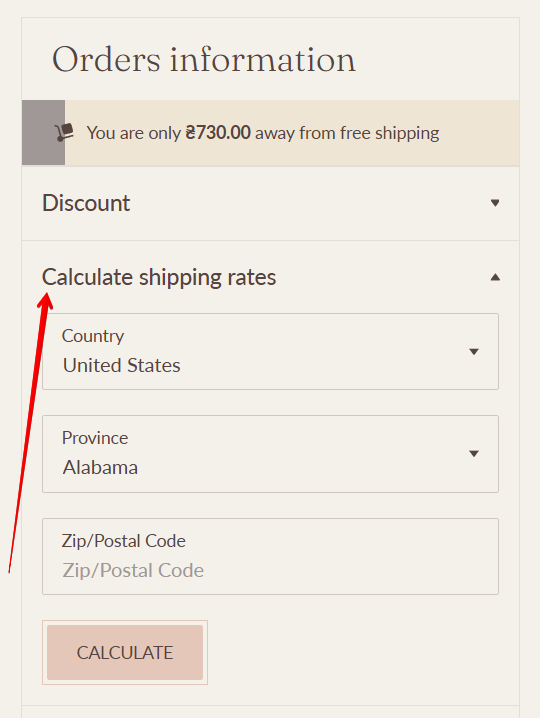
  7. Show shipping rates calculator – enable the shipping rates calculator in the cart drawer and cart page. If you have multiple currencies in your store – disable this feature. The shipping calculator does not support the store with multiple currencies;
    Shipping rates
  8. Checkout button label – label for the Checkout button;
  9. Terms and Conditions text – the setting is responsible for adding text for the terms and conditions text flag, if the text is not set then the checkbox will not be displayed;

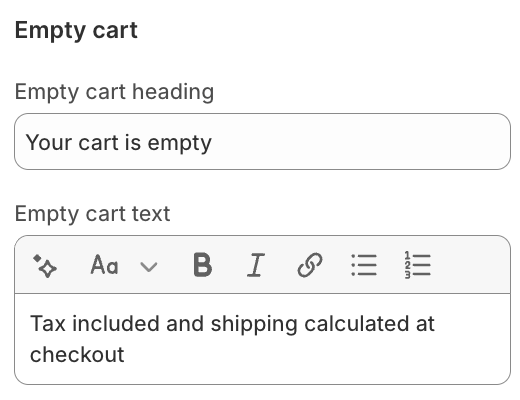
Empty cart

Empty cart

  1. Empty cart heading – the setting allows you to add a header when the shopping cart is empty;
  2. Empty cart text – the setting allows you to add a text when the shopping cart is empty;

Cart notification

  1. Show cart notification – the setting is responsible for showing/hiding the notification popup when adding to the cart;


Color swatches

General

Color swatches

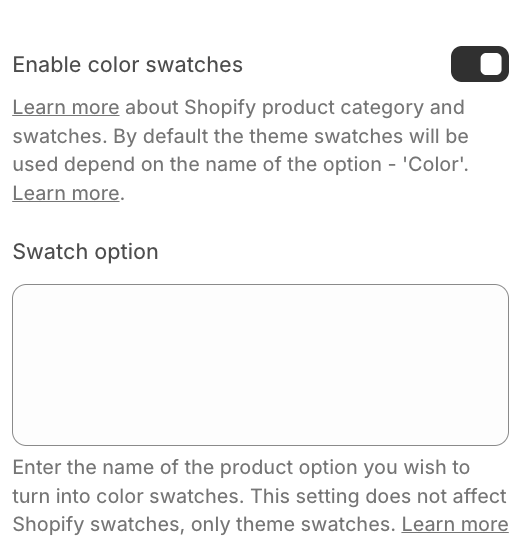
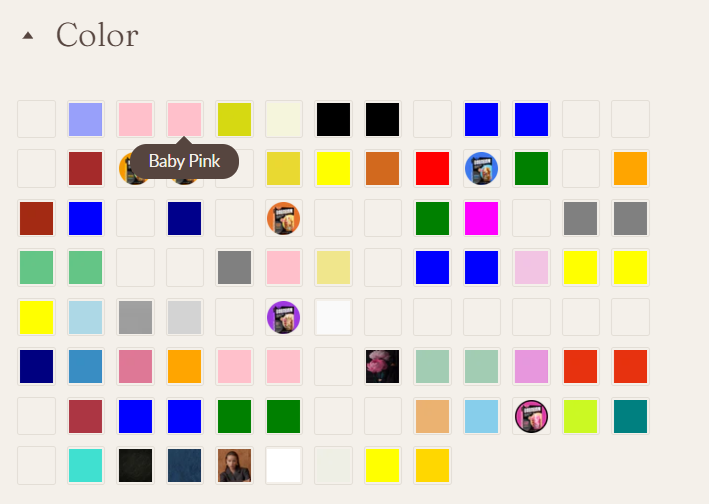
Color swatches

  1. Enable color swatches – the setting is responsible for whether color swatches will be displayed on the product card. By default, Shopify swatches will be used. Learn more about setup swatches for product options – https://help.shopify.com/en/manual/products/details/product-category . If Shopify swatches are not added, then theme swatches will work. Color swatches depend on the Color option. If the name of the color is split, then the last word is taken and substituted into the CSS palette. There is a chance that this color will not be in the CSS palette, then it will just be a white swatch. In this case, you must add an image to Shopify files of 50*50 px size in .png format with swatch- prefix. For example, the image name for banana-yellow would be swatch-banana-yellow.png;
  2. Swatch option – the setting is intended for stores that have a different option for color swatches than color. For example, a user has a purely German store, whose color option is called – Farbe, thus the user will need to specify a name for this setting. The default value is Color. NOTE: This setting works only for the theme swatches, not for the Shopify swatches.

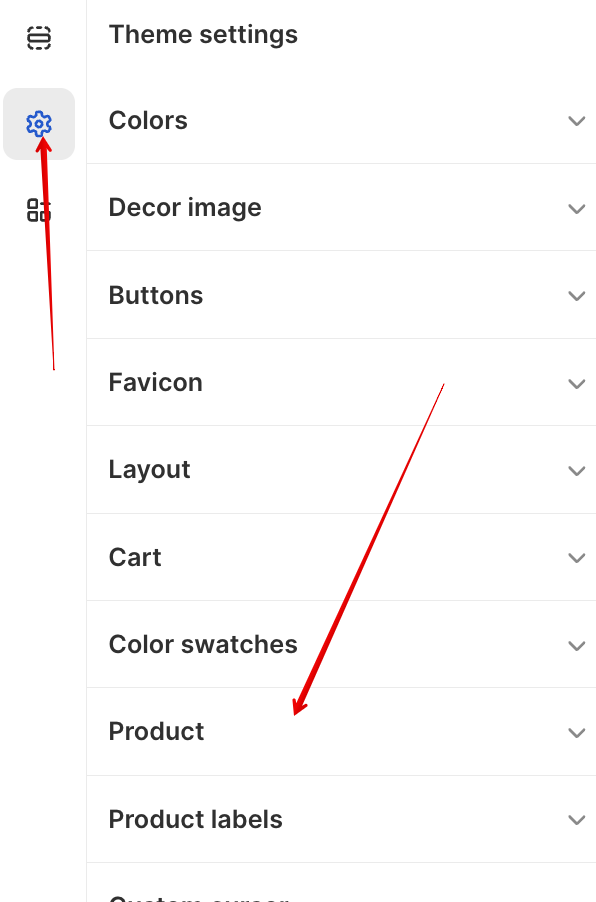
Product

General

Product

This settings block is intended for general Product settings on the site.

In order to get to the Product settings block, you need to go to Customizer → Theme Settings → Product.

Product

Settings

General

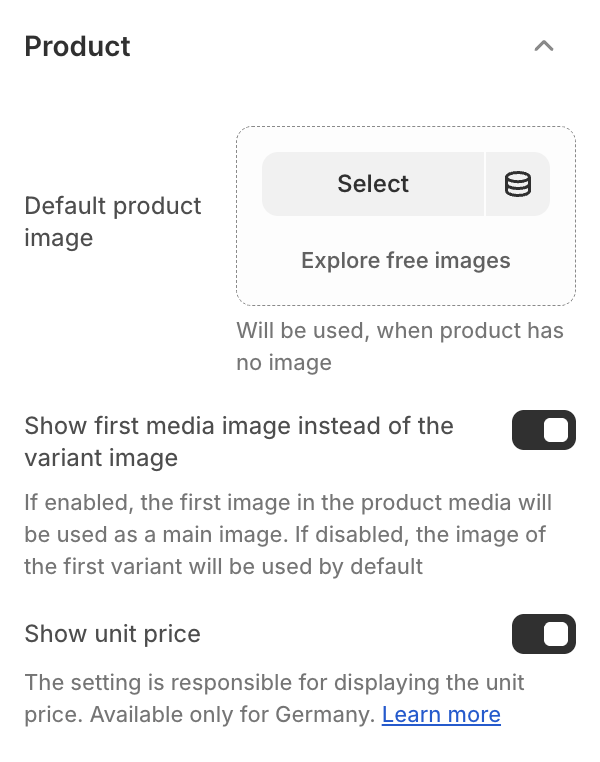
Product settings

  1. Default product image – this image will be used when the product has no image;
  2. Show first media image instead of the variant image – this setting allows you to display the first product image by default instead of the image from the first active variant. Displayed in product cards, on the product page, and in quick view;
  3. Show unit price – the setting is responsible for displaying the Unit price. More information here – https://help.shopify.com/en/manual/intro-to-shopify/initial-setup/sell-in-germany/price-per-unit.

Product labels

General

Product labels

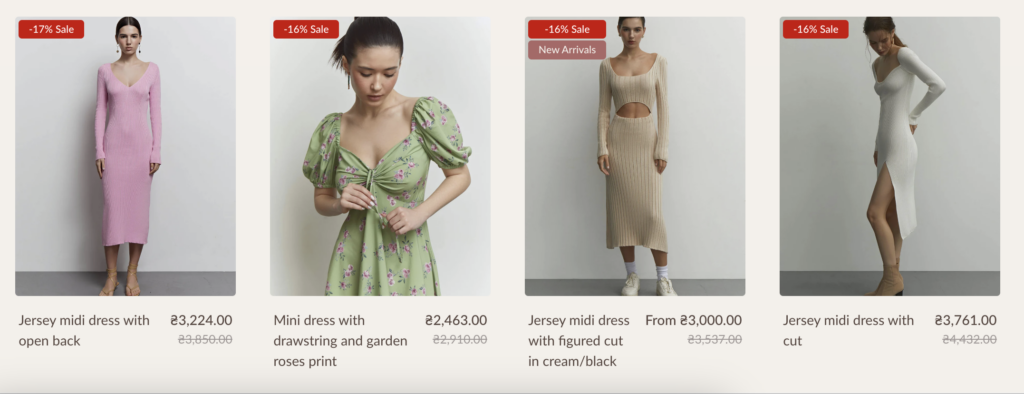
Product labels

Product labels settings 1

Product labels settings 2

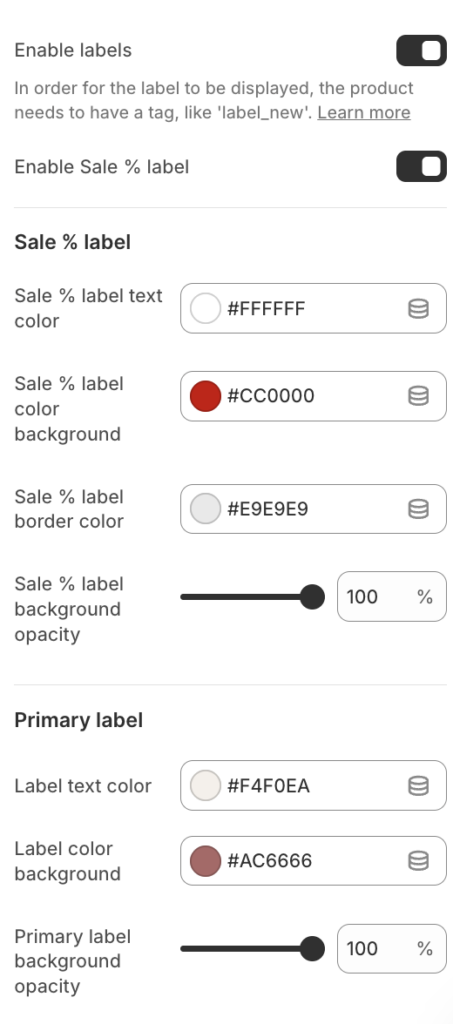
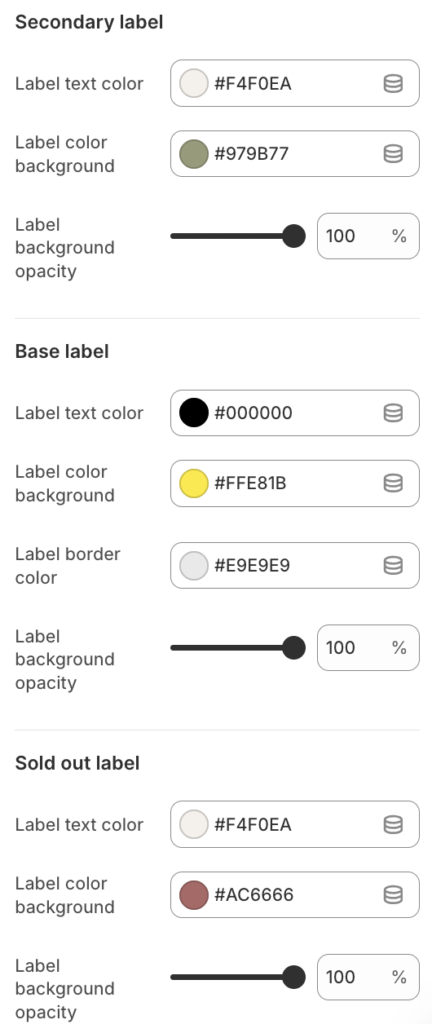
  1. Enable labels – the setting is responsible for whether labels will be shown on the product card. For the label to be displayed, a tag must be added to the product, for example, label_new is the base label that will display NEW with the base color. To change the type of a label, you need to add a :type, such as label__new:primary or label__new:secondary. The number of displayed labels is limited to 3, as well as a soldout label in case the product is not available;
  2. Enable Sale % label – the setting allows enabling or disabling the display of a label indicating the discount percentage;
  3. For each type of label, there are color settings. This way you can change the color for the label text: sale, primary, secondary, base, soldout;
  4. The background is specified for each label;
  5. The border color is specified for each label;

Custom cursor

General

Custom cursor

This settings block is intended for general Custom cursor settings on the site.

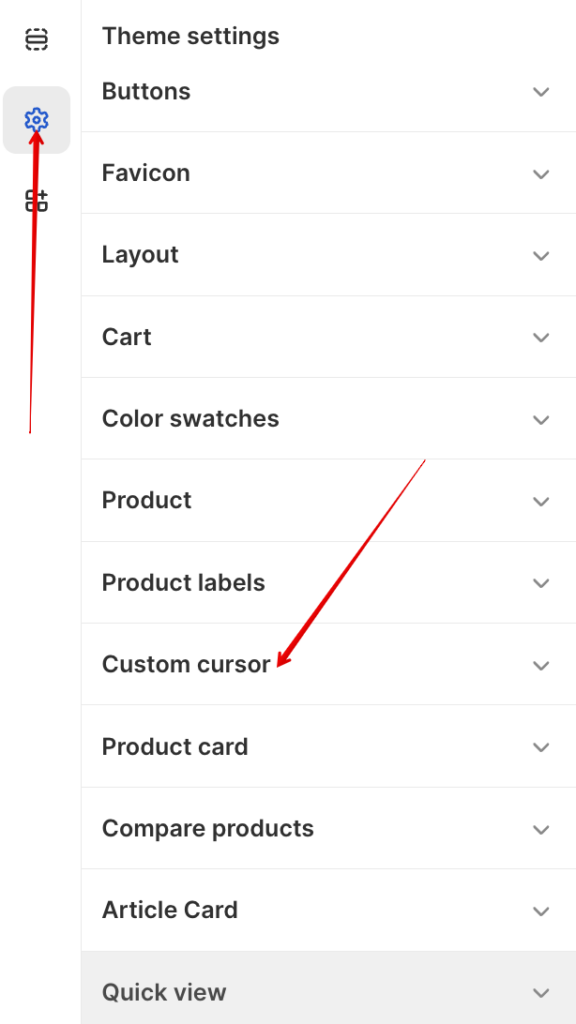
In order to get to the Layout settings block, you need to go to Customizer → Theme Settings → Custom cursor.

Custom cursor

Settings

Cursor settings

  1. Animation speed – the setting is responsible for choosing the animation speed of a custom cursor;

Product card

General

Product card

This block of settings is intended for general Product card settings on the site.

In order to get to the Product card settings block, you need to go to Customizer→Theme Settings→Product card.

Product card

Settings

Product card settings

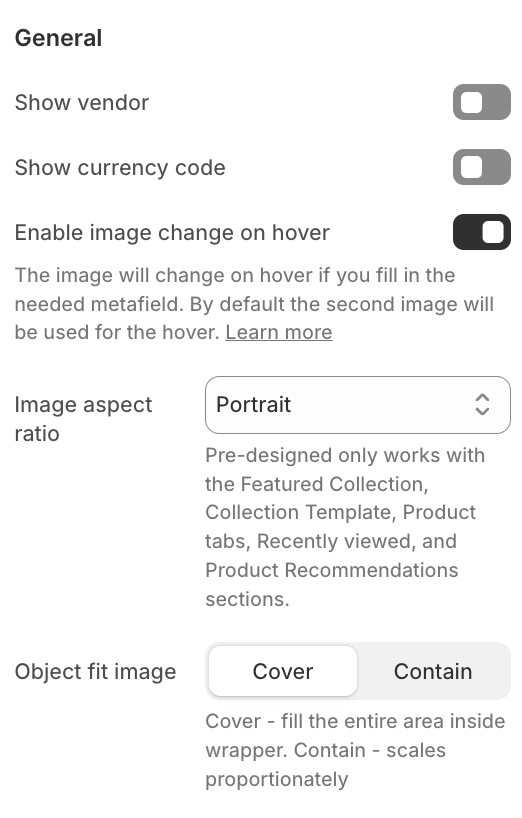
  1. Show vendor – the setting is responsible for showing/hiding the product vendor;
  2. Show currency code – setting responsible for whether the currency code will be shown;
  3. Enable image change on hover – the setting is responsible for whether the second image (video) will be shown on hover. By default the second product image will be used for the hover. To add an image (video), you need to add the product_card.hover_imagemetafield, where product_cardis the namespace and hover_image is the field name.
  4. Image aspect ratio – aspect ratio of the image. Can be “Square” or “Portrait”;
  5. Object fit image – the setting is responsible for stretching the image. If Cover(default) is selected – the image will take all the space available for it, that is, it will stretch as much as possible, and if Contain – it will retain its proportions;

Colors

Product card colors

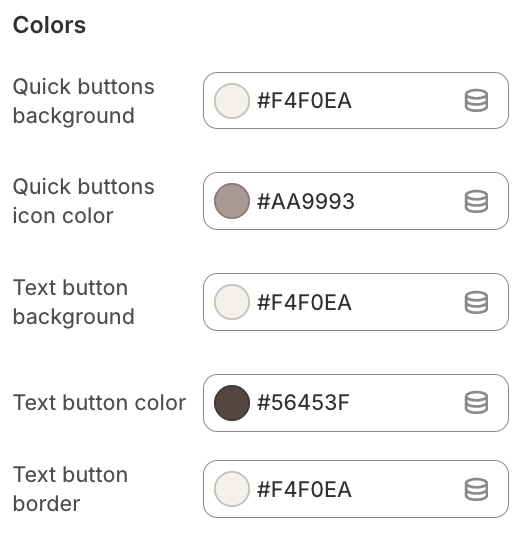
  1. Quick buttons background – setting allows you to specify the background color of quick buttons;
  2. Quick buttons icon color – setting allows you to specify the icon color of quick buttons;
  3. Text button background – setting allows you to set the color of the button background color;
  4. Text button color – setting allows you to set the color of the button text;
  5. Text button border – setting allows you to set the color of the button border color;

Compare products

General

Compare products

This block of settings is intended for general settings of the Compare products on the site.

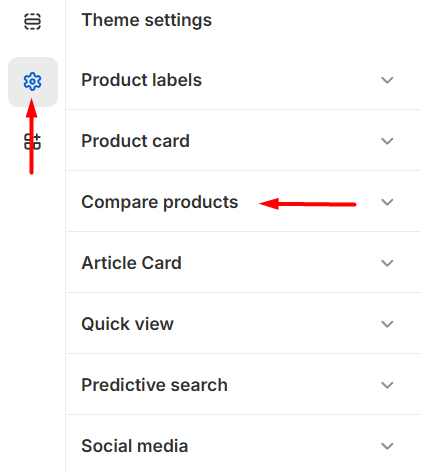
In order to get to the Product card settings block, you need to go to Customizer → Theme Settings → Compare products.

compare-products

Seattings

compare-products-settings

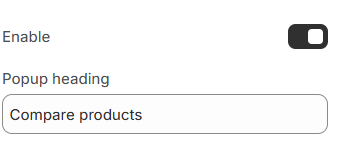
  1. Enable – the setting allows you to display or not display product compare buttons;
  2. Popup heading – heading of compare buttons popup;

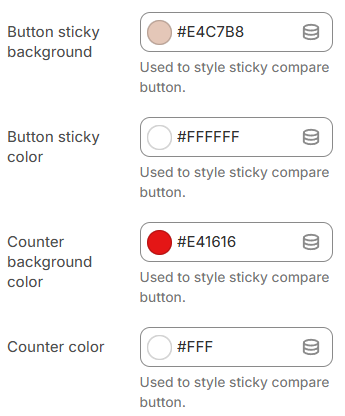
Colors

compare-products-colors

  1. Button sticky background – background color of sticky compare product button;
  2. Button sticky color – text color of sticky compare product button;
  3. Counter background color – settings allow you to change the color background of the counter;
  4. Counter color – Settings allow you to change the color text of the counter;
Article card

General

Article card

This block of settings is intended for general settings of the Article card on the site.

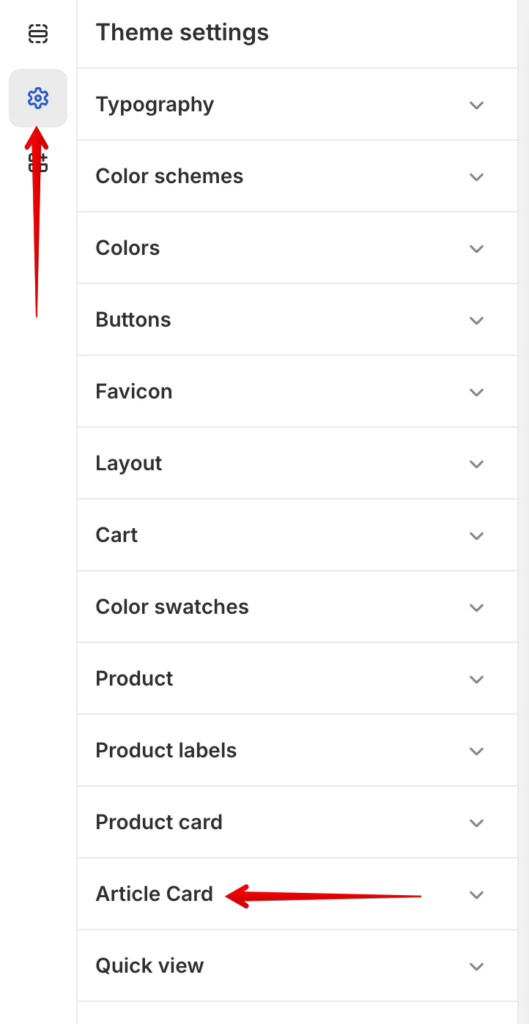
In order to get to the Article card settings block, you need to go to Customizer → Theme Settings → Article card.

article-card-add

Settings

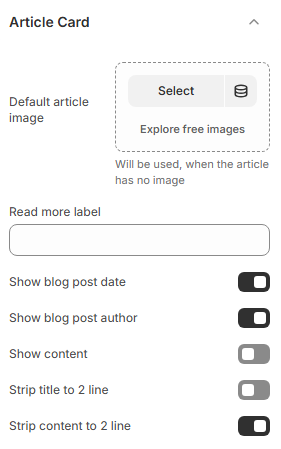
article-card-settings

  1. Default article image – the setting is used to add a default image if the article does not have one;

  2. Read more label – link text for the read more link in the article card;

  3. Show blog post date – the setting is responsible for showing/hiding the publication dates of the article;

  4. Show blog post author – the setting is responsible for showing/hiding the author of the article;

  5. Show content – the setting is responsible for article content output;

  6. Strip title to 2 line – the setting is responsible for trimming the title of the article to 3 lines;

  7. Strip content to 2 line – the setting is responsible for trimming the content of the article to 3 lines.

Quick view

General

Quick view

quick-view

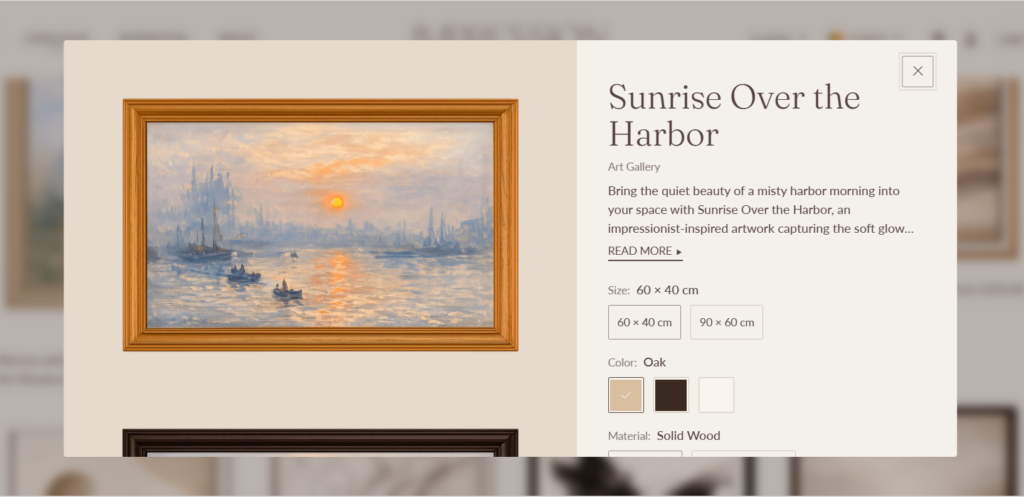
This block of settings is intended for the general settings of the Quick view window on the site.

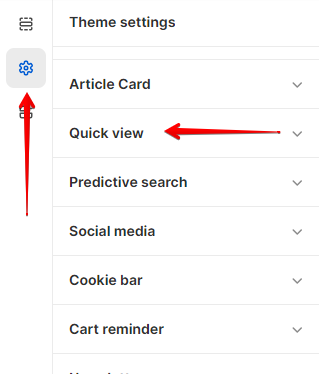
In order to get to the Quick view settings block, you need to go to Customizer → Theme Settings → Quick view.

quick-view-add

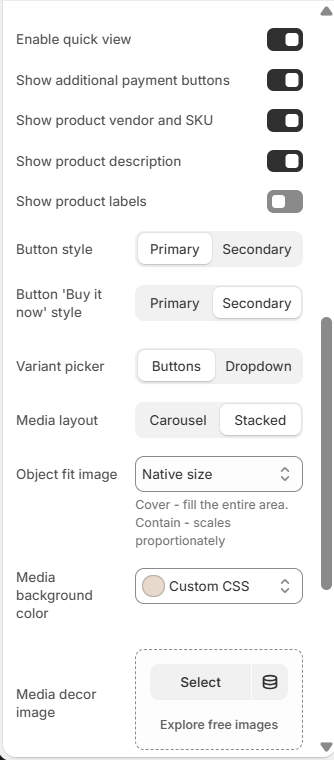
Settings

quick-view-settings

  1. Enable quick view – The setting responsible for enabling the quick view feature.

  2. Show additional payment buttons – The setting responsible for showing/hiding additional payment buttons.

  3. Show product vendor and SKU – The setting responsible for showing/hiding product vendor and SKU.

  4. Show product description – The setting responsible for showing/hiding product description.

  5. Show product labels – The setting responsible for showing/hiding product labels.

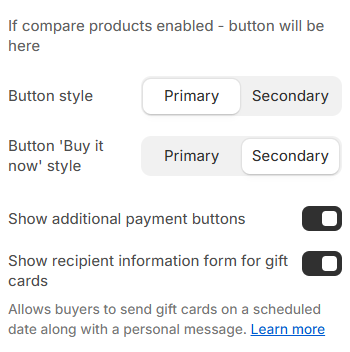
  6. Button style – The setting responsible for choosing the style of the Add to cart button: Primary or Secondary.

  7. Button 'Buy it now' style – The setting responsible for choosing the style of the Buy it now button: Primary or Secondary.

  8. Variant picker – The setting responsible for choosing variant picker style: buttons or dropdown.

  9. Media layout – The setting responsible for choosing the product images’ layout: Carousel or Stacked.

  10. Object fit image – The setting responsible for the display:
    Cover – fill the entire area.
    Contain – scales proportionately.
    Native size – original images’ size.

  11. Media background color – Background color of the images slider.

  12. Media decor image – Decorative background image of the images slider.

Predictive search

General

Predictive search

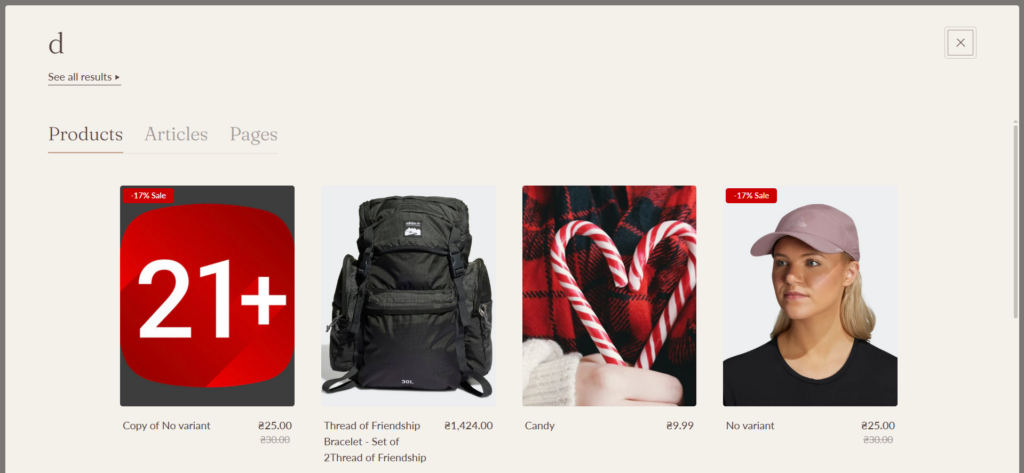
predictive-search

This block of settings is intended for general Predictive search settings on the site.

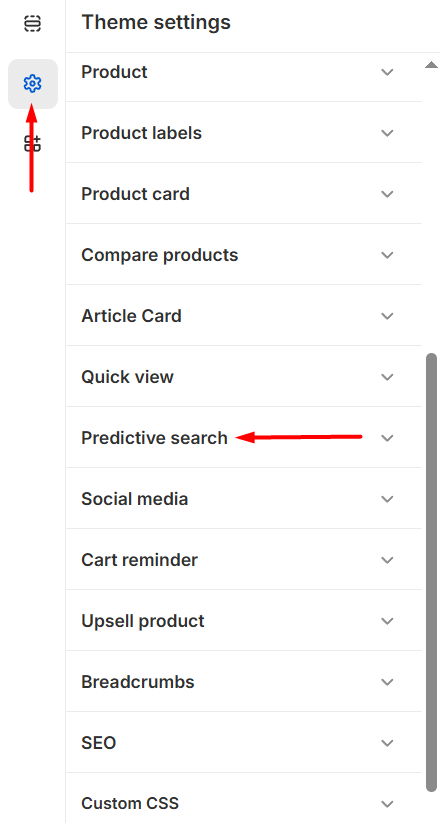
In order to get to the Predictive search settings block, you need to go to Customizer → Theme Settings → Predictive search.

predictive-search-add

Settings

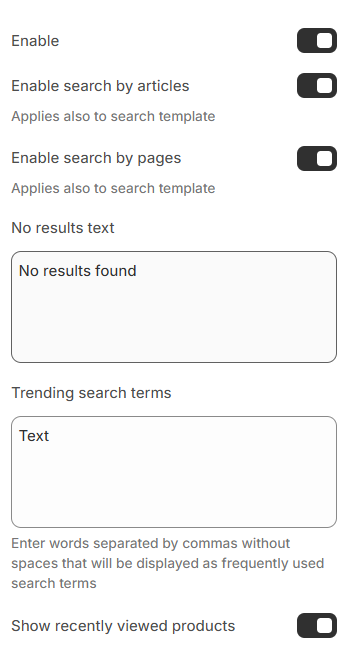
predictive-search-settings

  1. Enable search by articles – setting allows to include articles in the search;

  2. Enable search by pages – setting allows to include pages in the search;

  3. No results text – setting allows to set no result text;

  4. Trending search terms – settings allow you to add trending search terms;

  5. Show recently viewed products – settings allow you to add the display of recently viewed products;

Social media

General

Social media

This block of settings is intended for general settings of Social media on the site.

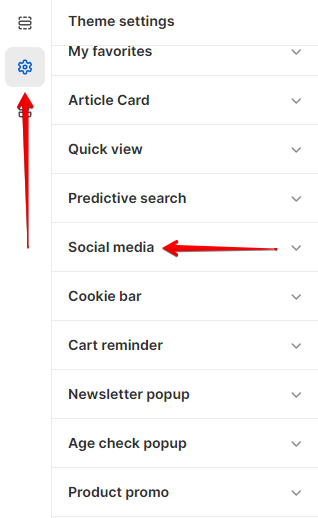
In order to get to the Social media settings block, you need to go to Customizer → Theme Settings → Social media.

social-media

Settings

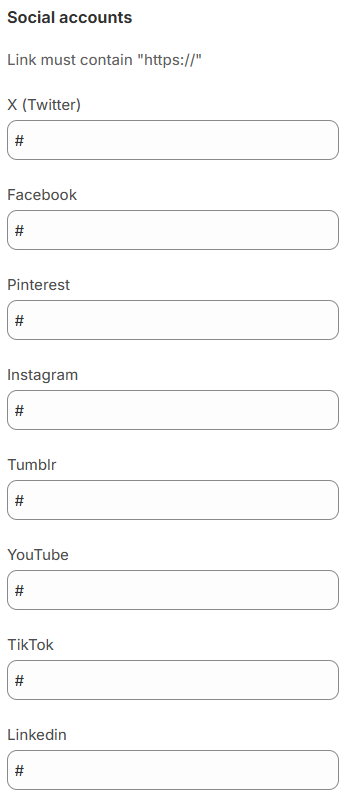
social-media-setting

  1. X (Twitter) – link to the store’s X (Twitter) account;

  2. Facebook – link to the store’s Facebook account;

  3. Pinterest -link to the store’s Pinterest account;

  4. Instagram – link to the store’s Instagram account;

  5. Tumblr – link to the store’s Tumblr account;

  6. YouTube – link to the store’s YouTube account;

  7. TikTok – link to the store’s TikTok account.

  8. Linkedin – link to the store’s Linkedin account.

Cart reminder

General

Cart reminder

This block of settings is intended for the general settings of the Cart reminder on the site.

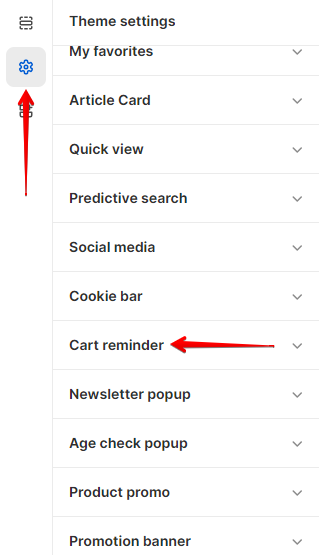
In order to get to the Cart reminder settings block, you need to go to Customizer → Theme Settings → Cart reminder.

cart-reminder

Settings

cart-reminder-setting

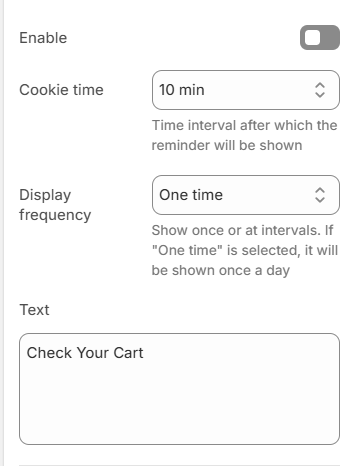
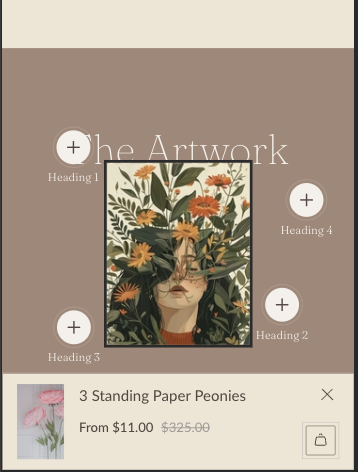
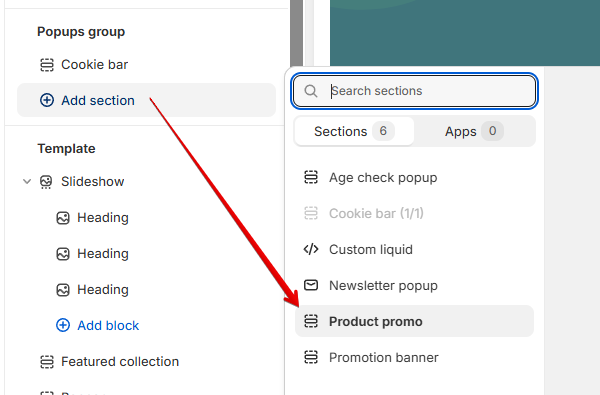
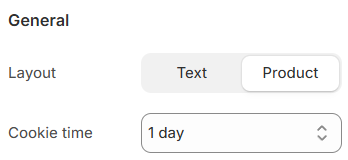
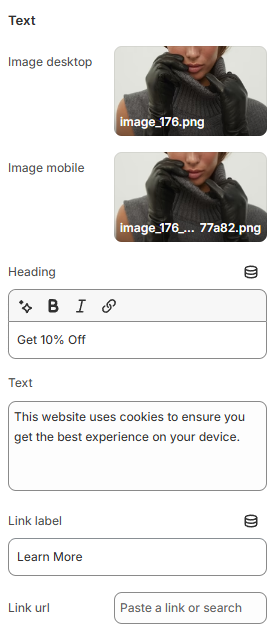
  1. Enable – the setting is responsible for enabling/disabling the pop-up.

  2. Cookie time – the setting is responsible for the period after which the cart reminder pop-up will be shown. It has several values: 10 minutes, 30 minutes, 1 hour, 8 hours, 1 day.

  3. Display frequency – the setting is responsible for the behavior of the pop-up.
    If one time is selected, in this case, when interacting with the pop-up, it will be closed for 24 hours.
    If the Cookie interval is selected, the value from the Cookie time setting will be taken.

  4. Text – the setting is responsible for the text inside the pop-up.

Colors

cart-reminder-color

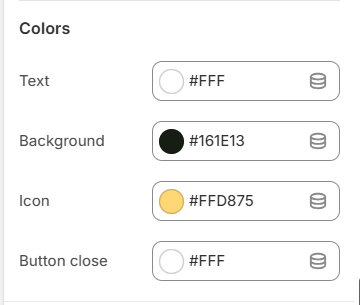
  1. Text – the setting is responsible for the text color.

  2. Background – the setting is responsible for the pop-up background.

  3. Icon – the setting is responsible for the icon color.

  4. Button close – the setting is responsible for the close button color.

Breadcrumbs

General

Breadcrumbs

This settings block is intended for general Breadcrumbs settings on the site.

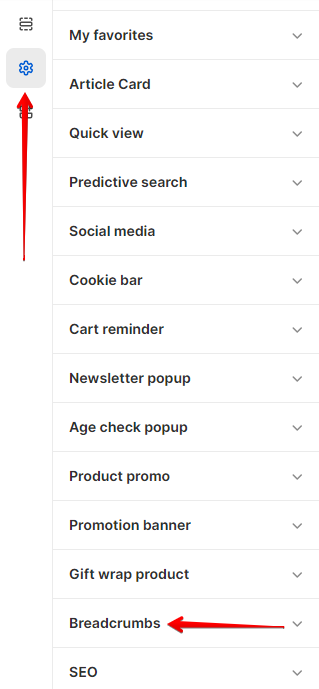
In order to get to the Breadcrumbs settings block, you need to go to Customizer → Theme Settings → Breadcrumbs.

breadcrumbs

Settings

General

breadcrumbs-general

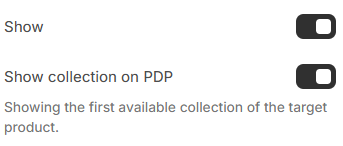
  1. Show– the setting is responsible for showing/hiding breadcrumbs.

  2. Show collection on PDP – showing the first available collection of the target product.

Layout

layout

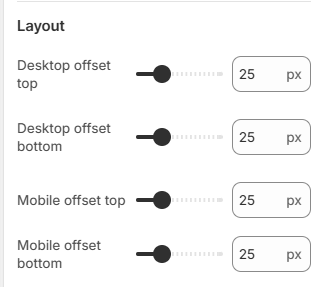
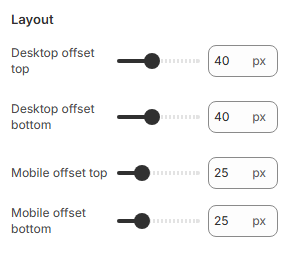
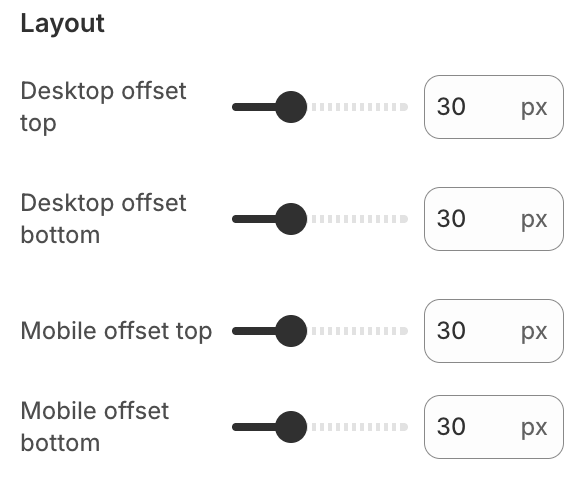
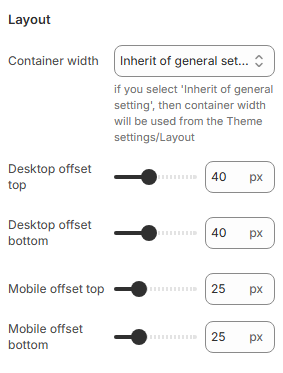
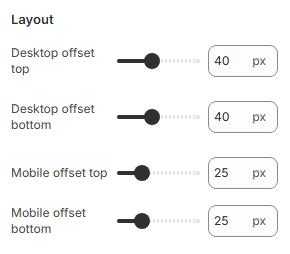
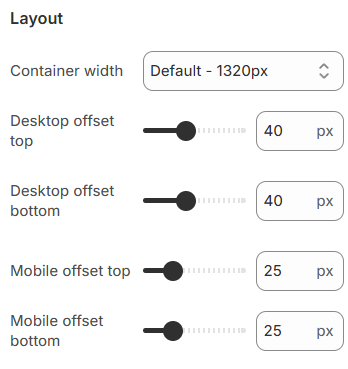
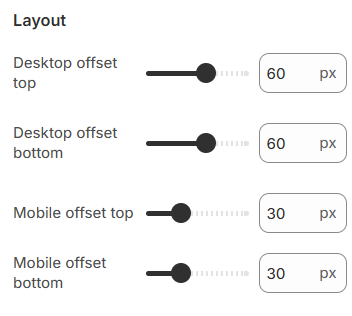
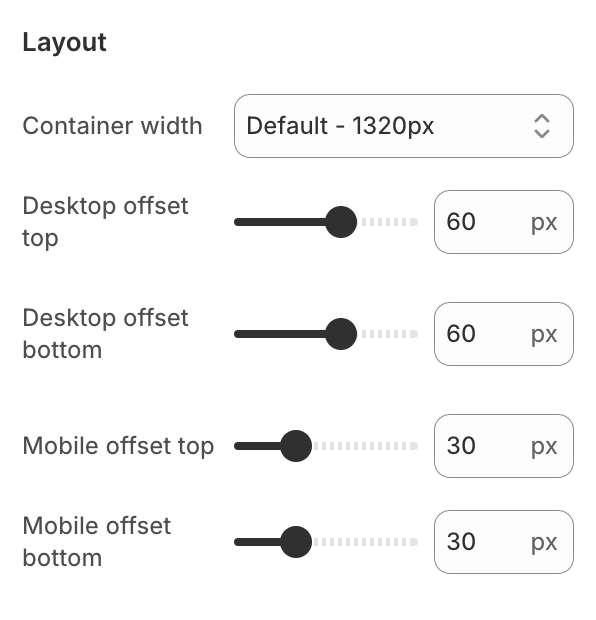
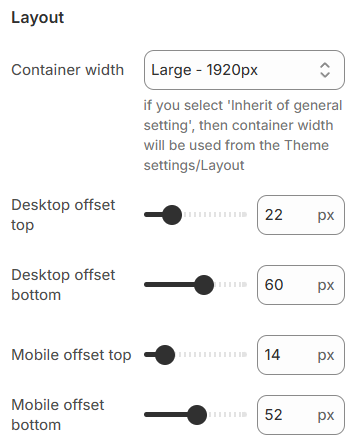
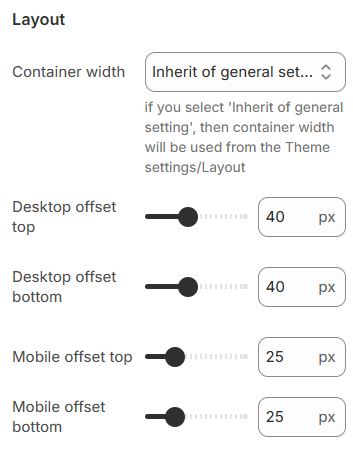
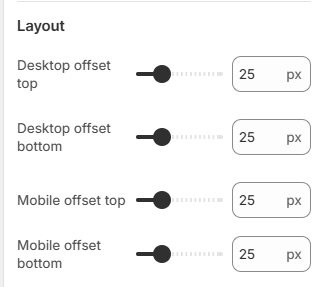
  1. Desktop offset top – the top indent of the section on the desktop;

  2. Desktop offset bottom – the bottom indent of the section on the desktop;

  3. Mobile offset top – the top indent of the section on the mobile;

  4. Mobile offset bottom – the bottom indent of the section on the mobile.

SEO

General

SEO

This settings block is intended for general Seo settings on the site.

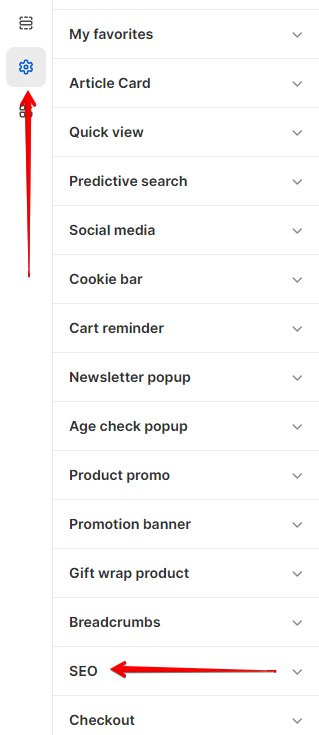
In order to get to the Seo settings block, you need to go to Customizer → Theme Settings → Seo.

seo-general

Settings

seo-setting

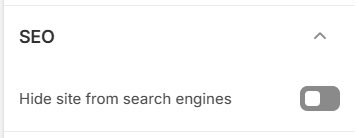
  1. Hide site from search engine – the setting is responsible for hiding pages from indexing by search robots.

Custom CSS

General

Custom CSS

This block of settings is intended for general Custom CSS settings on the site.

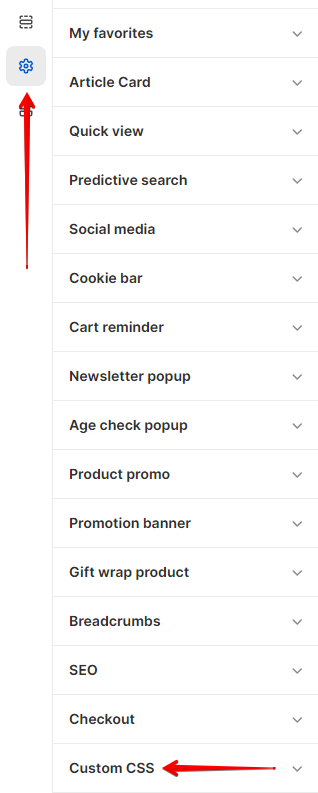
In order to get to the Custom CSS settings block, you need to go to Customizer → Theme Settings → Custom CSS.

custom-css

Settings

custom-css-settings

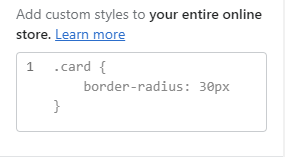
  1. Textarea – a text area where you can add your CSS code for customization.

Additional information

In this block, your CSS will be added at the end of the page, and the same custom CSS block that is in the section settings will be added to the end of the section.

Blog

Pages

Blog

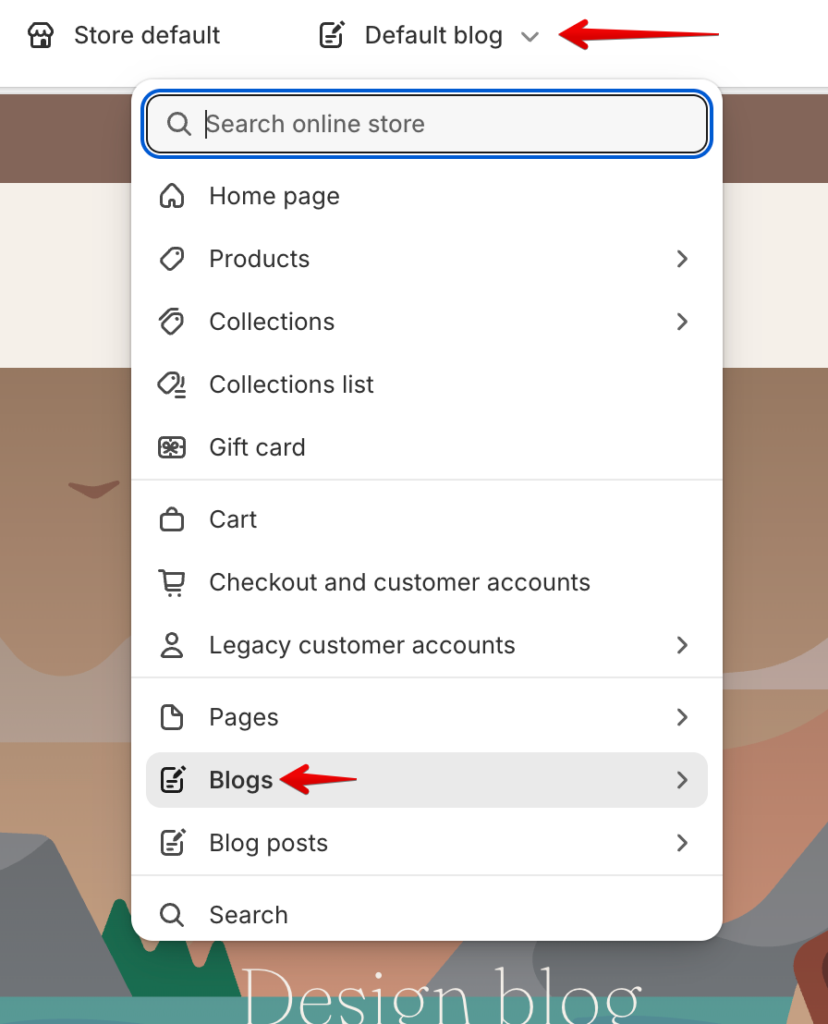
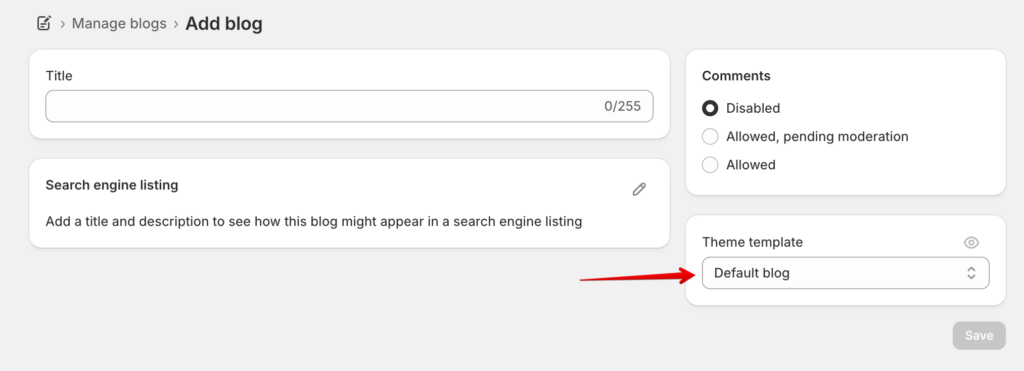
This is a blog page with a default template blog.json.

blog-page

manage-blogs

You can use the section “Blog template” to configure the appearance and additional settings of the page.

404 page

Pages

404 page

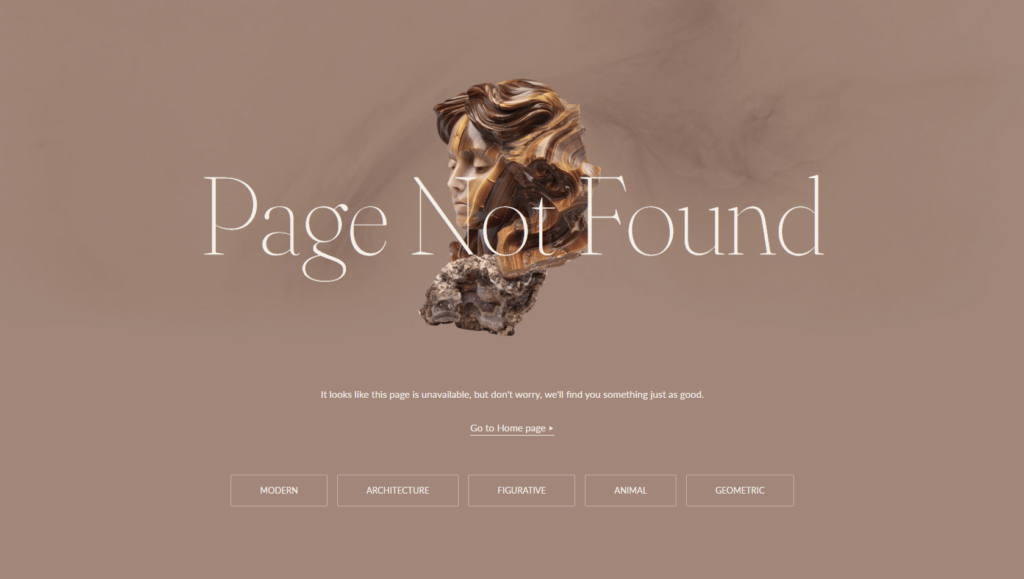
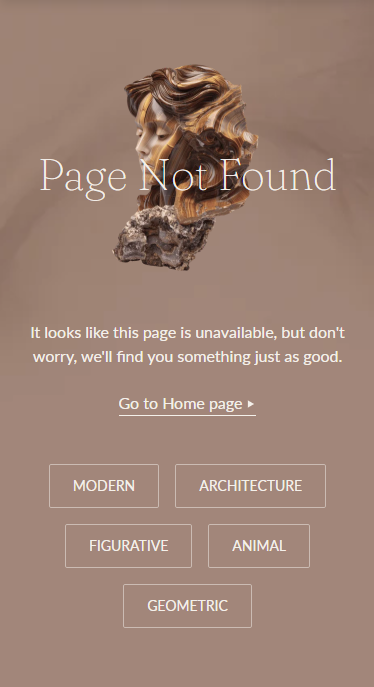
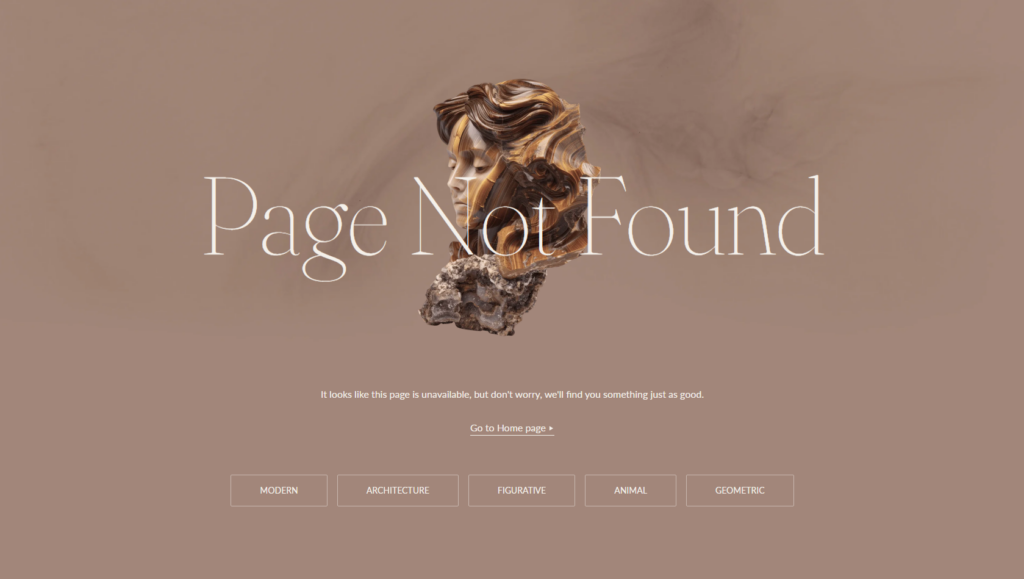
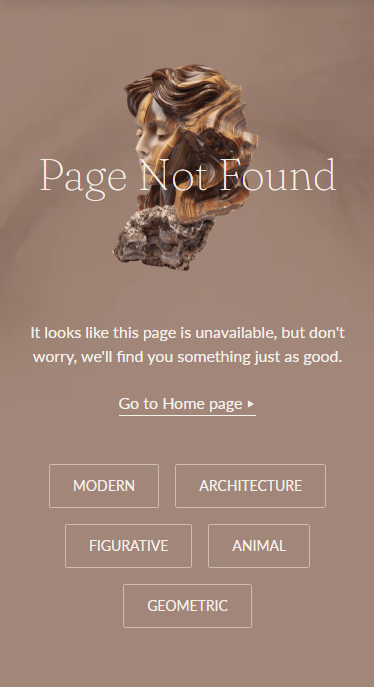
This is a page with a unique template 404.json

This template can be used to display information for the user when he opens a hidden or non-existent page.

page-404-desktop

page-404-mobile

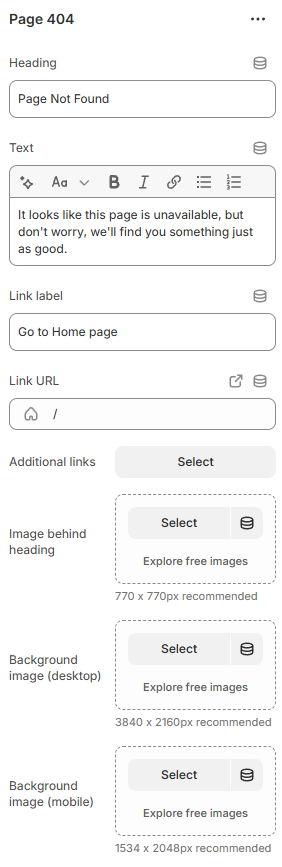
You can use the section “404 template” to add additional information for the user.

Page

Pages

Page

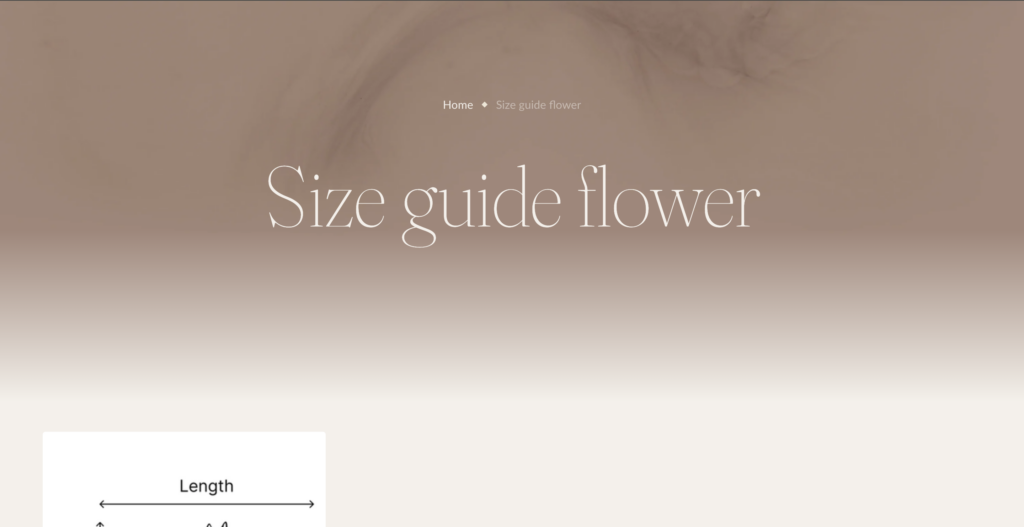
This is a page with a unique template page.json

This template can be used to display page layouts (banner image, content).

page

You can use the section “Page template” to add additional information for the user.

FAQ

Pages

FAQ

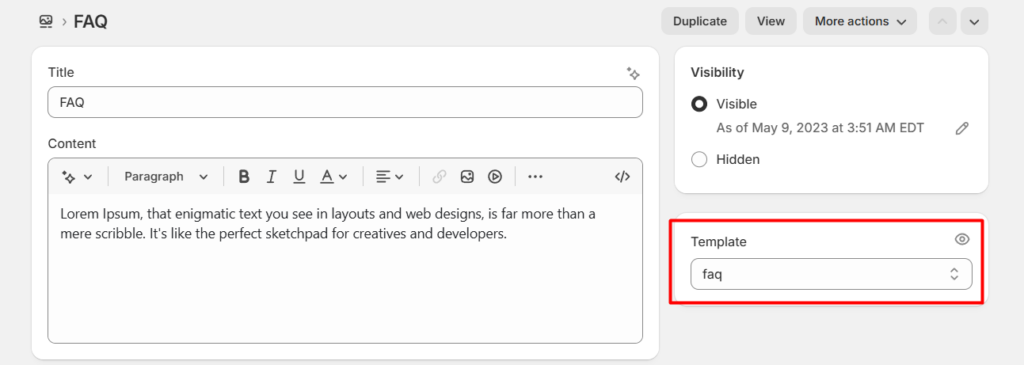
This is a page with a unique template page.faq.json

page-faq

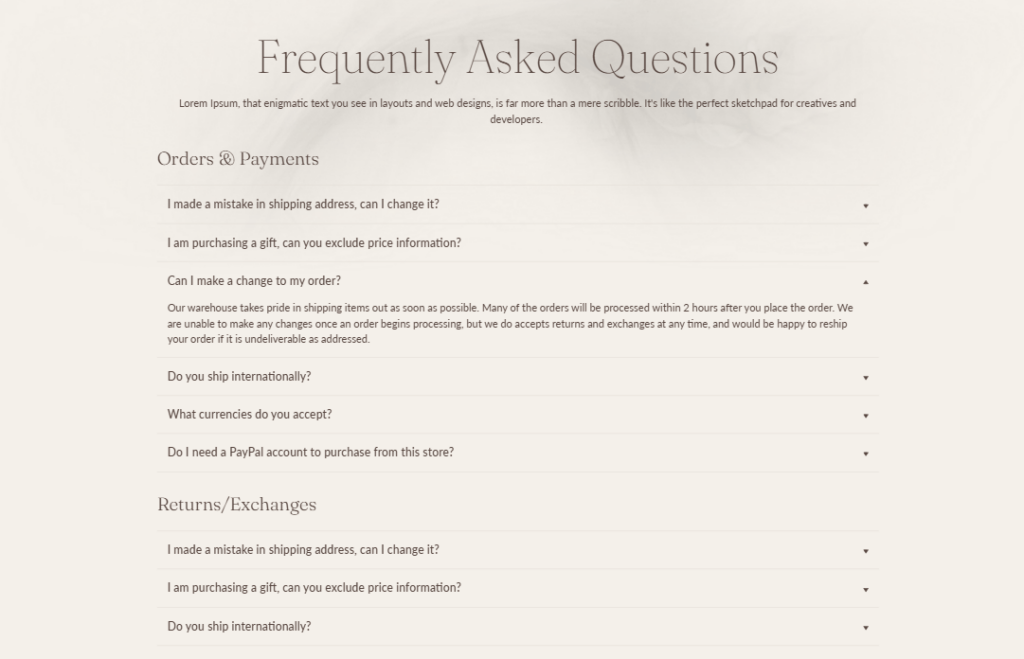
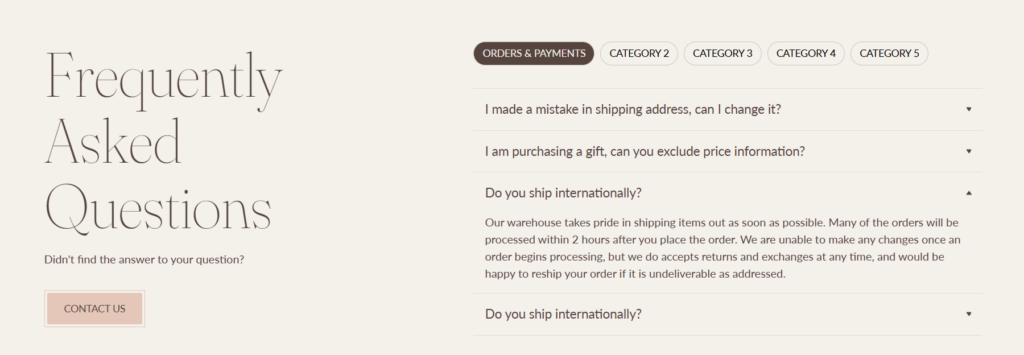
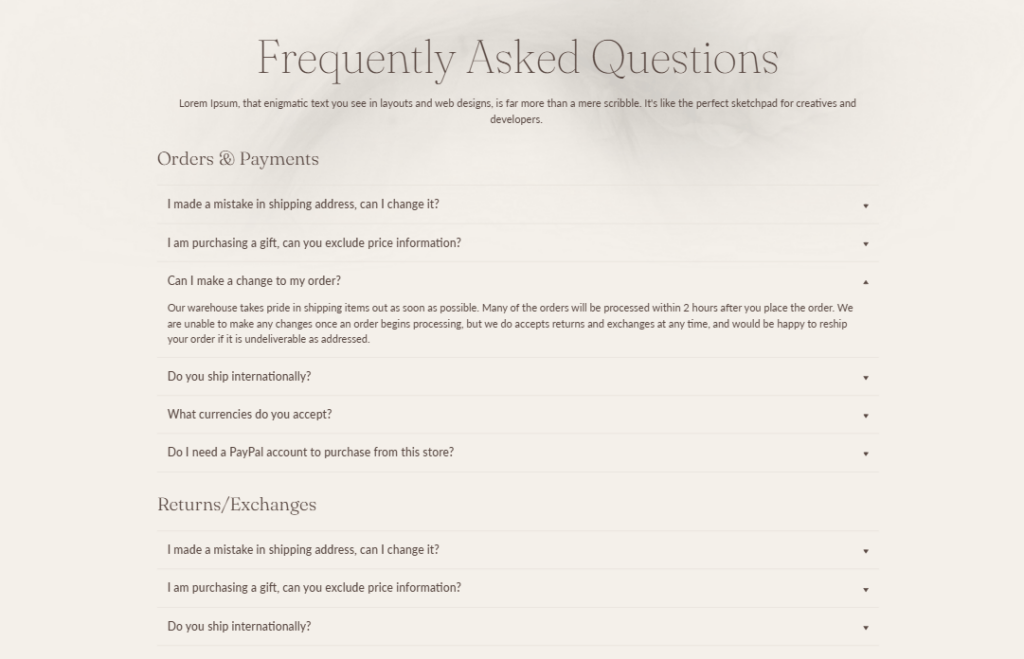
This template can be used to show customers’ answers to frequently asked questions.

faq-page

You can use the FAQ template section to add answers to frequently asked questions.

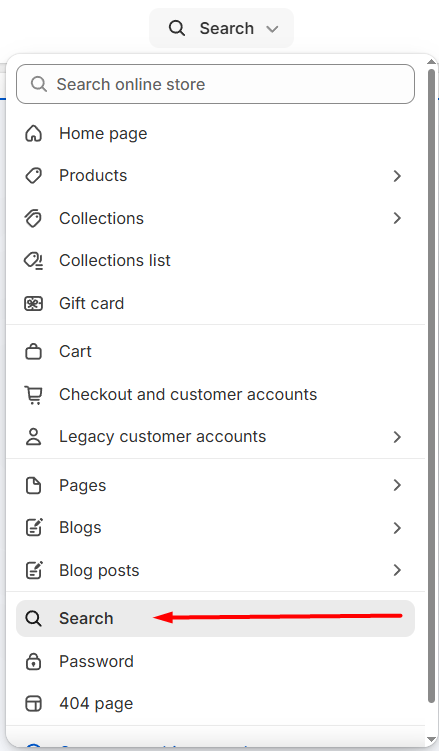
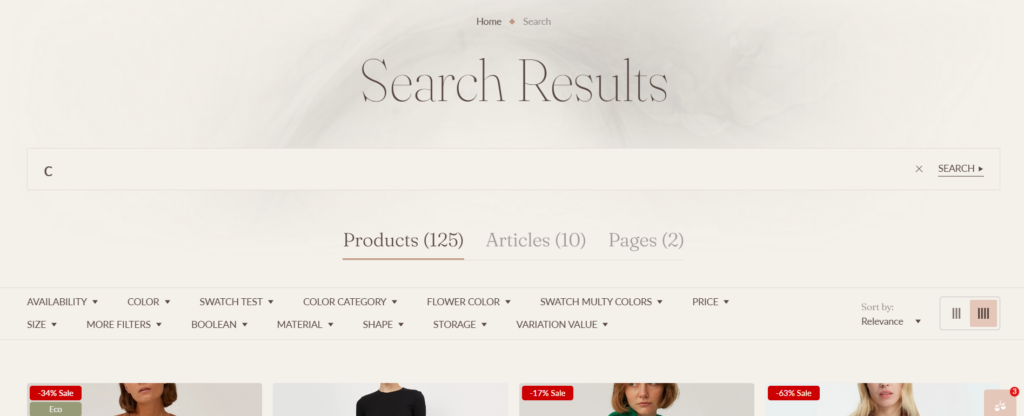
Search

Pages

Search

This is a page with a default template search.json

search-page

This template is used by default for the search page. You don’t need to add anything for this template to be displayed.

search-page-desktop

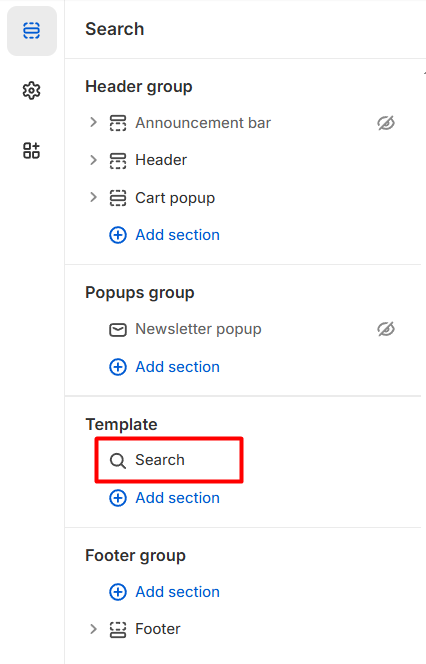
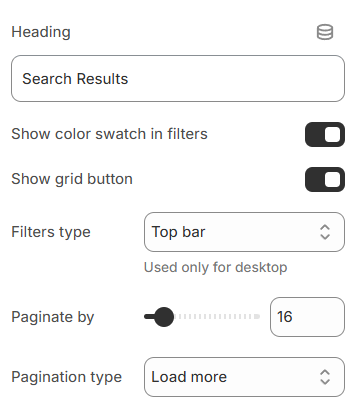
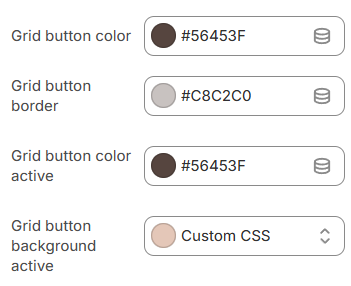
You can use the section “Search template” to configure the appearance and additional settings of the page.

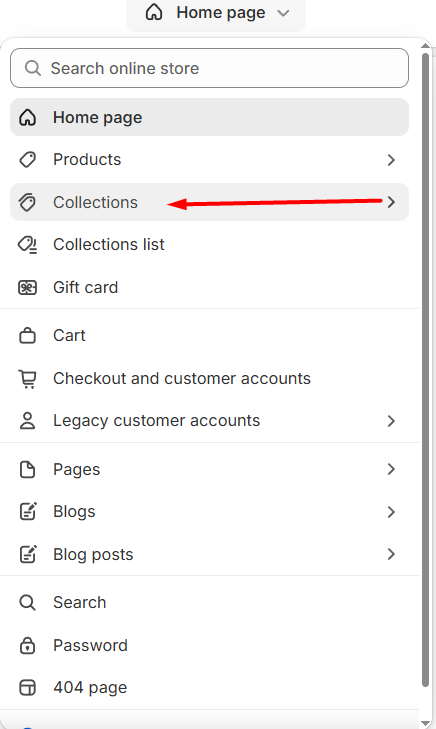
Collection

Pages

Collection

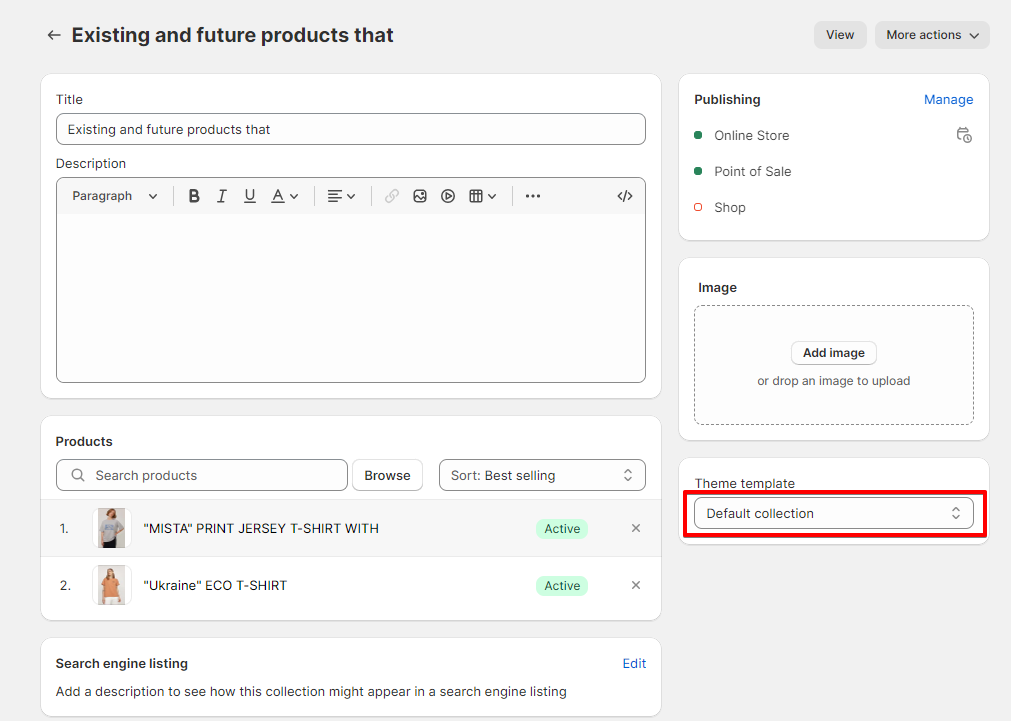
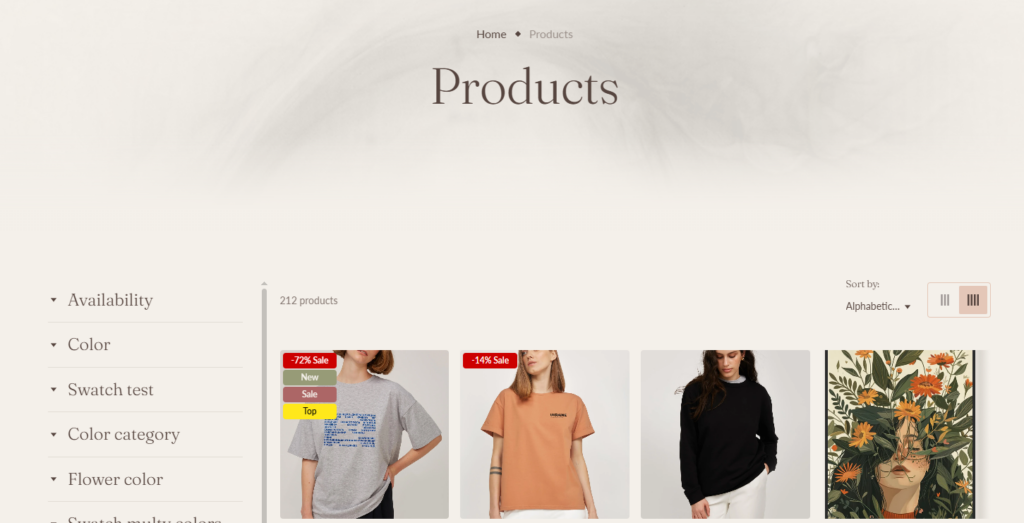
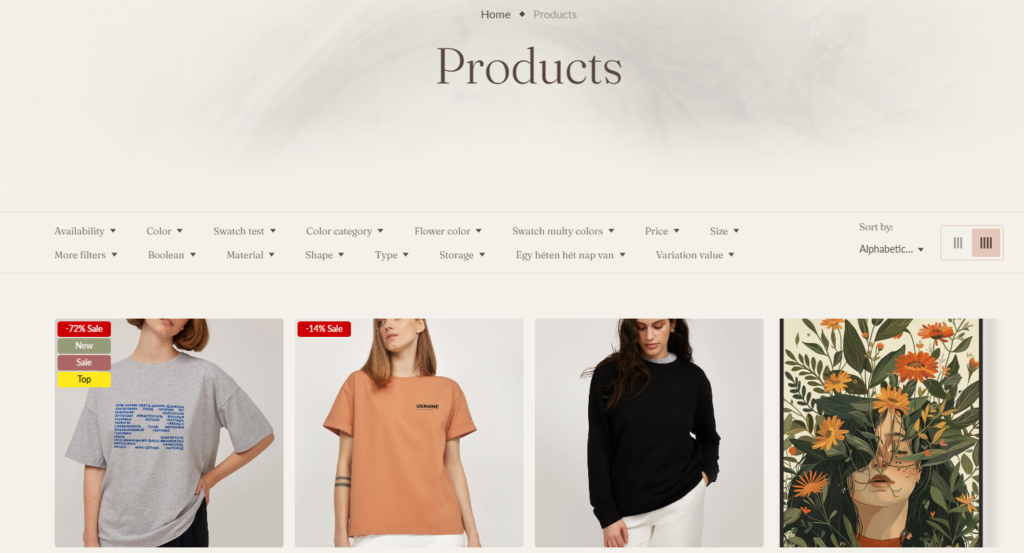
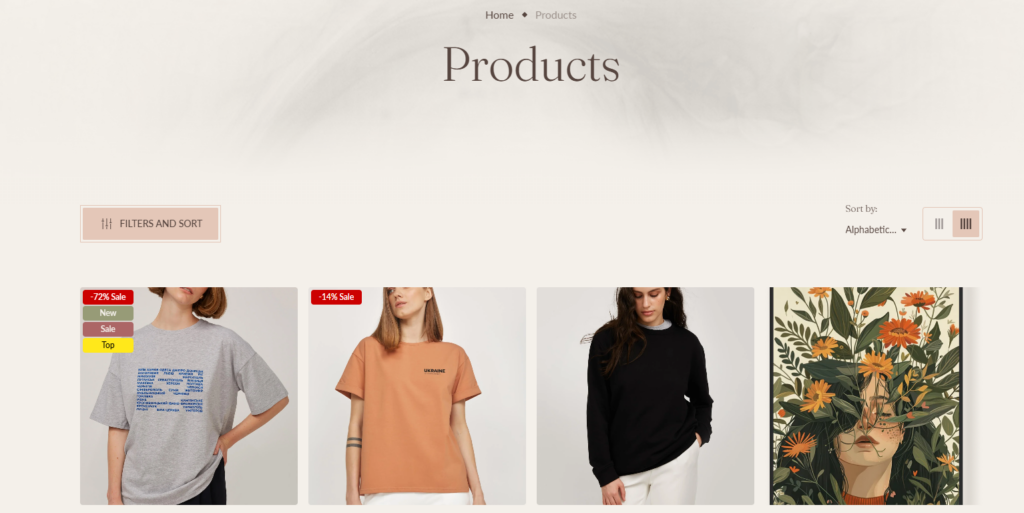
This is a collection page with a default template collection.json

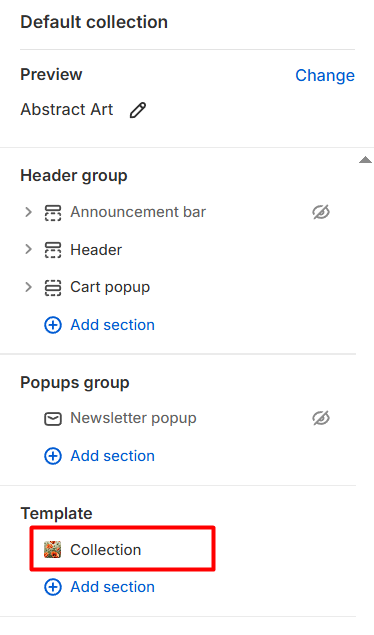
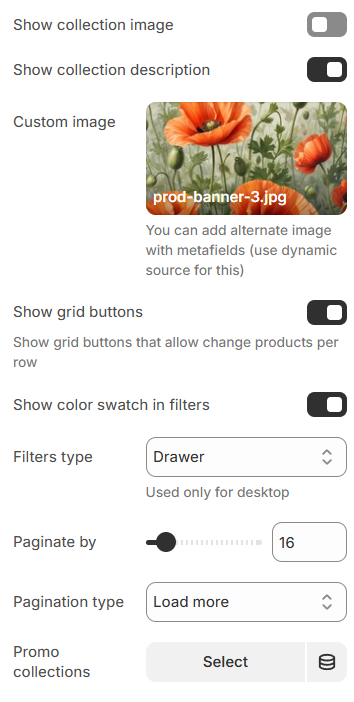
collection-page

default-collection-page

This template is used by default for the collection page. You don’t need to add anything for this template to be displayed.

You can use the section “Collection template” to configure the appearance and additional settings of the page.

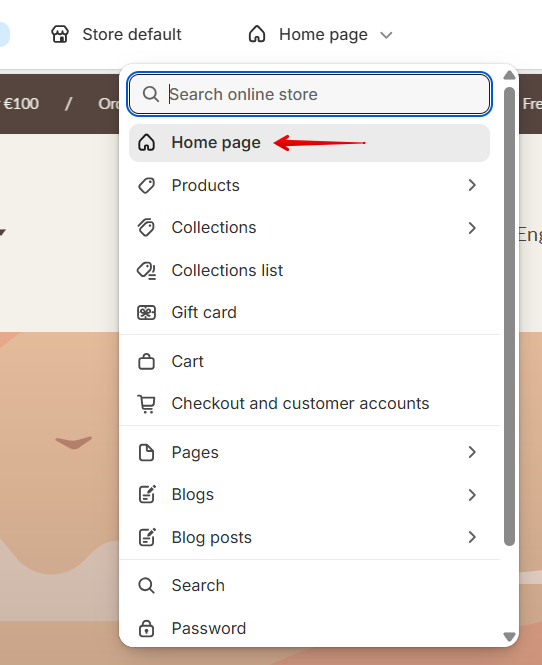
Homepage

Pages

Homepage

This is a homepage with the default template index.json.

homepage-page

Homepage is the main store page that your customers see first. On this page, you can display any dynamic sections and build your own unique store.

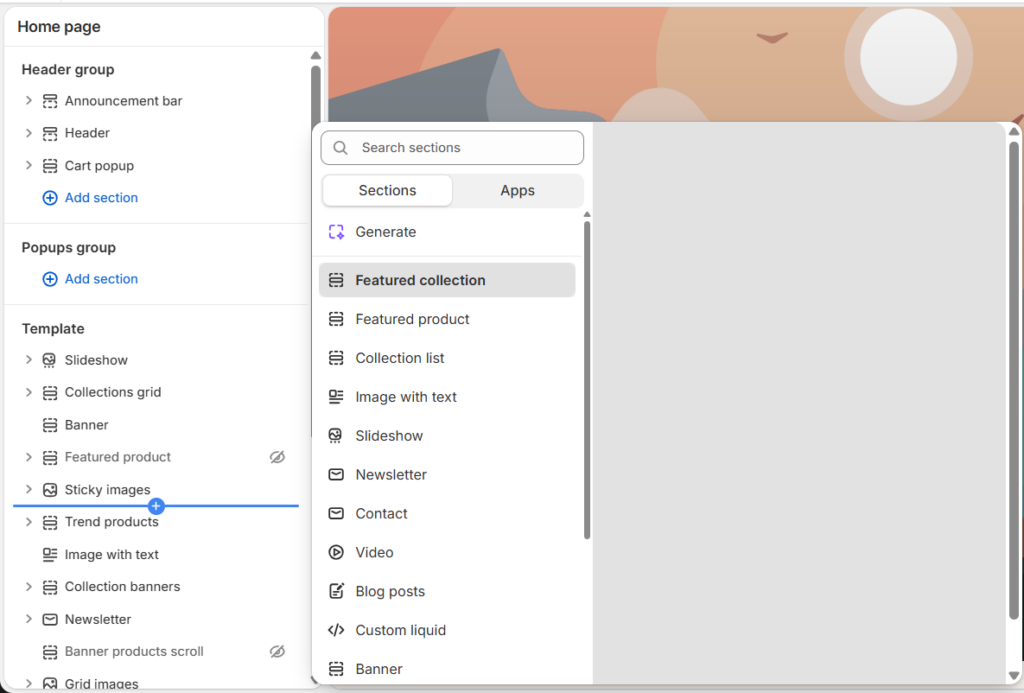
template

As per Shopify’s limits, you can only add up to 25 sections per page.

New customer account

Pages

New customer account

Setting up and managing new customer accounts

New customer accounts let your customers log in using a one-time 6-digit verification code sent by email. A password isn’t required to log in. Both classic and new customer accounts are available to you and can be used by your customers. This customer account type is developed and managed by Shopify.

Click the link for more: Shopify manual.

Contact

Pages

Contact

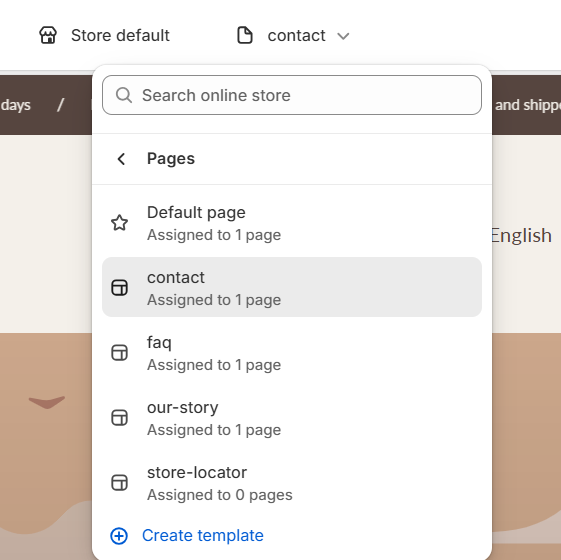
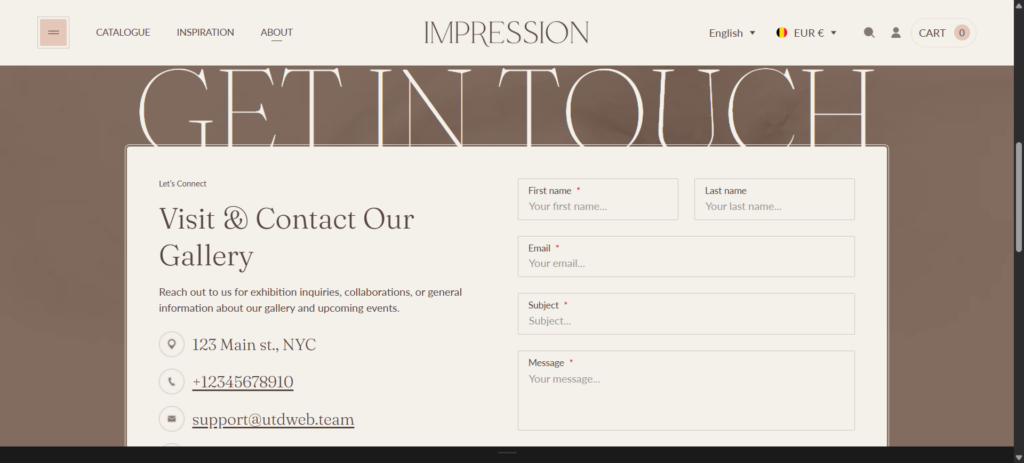
This is a page with a unique template page.contact.json

contact

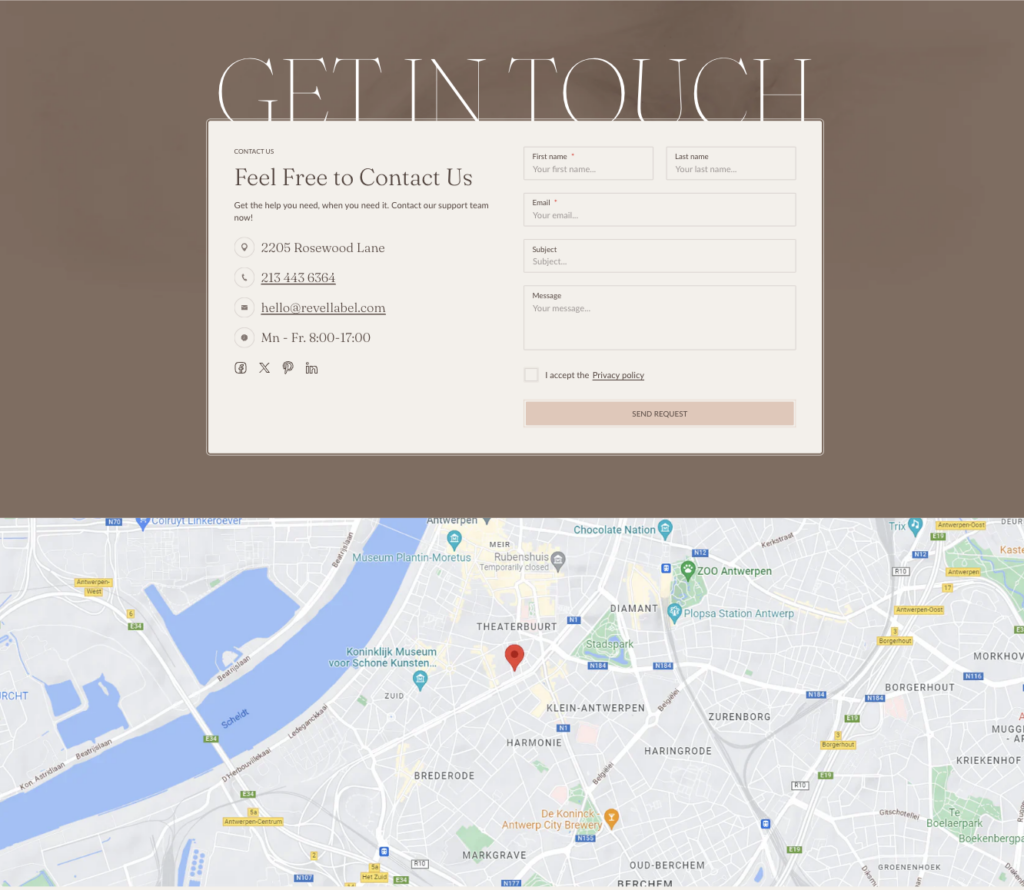
This template is used for the Contact page to show contact information for your customers.

contact-us-desktop

Product page

Pages

Product page

This is a product page with a default template product.json

product-page

pruduct-admin-page

This template is used by default for the product page. You don’t need to add anything for this template to be displayed.

You can use the section “Product template” to configure the appearance and additional settings of the page.

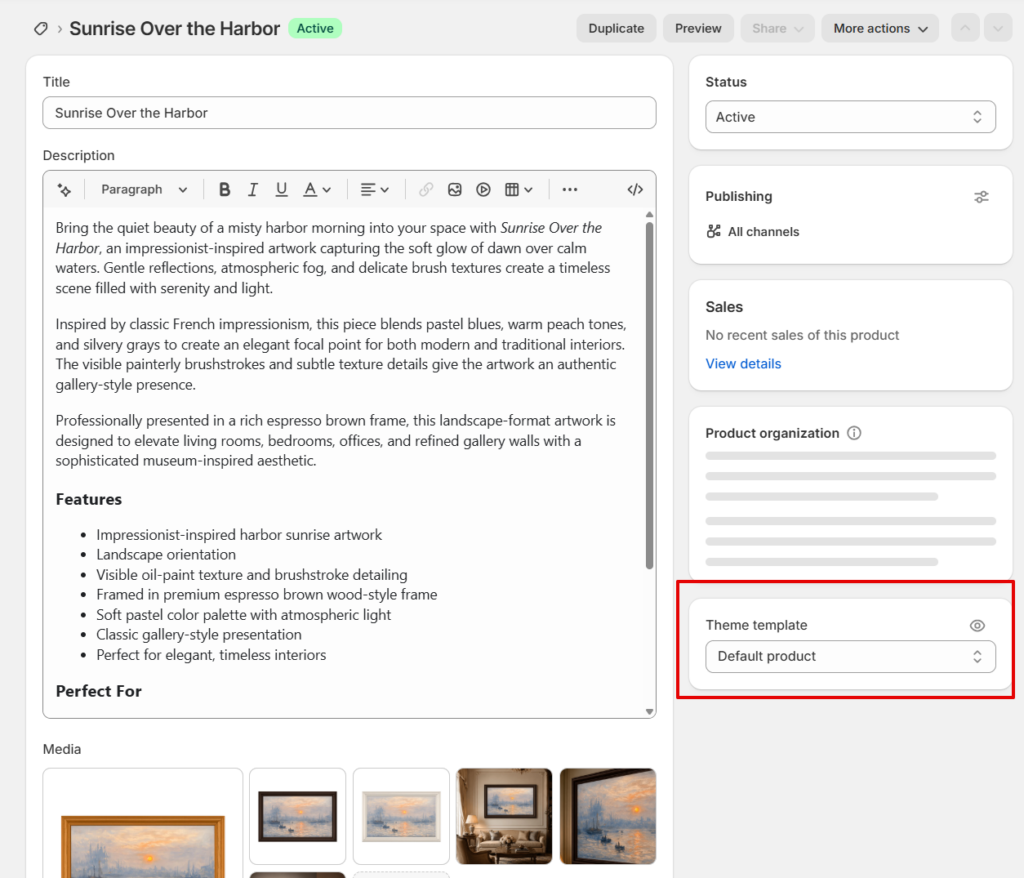
Pre-order product

Pages

Pre-order product

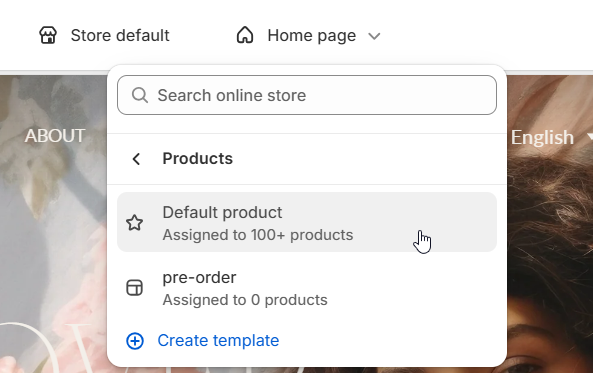
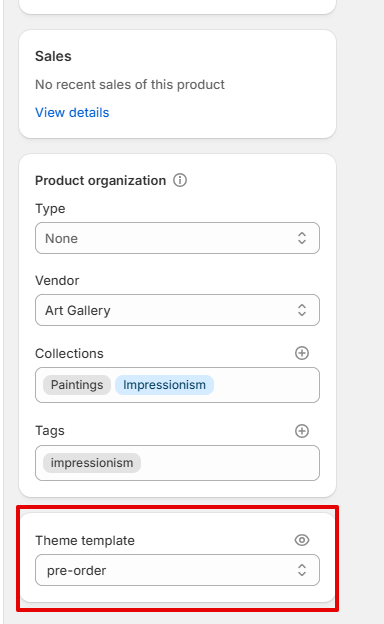
This is a product page with default template product.pre-order.json. You do not need to create it. The theme has it by default.

pre-order-set

This template can be used to show customers that the product is available for Pre-order purchase.

Additional info

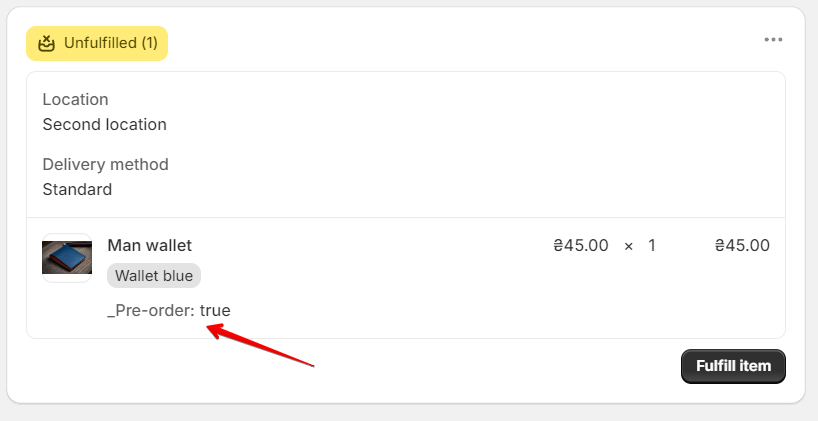
The logic of purchasing a product does not change; the only difference is changing the text of the “Add to cart” button to “Pre-order”. When a customer purchases a product, then in the admin panel on the “Order status page,” you can see an additional property “Pre-order”:

pre-order-true

You can use the section “Product Template” to configure the appearance and additional settings of the page.

You can use a block “Countdown timer” to set a timer that indicates how long the product will be available for Pre-order or any other purpose.

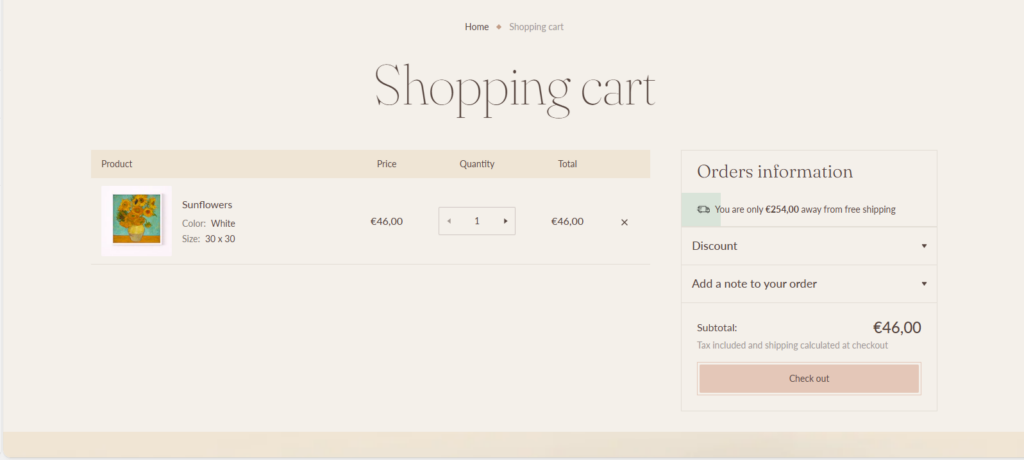
Cart page

Pages

Cart page

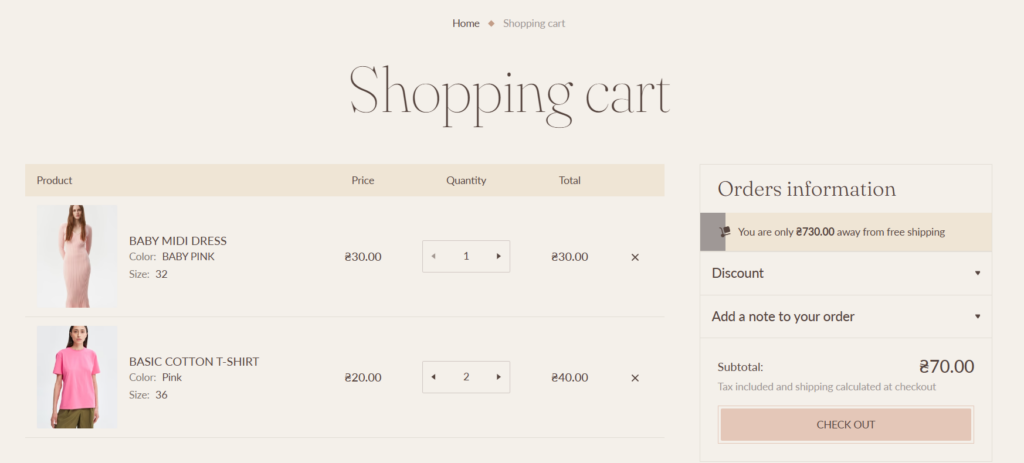
This is a page with a default template cart.json

cart-page

This template is used by default for the cart page. You don’t need to add anything for this template to be displayed.

You can use the section “Cart template” to configure the appearance and additional settings of the page.

Collections list

Pages

Collections list

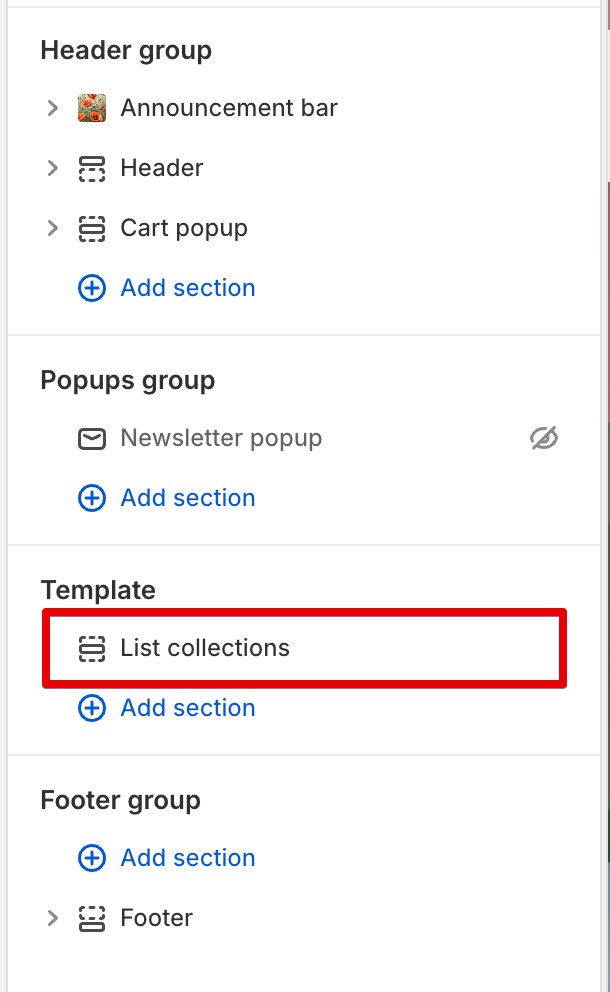
This is a page with a default template list-collections.json used to display list of colelctions on the “All collections” page.

collection-list

You can use the section “List collections” to configure the appearance and additional settings of the page.

collection-list-section

Article

Pages

Article

This is a blog post page with a default template article.json. The template is added initially and cannot be removed.

default-blog-page

This template is used by default for the single blog page. You don’t need to add anything for this template to be displayed. You can use the section “Article main” to configure the appearance and additional settings.

Password page

Pages

Password page

This is a page with a unique template password.json. This page is added by default and will be displayed to customers if your store is password-protected.

password-template

This template is used by default for the password page. You can use the “Password header”, “Password content”, and “Password footer” sections to configure the appearance and additional settings of the page.

password-desktop

Ticker

Sections & Snippets

Ticker

ticker-background-desktop

ticker-desktop

ticker-background-mobile

ticker-mobile

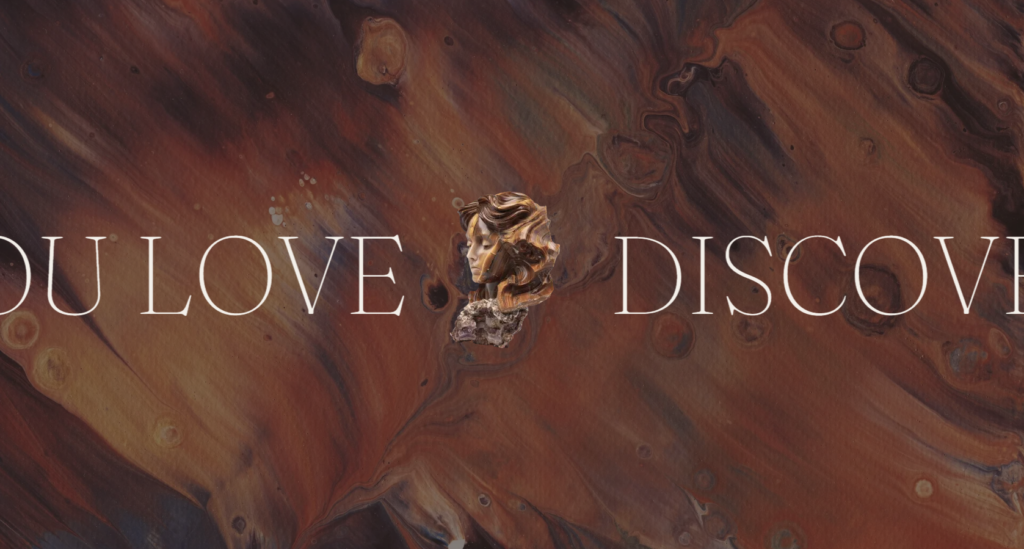
The Ticker section in your Shopify theme allows you to create a scrolling ticker with customizable text, images, and layout settings. Below is a detailed guide to all settings.

Adding a section

In order to add a section, you need to go to Customizer → Add Section → Ticker.

Section settings

General

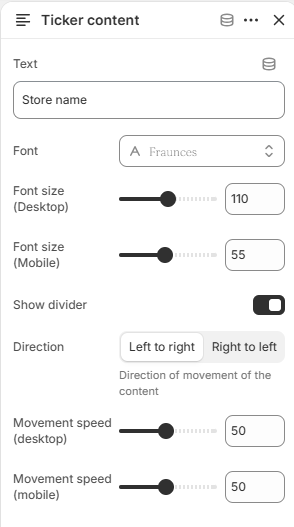
ticker-settings

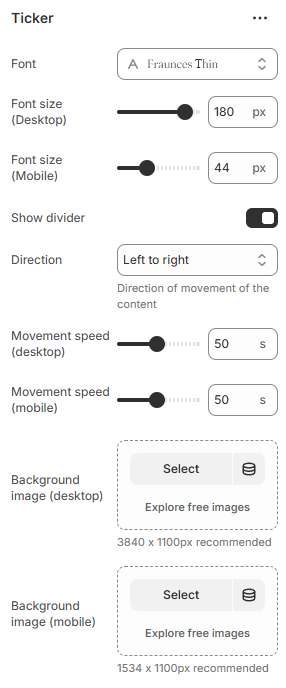
  1. Font – the setting allows you to set the font for the text;

  2. Font size (desktop) – the setting allows you to set the font size of the ticker for the desktop;

  3. Font size (mobile) – the setting allows you to set the font size of the ticker for the mobile;

  4. Show divider – the setting allows you to set the dividers between text;

  5. Direction – the setting allows you to set the direction of ticker movement;

  6. Movement speed (desktop) – the setting allows you to set the speed of the ticker for the desktop;

  7. Movement speed (mobile) – the setting allows you to set the speed of the ticker for the mobile;

  8. Background image (desktop) – the setting allows you to set the background image of the ticker for the desktop (3840 x 1100px recommended);

  9. Background image (mobile) – the setting allows you to set the background image of the ticker for the mobile (1534 x 1100px recommended).

Colors

ticker-color-settings

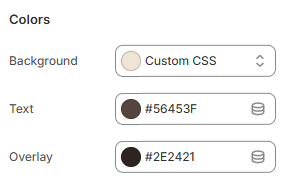
  1. Background – the setting allows you to set the background color of the section;

  2. Text – the setting allows you to set the color of the text;

  3. Overlay – the setting allows you to set the overlay color of the section background image.

Layout Settings

ticker-layout-settings

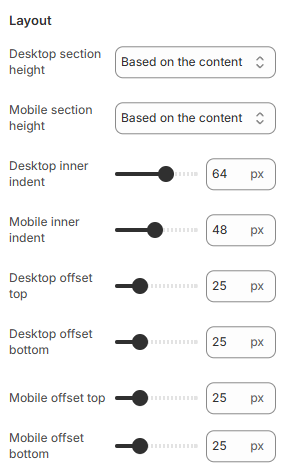
  1. Desktop section height– the setting allows you to set the height of the section on desktop;

  2. Mobile section height– the setting allows you to set the height of the section on mobile;

  3. Desktop inner indent – the setting allows you to set the inner indent of the section on desktop;

  4. Mobile inner indent – the setting allows you to set the inner indent of the section on mobile;

  5. Desktop offset top – the top indent of the section on the desktop;

  6. Desktop offset bottom – the bottom indent of the section on the desktop;

  7. Mobile offset top – the top indent of the section on the mobile;

  8. Mobile offset bottom – the bottom indent of the section on the mobile.

Blocks settings

Content:

ticker-content-settings

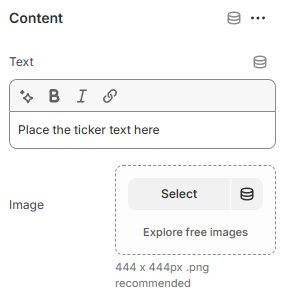
  1. Text – the setting allows you to fill in the text content for the section;

  2. Image – the setting allows you to specify the image (444 x 444px recommended).

Richtext

Sections & Snippets

Richtext

richtext

Adding a section

In order to add a section, you need to go to Customizer → Add Section → Rich text.

add-richtext

Section settings

General

richtext-settings

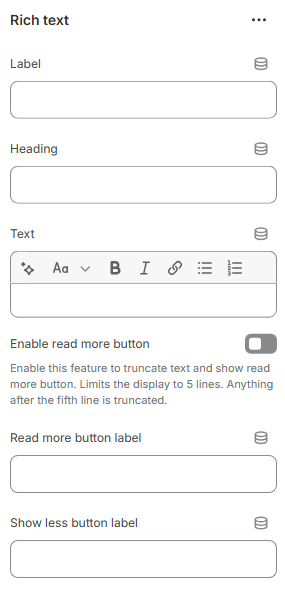
  1. Label – this setting allows you to set text of the label;

  2. Heading – this setting allows you to set text of the heading;

  3. Text – this setting allows you to set the main text of section;

  4. Enable read more button – this setting enables the feature to truncate text and display a button to expand the full text. Limits the display to 5 lines. Anything after the fifth line is truncated;

  5. Read more button label – this setting allows you to set the text of the “Read more” button;

  6. Show less button label – this setting allows you to set the text of the “Show less” button.

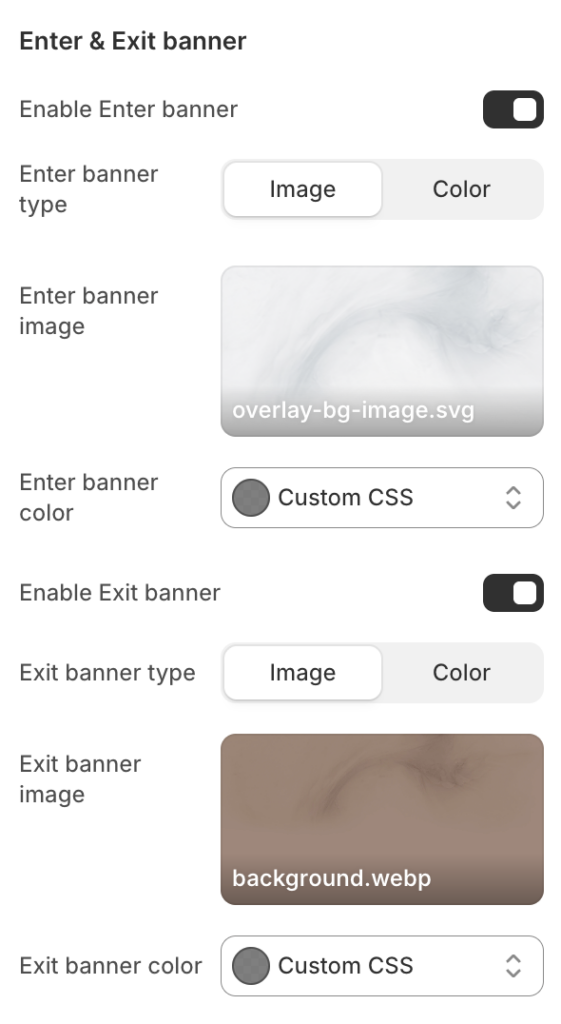
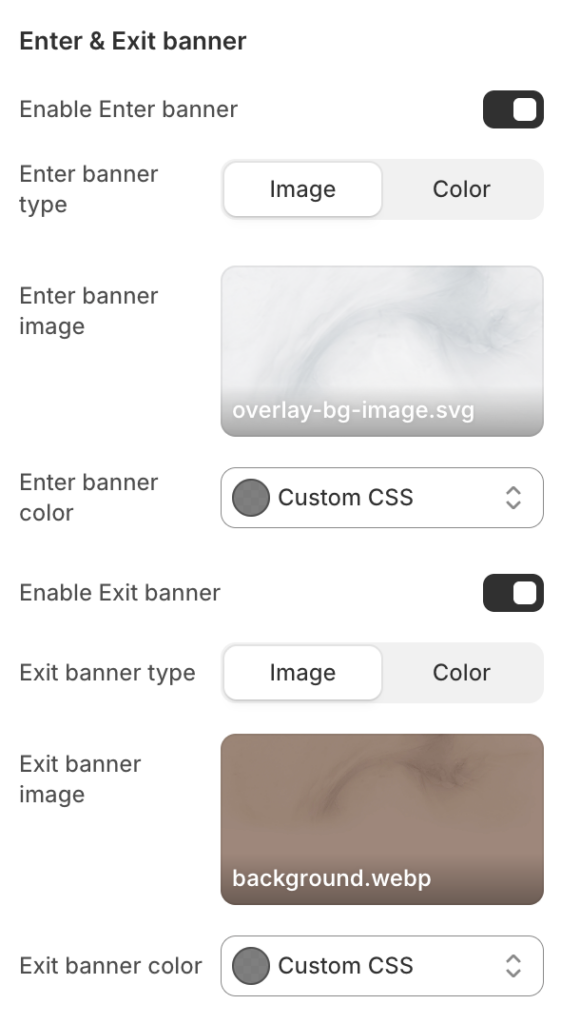
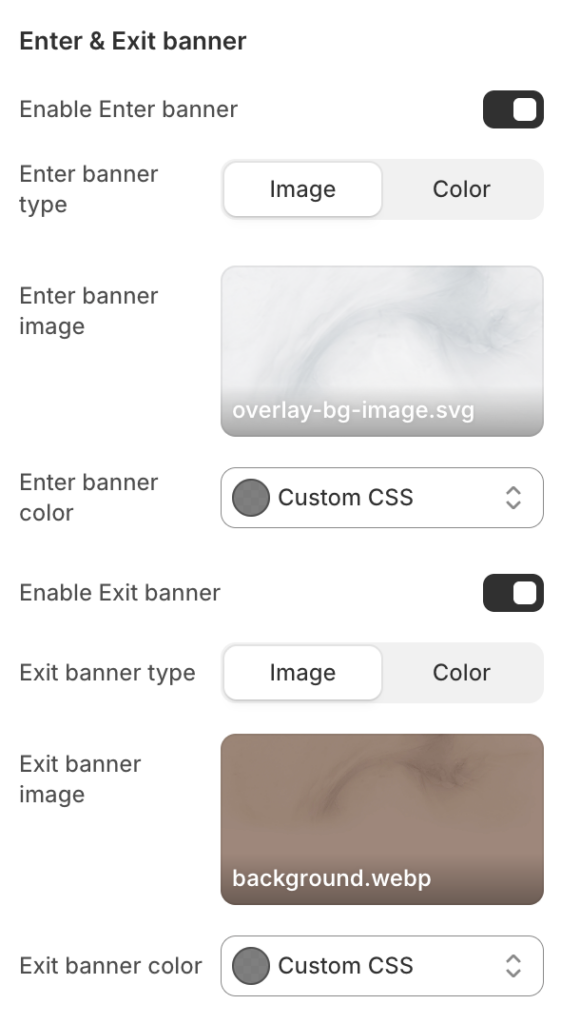
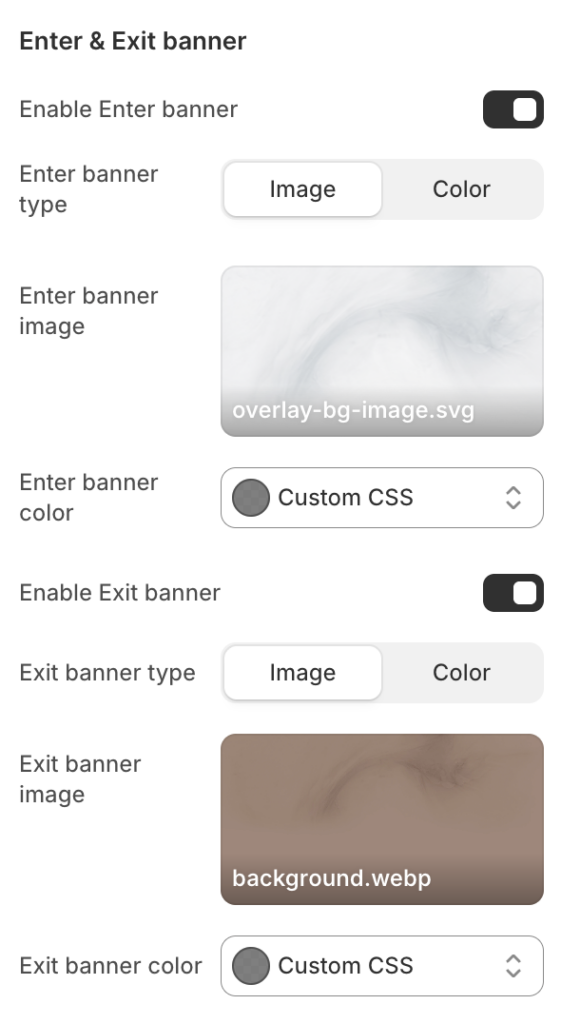
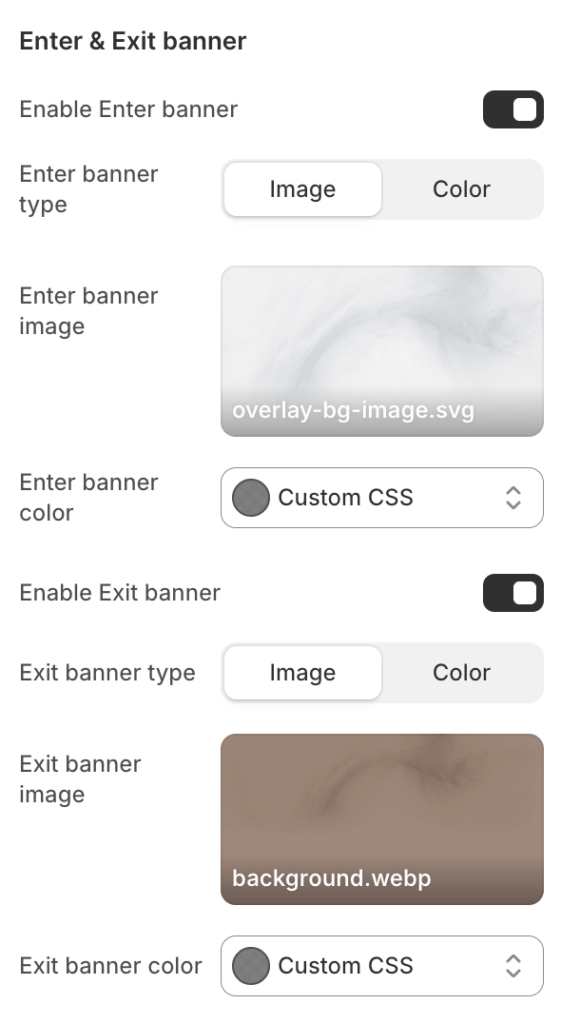
Enter & Exit banner Settings.

richtext-enter-exit-banner

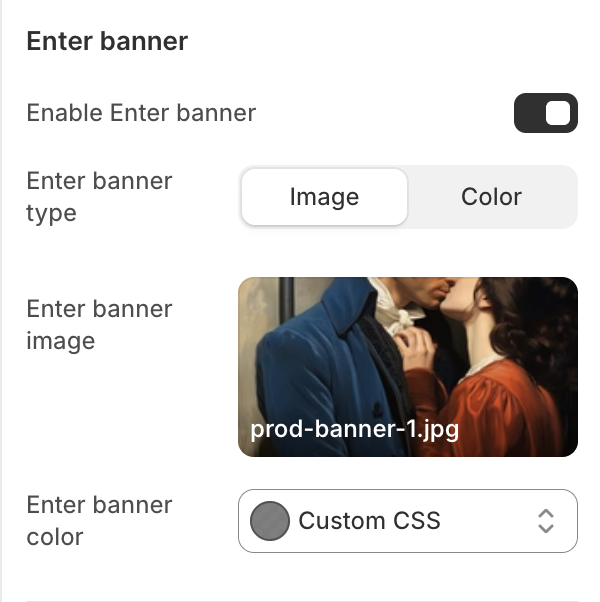
  1. Enable Enter banner – the setting allows you to show the enter banner image;

  2. Enter banner type – the setting allows you to select the type of banner. You can choose either an image or a color;

  3. Enter banner image – the setting allows you to select the enter banner image;

  4. Enter banner color – the setting allows you to select the enter banner color;

  5. Enable exit banner – the setting allows you to show the exit banner image;

  6. Exit banner type – the setting allows you to select the type of banner. You can choose either an image or a color;

  7. Exit banner image – the setting allows you to select the exit banner image;

  8. Exit banner color – the setting allows you to select the exit banner color.

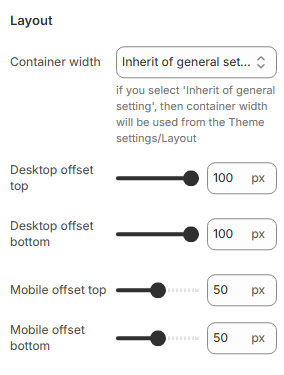
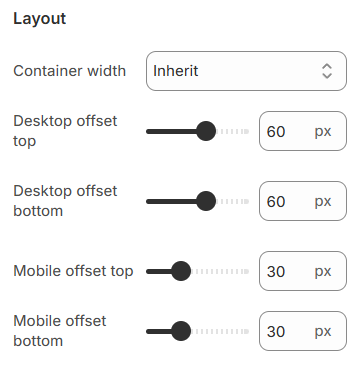
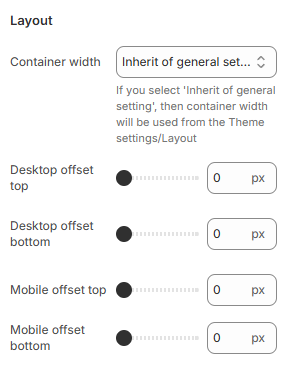
Layout Settings

layout-rich-text

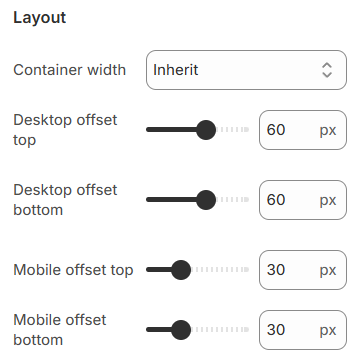
  1. Container width – section container settings;

  2. Desktop offset top – the top indent of the section on the desktop;

  3. Desktop offset bottom – the bottom indent of the section on the desktop;

  4. Mobile offset top – the top indent of the section on the mobile;

  5. Mobile offset bottom – the bottom indent of the section on the mobile.

Cart drawer

Sections & Snippets

Cart drawer

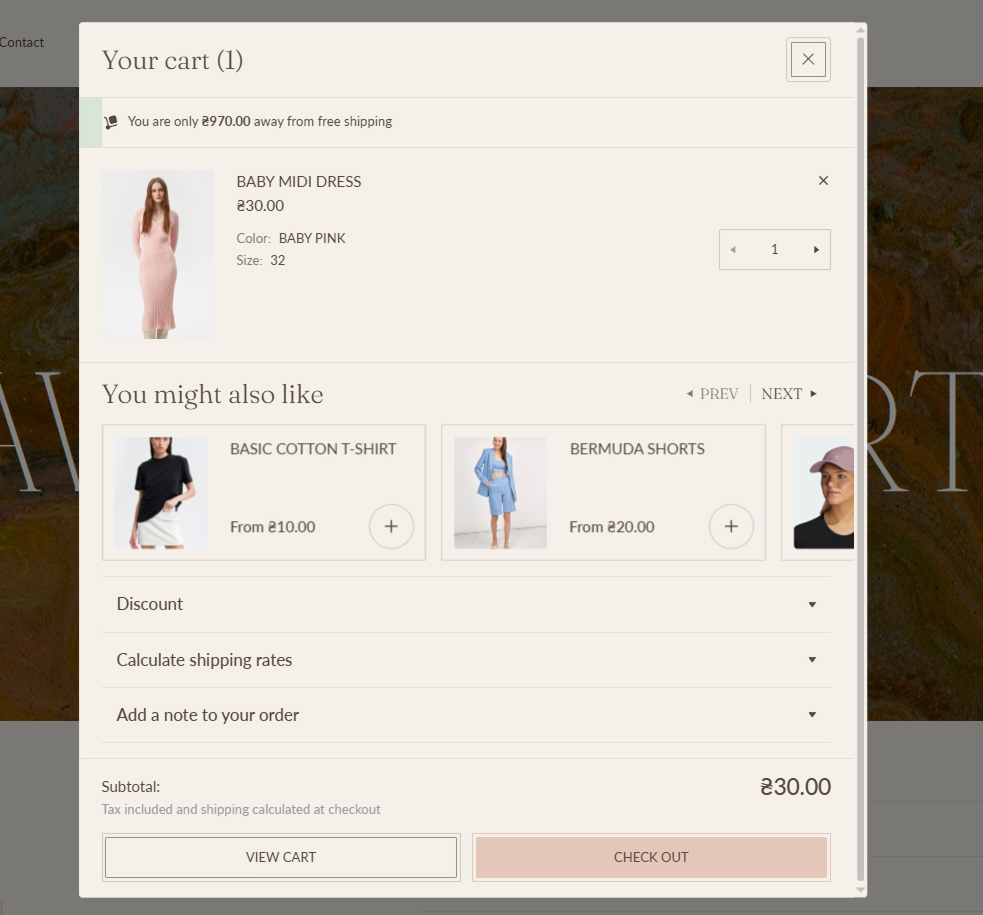
cart-drawer

Adding a Section

The section is static, it is added initially and cannot be deleted. The section will be added if the Drawer type is selected in the Cart global settings (Settings – Cart – Cart type).

You can enable/disable “Disount”, “Calculate shipping rates”, “Note order” in the Cart global settings (Settings – Cart – Cart type).

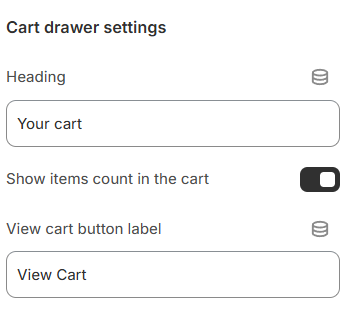
Cart drawer settings

cart-drawer-setting

  1. Heading – the setting allows you to set the text for the section title. By default, it is taken from translations;

  2. Show items count in the cart – the setting is responsible for displaying the number of products in the cart;

  3. View cart button label – the setting is responsible for the “View cart” link text;

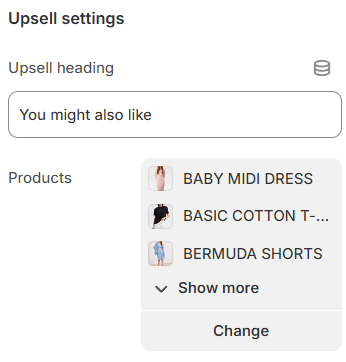
Upsell settings

cart-upsell

  1. Upsell heading – the setting allows you to set a title for a popup with upsell products;

  2. Products – he setting allows you to select products that act as upsells;

Blocks settings

Block “Items”

Block limit – 1

The block is responsible for displaying the products in the cart. The block has no settings.

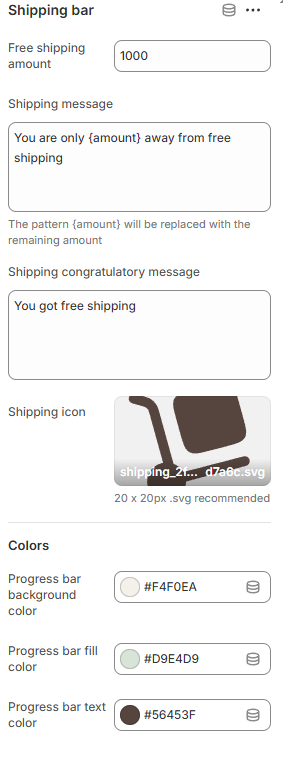
Block “Shipping bar”

Block limit – 1.

Block is responsible for displaying the Shipping bar.

shipping-bar-setting

  1. Free shipping amount – the setting allows you to set the desired goal to be achieved by the user;

  2. Shipping message – the setting allows you to set a message displayed near the progress bar;

  3. Shipping congratulatory message – the setting allows you to set a message to be displayed instead of the progress bar;

  4. Shipping icon – the setting allows you to set an icon to the shipping bar;

Colors

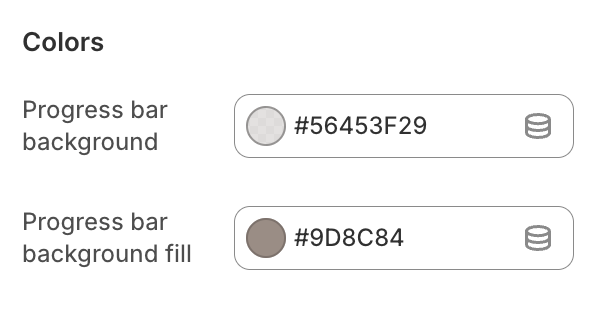
  1. Progress bar background color – the setting allows you to set the background color for the progress bar;

  2. Progress bar fill color – the setting allows you to set the fill color for the progress bar;

  3. Progress bar text color – the setting allows you to set the text color for the progress bar;

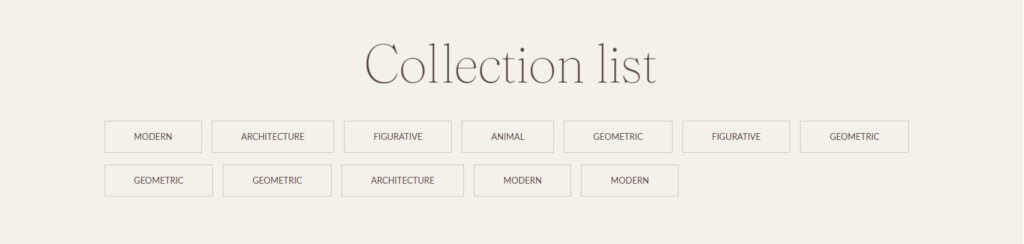
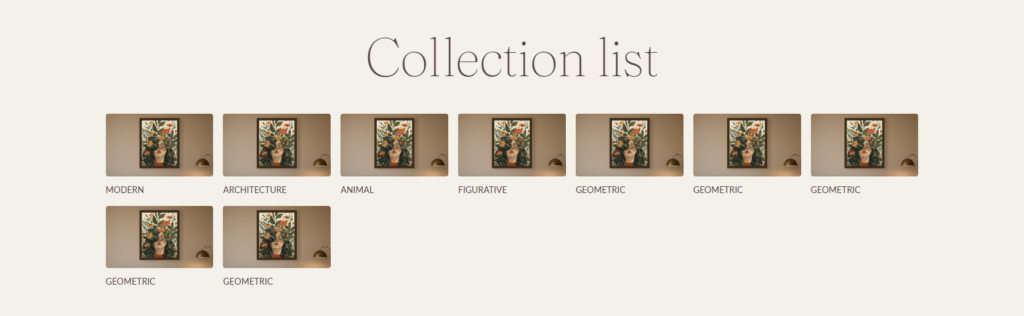
Collection list

Sections & Snippets

Collection list

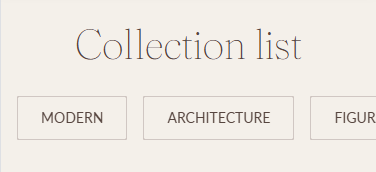
collection-list-desktop

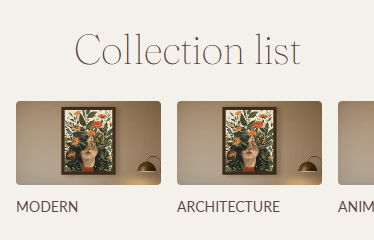
collection-list-desktop-2

collection-list-mobile

collection-list-mobile-2

Adding a section

In order to add a section, you need to go to Customizer → Add Section → Collection list.

Section settings

General

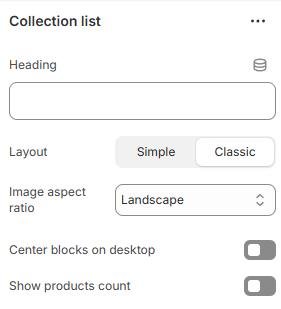
collection-list-settings

  1. Heading – the setting allows you to set the heading of the section;

  2. Layout – the setting allows you to set the layout of the section. Can be “Simple” or “Classic”;

  3. Image aspect ratio – the setting allows you to set the aspect ratio of the images. Can be “Square”, “Portrait” or “Landscape”;

  4. Center blocks on desktop – the setting allows you to center blocks on the desktop;

  5. Show products count – the setting allows you to show the product count of the collection near the title.

Layout

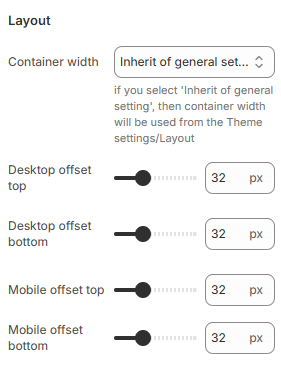
collection-list-layout-settings

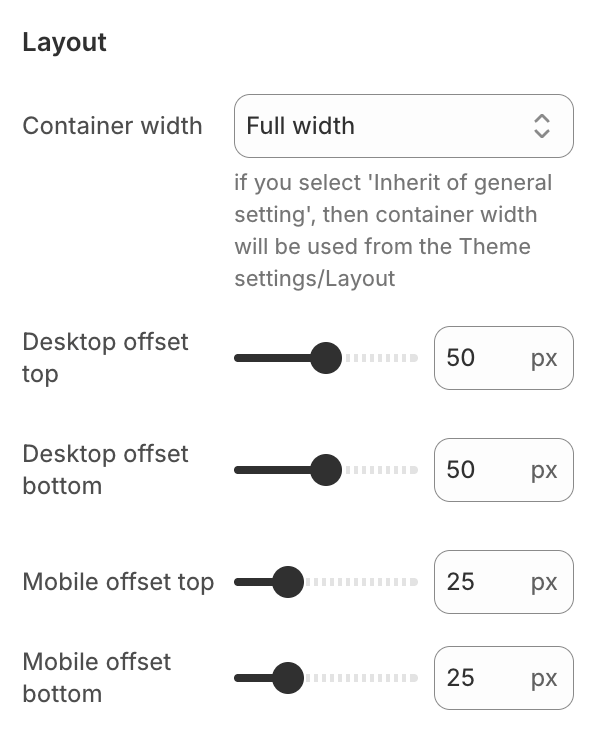
  1. Container width – a container width of the section. If “Inherit” value is selected then the container width is based on the group ‘Layout’ settings in the Theme settings;

  2. Desktop offset top – the top indent of the section on the desktop;

  3. Desktop offset bottom – the bottom indent of the section on the desktop;

  4. Mobile offset top – the top indent of the section on the mobile;

  5. Mobile offset bottom – the bottom indent of the section on the mobile.

Blocks settings

Collection:

collection-list-block-settings

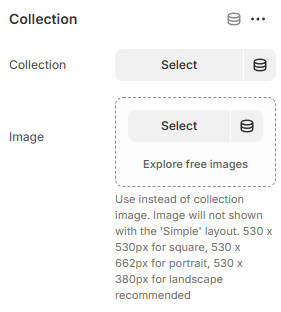
  1. Collection – the setting allows you to set the collection;

  2. Image – the setting allows you to set the image of the block instead of collection image. If the setting is empty and the collection image is empty then an image from the first product of the collection will be shown. Image will not shown with the ‘Simple’ layout. 530 x 530px for square, 530 x 662px for portrait, 530 x 380px for landscape recommended.

Cart template

Sections & Snippets

Cart template

cart-template

Adding a section

The section is static on a cart page template, it was added initially and cannot be removed.

Section settings

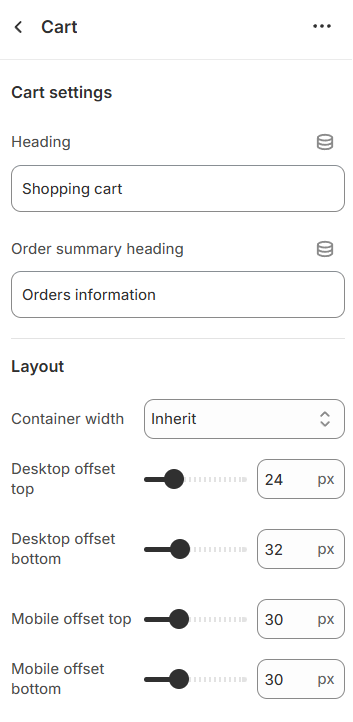
cart-settings

Cart settings

  1. Heading – a heading for the section;

  2. Order summary heading – a heading for the order summary information;

Layout

  1. Container width – section container settings;

  2. Desktop offset top – the top indent of the section on the desktop;

  3. Desktop offset bottom – the bottom indent of the section on the desktop;

  4. Mobile offset top – the top indent of the section on the mobile;

  5. Mobile offset bottom – the bottom indent of the section on the mobile.

In the section you can add a “Shipping bar” block.

Block Shipping bar
shipping-bar-setting

Block settings:

  1. Free shipping amount – the setting allows you to set the desired goal to be achieved by the user;

  2. Shipping message – the setting allows you to set a message displayed near the progress bar;

  3. Shipping congratulatory message – the setting allows you to set a message to be displayed instead of the progress bar;

  4. Shipping icon – the setting allows you to set an icon to the shipping bar;

Colors

  1. Progress bar background color – the setting allows you to set the background color for the progress bar;

  2. Progress bar fill color – the setting allows you to set the fill color for the progress bar;

  3. Progress bar text color – the setting allows you to set the text color for the progress bar;

Image with text

Sections & Snippets

Image with text

image-with-text

image-with-text-mobile

Adding a section

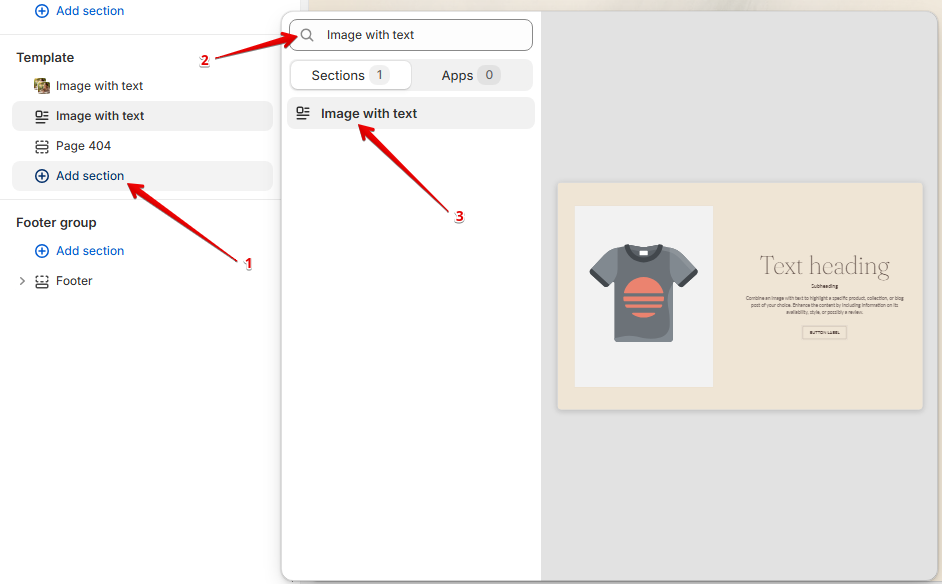
In order to add a section, you need to go to Customizer → Add Section → Image with text.

adding-image-with

Section settings

image-with-text-section-settings

General

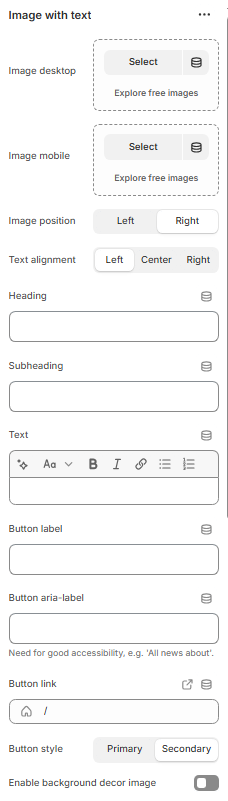
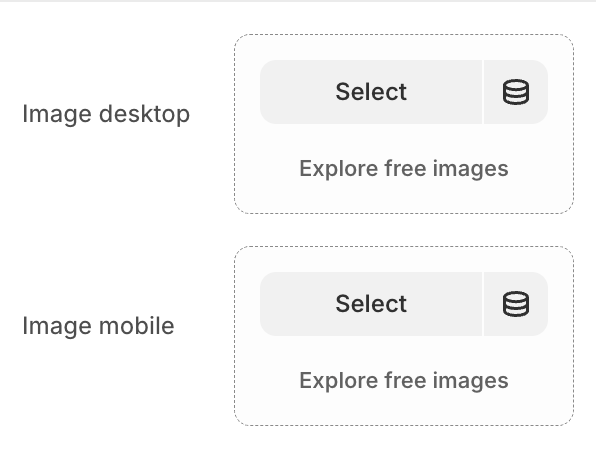
  1. Image desktop – the setting allows you to select the image for desktop resolutions;

  2. Image mobile – the setting allows you to select the image for mobile resolutions;

  3. Image position – the setting allows you to select image position in the section;

  4. Text alignment – the setting allows you to select the alignment of the text;

  5. Heading – the setting allows you to set the text of the heading;

  6. Subheading – the setting allows you to set the text of the subheading;

  7. Text – the setting allows you to set text content;

  8. Button label – the setting allows you to set the label for the button;

  9. Button aria-label – the setting allows you to set the aria-label for the button. This attribute allows screen readers to better convey information to people with disabilities;

  10. Button link – the setting allows you to select a button style;

  11. Button style – the setting allows you to set the type of the button;

  12. Enable background decor image – the setting allows you to set the background decoration image.

Layout Settings

image-with-text-section-layout

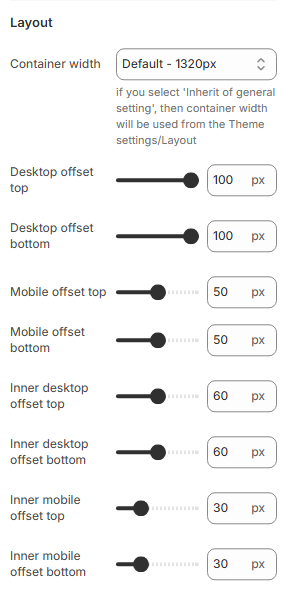
  1. Container width – section container settings.

  2. Desktop offset top – the top indent of the section on the desktop;

  3. Desktop offset bottom – the bottom indent of the section on the desktop;

  4. Mobile offset top – the top indent of the section on the mobile;

  5. Mobile offset bottom – the bottom indent of the section on the mobile;

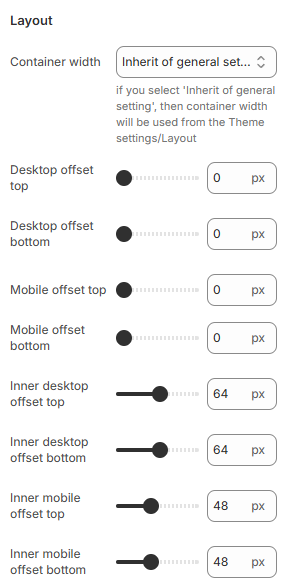
  6. Inner desktop offset top – the top indent of the inner container on the desktop;

  7. Inner desktop offset bottom – the bottom indent of the inner container on the desktop;

  8. Inner mobile offset top – the top indent of the inner container on the mobile;

  9. Inner mobile offset bottom – the bottom indent of the inner container on the mobile.

Social gallery

Sections & Snippets

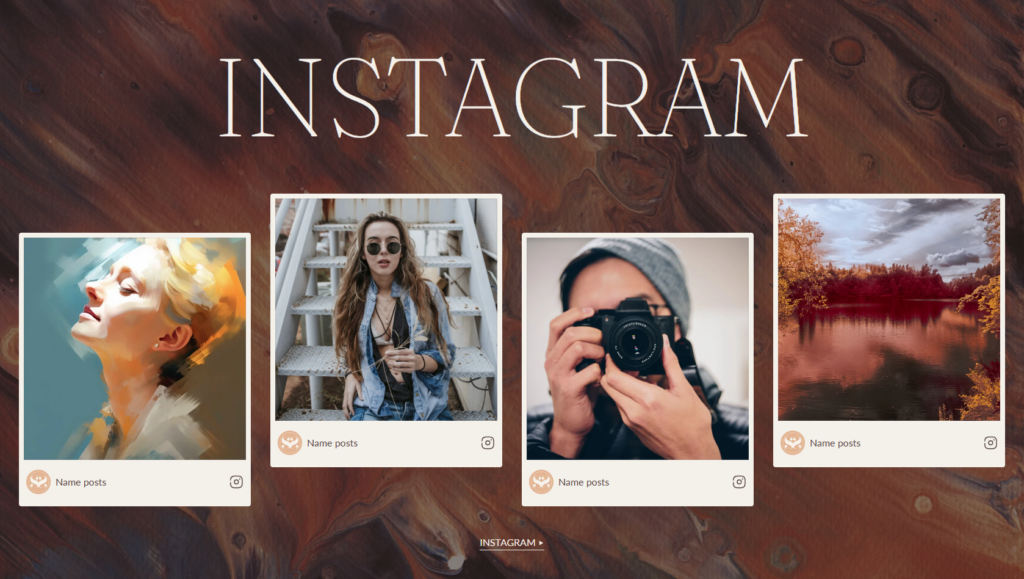
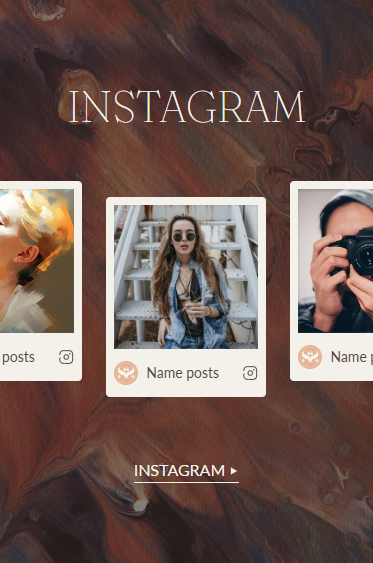
Social gallery

social-gallery-desktop

social-gallery-mobile

Adding a section

In order to add a section, you need to go to Customizer → Add Section → Social gallery.

Section settings

General

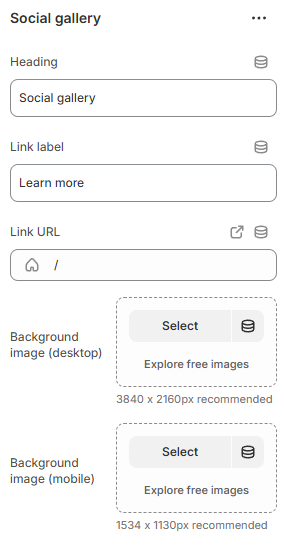
social-gallery-settings

  1. Heading – the setting allows you to set the heading of the section;

  2. Link label – the setting allows you to set the label of the section link;

  3. Link URL – the setting allows you to set the URL of the section link;

  4. Background image (desktop) – the setting allows you to set the background image of the section for the desktop (3840 x 2160px recommended);

  5. Background image (mobile) – the setting allows you to set the background image of the section for the mobile (1534 x 1130px recommended).

Colors

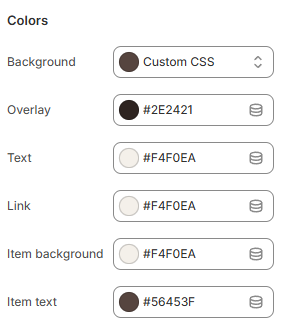
social-gallery-color-settings

  1. Background – the setting allows you to set the background color of the section;

  2. Overlay – the setting allows you to set the overlay color of the section background image;

  3. Text – the setting allows you to set the color of the text;

  4. Link – the setting allows you to set the color of the link;

  5. Item background – the setting allows you to set the background color of the gallery item;

  6. Item text – the setting allows you to set the text color of the gallery item.

Layout

social-gallery-layout-settings

  1. Container width – a container width of the section. If “Inherit” value is selected then the container width is based on the group ‘Layout’ settings in the Theme settings;

  2. Desktop offset top – the top indent of the section on the desktop;

  3. Desktop offset bottom – the bottom indent of the section on the desktop;

  4. Mobile offset top – the top indent of the section on the mobile;

  5. Mobile offset bottom – the bottom indent of the section on the mobile.

Blocks settings

social-gallery-item-settings

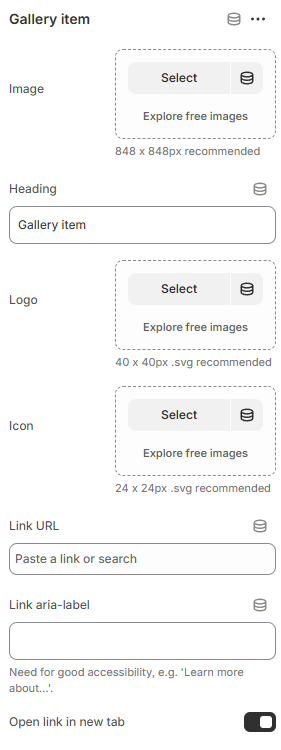
  1. Image – the setting allows you to set the image of the gallery item. 848 x 848px recommended;

  2. Heading – the setting allows you to set the heading of the gallery item;

  3. Logo – the setting allows you to set the logo of the gallery item. 40 x 40px recommended;

  4. Icon – the setting allows you to set the logo of the gallery item. 24 x 24px recommended;

  5. Link URL – the setting allows you to set the link URL of the gallery item;

  6. Link aria label – the setting allows you to set the link aria label of the gallery item. Need for good accessibility, e.g. ‘Learn more about…’;

  7. Open link in new tab – the setting allows you to set the image of the gallery item. 848 x 848px recommended.

Blog posts

Sections & Snippets

Blog posts

blogpost

blogpost-mobile

Adding a section

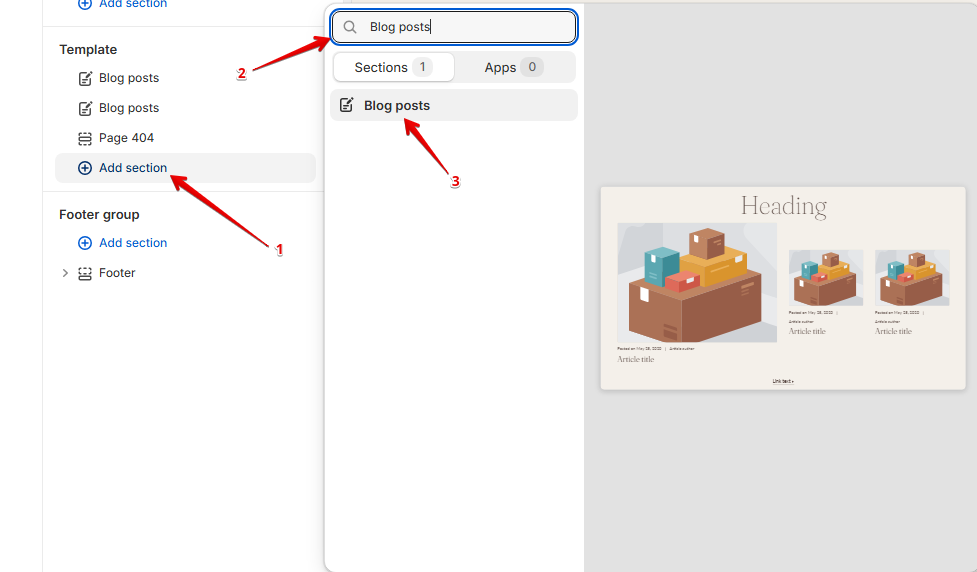
In order to add a section, you need to go to Customizer → Add Section → Blog posts.

adding-blogpost-section

Section settings

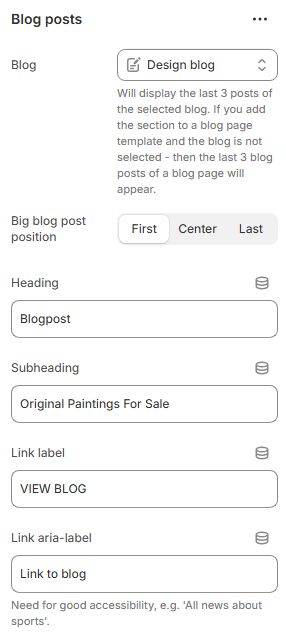
blogpost-setting

General

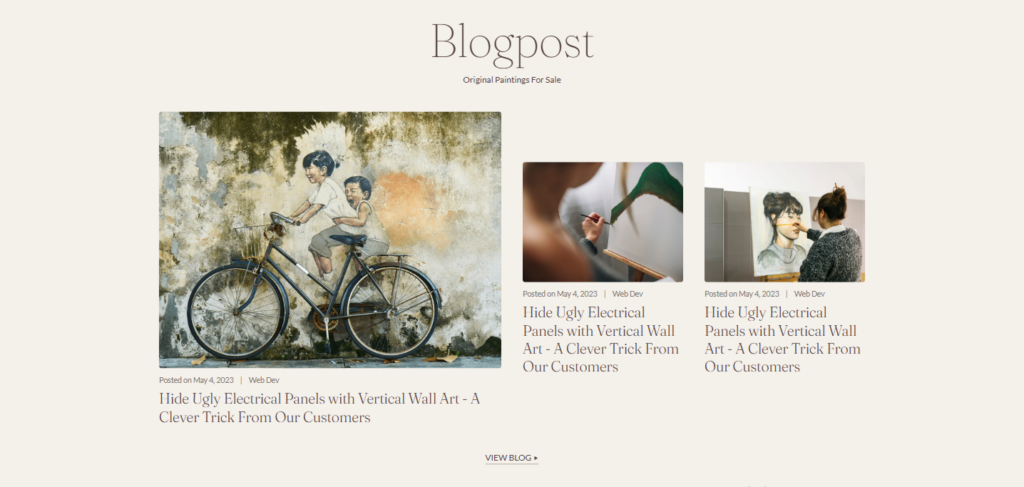
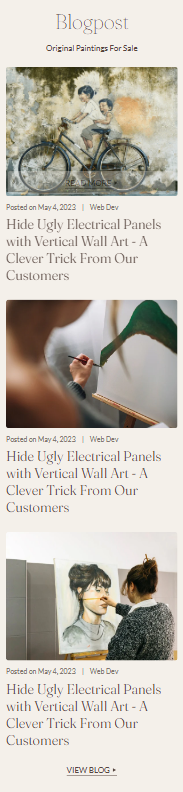
  1. Blog – select the blog whose posts you want to display;

  2. Big blog post position – setting that allows you to select the position for a big blog post;

  3. Heading – this setting allows you to set text of the heading;

  4. Subheading – this setting allows you to set text of the subheading;

  5. Link label – setting allows you to set the label for the link;

  6. Link aria-label – setting allows you to set the aria-label for the link. This attribute allows screen readers to better convey information to people with disabilities.

Layout Settings

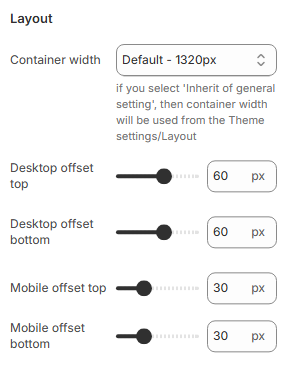
blogpost-layout

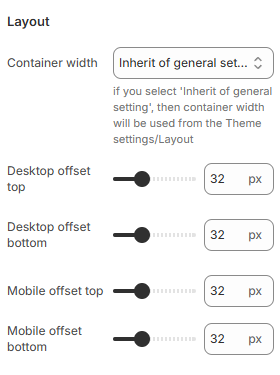
  1. Container width – section container settings.

  2. Desktop offset top – the top indent of the section on the desktop;

  3. Desktop offset bottom – the bottom indent of the section on the desktop;

  4. Mobile offset top – the top indent of the section on the mobile;

  5. Mobile offset bottom – the bottom indent of the section on the mobile.

Best sellers

Sections & Snippets

Best sellers

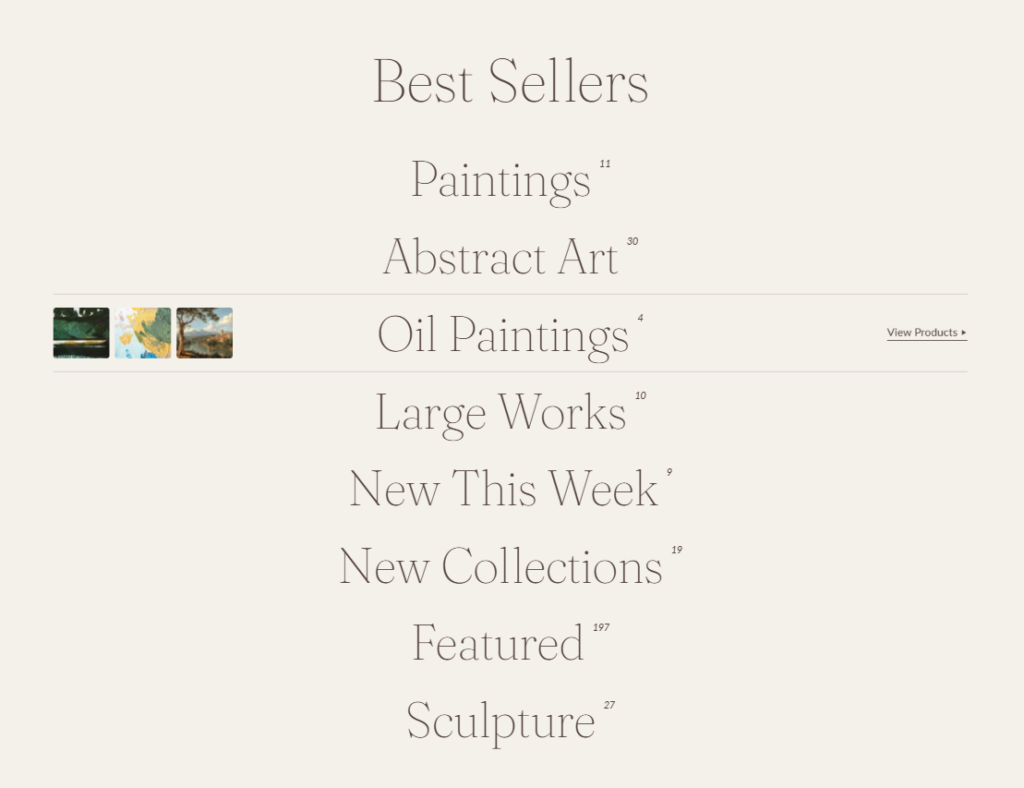
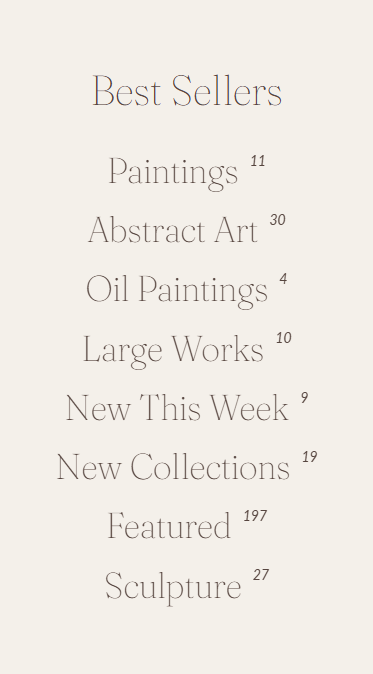
best-sellers-desktop

best-sellers-mobile

Adding a section

In order to add a section, you need to go to Customizer → Add Section → Best sellers.

Section settings

General

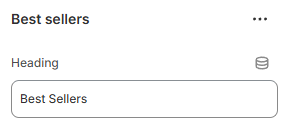
best-sellers-settings

  1. Heading – the setting allows you to set the heading of the section.

Enter & Exit banner Settings.

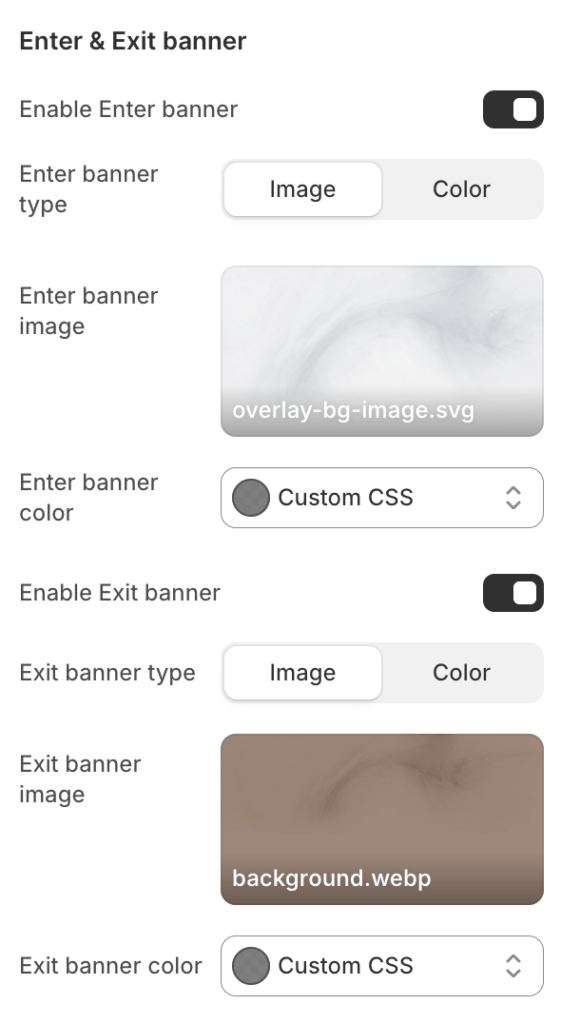
enter-exit-banner-settings

  1. Enable Enter banner – the setting allows you to show the enter banner image;

  2. Enter banner type – the setting allows you to select the type of banner. You can choose either an image or a color;

  3. Enter banner image – the setting allows you to select the enter banner image;

  4. Enter banner color – the setting allows you to select the enter banner color;

  5. Enable exit banner – the setting allows you to show the exit banner image;

  6. Exit banner type – the setting allows you to select the type of banner. You can choose either an image or a color;

  7. Exit banner image – the setting allows you to select the exit banner image;

  8. Exit banner color – the setting allows you to select the exit banner color.

Layout

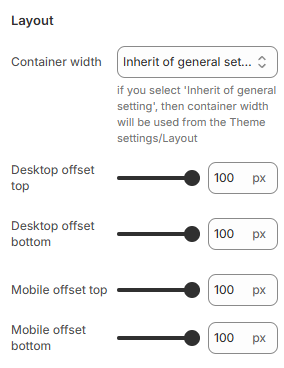
layout-settings

  1. Container width – a container width of the section. If “Inherit” value is selected then the container width is based on the group ‘Layout’ settings in the Theme settings;

  2. Desktop offset top – the top indent of the section on the desktop;

  3. Desktop offset bottom – the bottom indent of the section on the desktop;

  4. Mobile offset top – the top indent of the section on the mobile;

  5. Mobile offset bottom – the bottom indent of the section on the mobile.

Blocks settings

Collection

  1. Collection – the setting allows you to set the collection;

  2. Heading – the setting allows you to set the heading. Use instead of collection heading;

  3. Link label – the setting allows you to set the link label;

  4. Thumbnail first – the setting allows you to set the first thumbnail;

  5. Thumbnail second– the setting allows you to set the second thumbnail;

  6. Thumbnail third– the setting allows you to set the third thumbnail.

Newsletter

Sections & Snippets

Newsletter

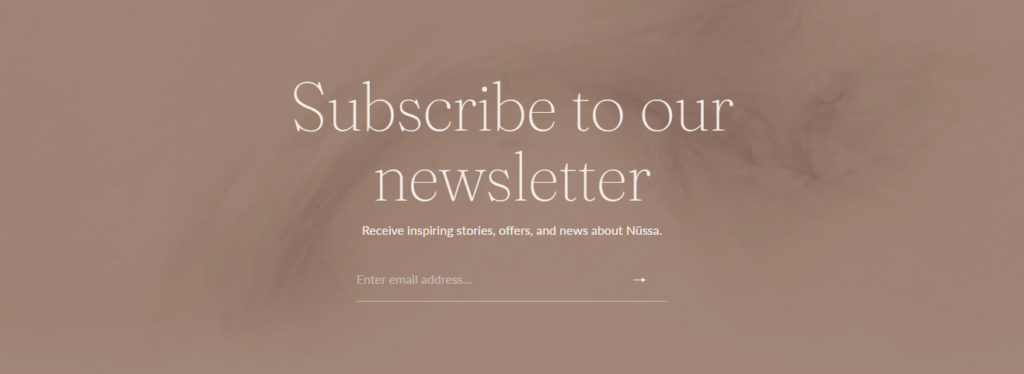
newsletter-desktop

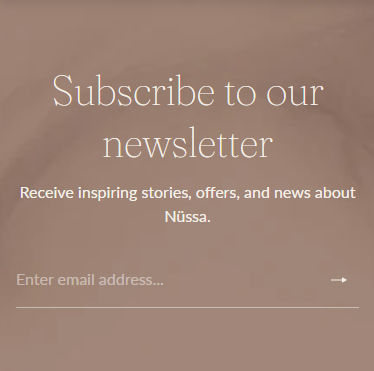
newsletter-mobile

Adding a section

In order to add a section, you need to go to Customizer → Add Section → Newsletter.

Section settings

General

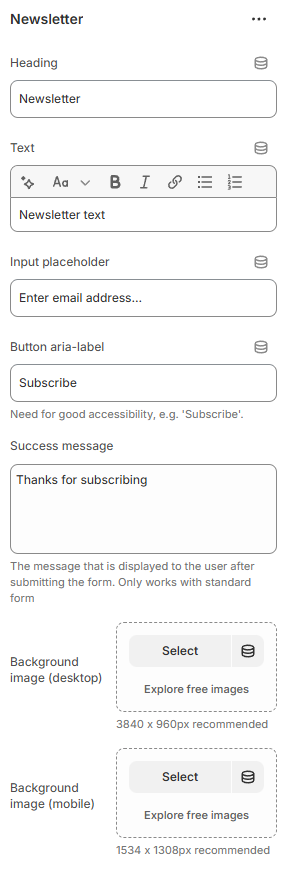
newsletter-settings

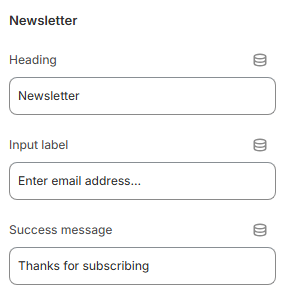
  1. Heading – the setting allows you to set the heading;

  2. Text – the setting allows you to set text content;

  3. Input placeholder – the setting allows you to set the text for the input placeholder;

  4. Button aria-label – the setting allows you to set the aria-label for the input button;

  5. Success message – the setting allows you to set the text of successful sending;

  6. Background image (desktop) – the setting allows you to set the background image of the section for the desktop (3840 x 960px recommended);

  7. Background image (mobile) – the setting allows you to set the background image of the section for the mobile (1534 x 1308px recommended).

Colors

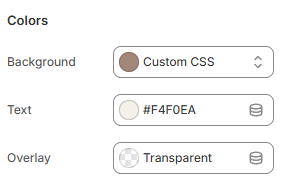
newsletter-color-settings

  1. Background – the setting allows you to set the background color of the section;

  2. Text – the setting allows you to set the color of the text;

  3. Overlay – the setting allows you to set the overlay color of the section background image.

Layout

newsletter-layout-settings

  1. Container width – a container width of the section. If “Inherit” value is selected then the container width is based on the group ‘Layout’ settings in the Theme settings;

  2. Desktop offset top – the top indent of the section on the desktop;

  3. Desktop offset bottom – the bottom indent of the section on the desktop;

  4. Mobile offset top – the top indent of the section on the mobile;

  5. Mobile offset bottom – the bottom indent of the section on the mobile.

Grid images

Sections & Snippets

Grid images

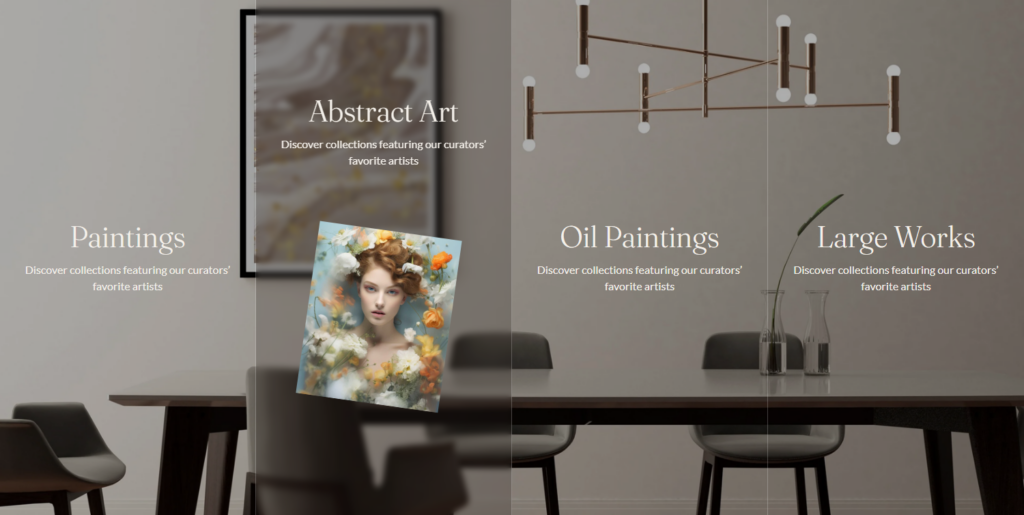
grid-images

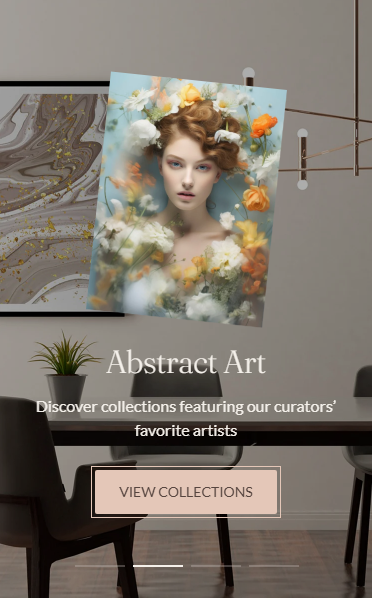
grid-images

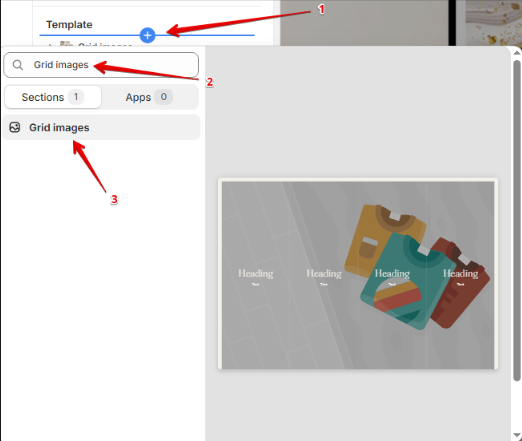
Adding a sectionadd-grid-images

Section settings

grid-images-settings1

General

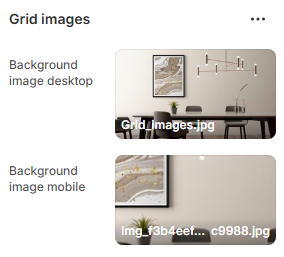
  1. Background image desktop – the setting allows you to select the background image for desktop resolutions;

  2. Background image mobile – the setting allows you to select the background image for mobile resolutions.

grid-images-color-setting

Colors

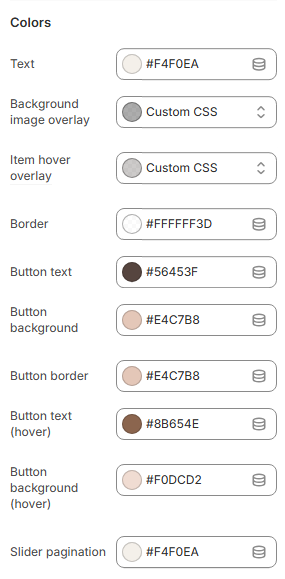
  1. Text – the setting allows you to select a color for the title and text;

  2. Background image overlay – the setting allows you to select a color background image overlay;

  3. Item hover overlay – the setting allows you to select a color for hover on block;

  4. Border – the setting allows you to select a color for the border between blocks;

  5. Button text – the setting allows you to select a color for button text;

  6. Button background – the setting allows you to select a color for button background;

  7. Button border – the setting allows you to select a color for button border;

  8. Button text (hover) – the setting allows you to select a color for button text on hover;

  9. Button background (hover) – the setting allows you to select a color for button background on hover;

  10. Slider pagination – the setting allows you to select a color for slider pagination.

In order to add a section, you need to go to Customizer → Add Section → Grid images.

Layout

grid-images-layout

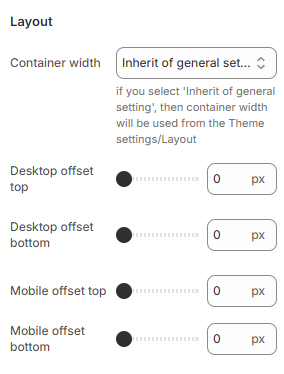
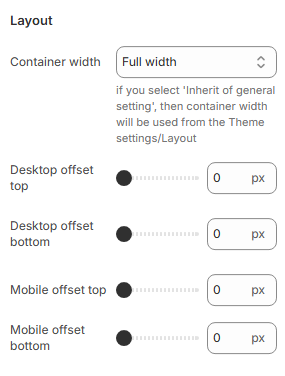
  1. Container width – section container settings;

  2. Desktop offset top – the top indent of the section on the desktop;

  3. Desktop offset bottom – the bottom indent of the section on the desktop;

  4. Mobile offset top – the top indent of the section on the mobile;

  5. Mobile offset bottom – the bottom indent of the section on the mobile.

Block settings

The section has a limit on the amount of blocks. The maximum number of blocks is 4.

grid-images-block-setting

General

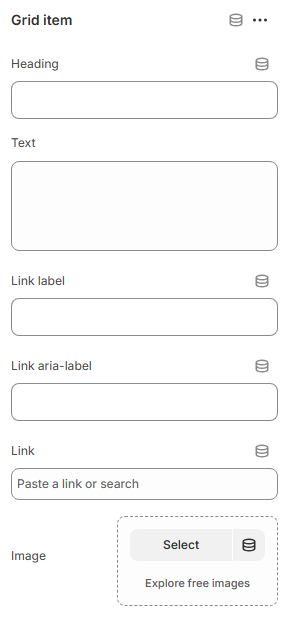
  1. Heading – this setting allows you to set text of the heading;

  2. Text – the setting allows you to set the text of the section;

  3. Link label – the setting allows you to set the text for the link;

  4. Link aria-label – the setting allows you to set the aria-label for the link;

  5. Link – the setting allows you to set the link for the link;

  6. Image – the setting allows you to select the image.

Store location

Sections & Snippets

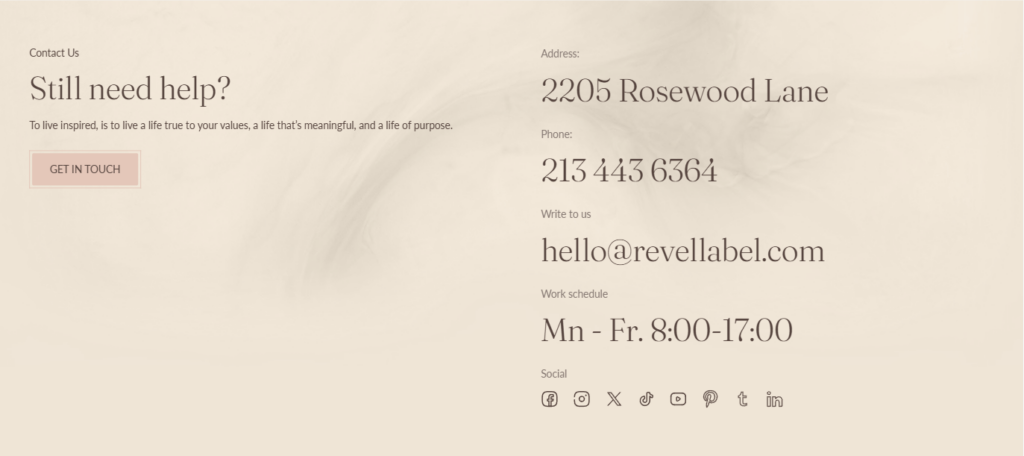
Store location

store-location-desktop

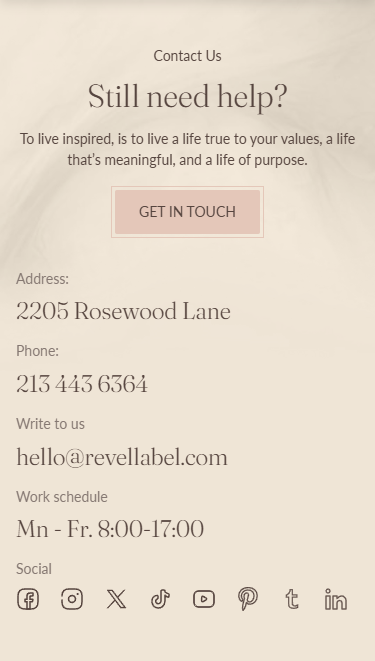
store-location-mobile

Adding a section

In order to add a section, you need to go to Customizer → Add Section → Store location.

Section settings

General

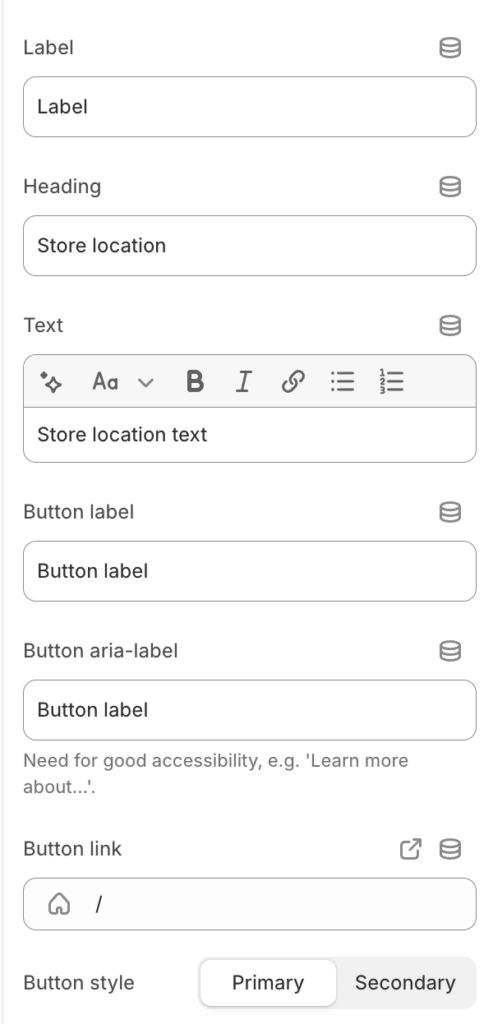
store-location-settings-general

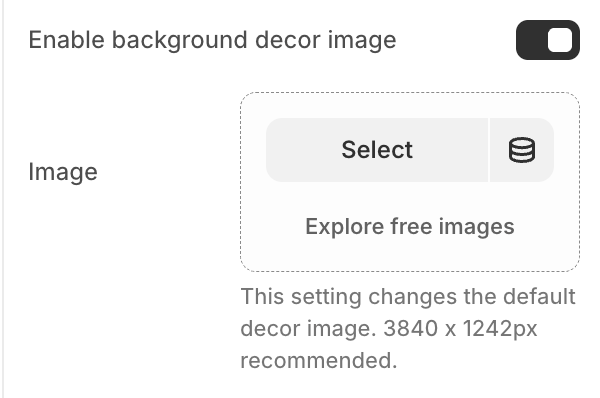
store-location-settings-general2

  1. Label – the setting allows you to specify the label of the section;

  2. Heading – the setting allows you to specify the heading of the section;

  3. Text – the setting allows you to specify the text of the section;

  4. Button label – the setting allows you to set the button label of the section;

  5. Button aria-label – the setting allows you to set the button aria label of the section. Need for good accessibility, e.g. ‘Learn more about…’;

  6. Button link – the setting allows you to set the button link of the section;

  7. Button style– the setting allows you to set the button style (primary / secondary) of the section;

  8. Enable background decor image – the setting allows you to show the background decoration image. The background color of the section will be changed to background secondary;

  9. Image – the setting allows you to set the background decoration image.

Enter & Exit banner Settings

enter-exit-banner-settings

  1. Enable Enter banner – the setting allows you to show the enter banner image;

  2. Enter banner type – the setting allows you to select the type of banner. You can choose either an image or a color;

  3. Enter banner image – the setting allows you to select the enter banner image;

  4. Enter banner color – the setting allows you to select the enter banner color;

  5. Enable exit banner – the setting allows you to show the exit banner image;

  6. Exit banner type – the setting allows you to select the type of banner. You can choose either an image or a color;

  7. Exit banner image – the setting allows you to select the exit banner image;

  8. Exit banner color – the setting allows you to select the exit banner color.

Layout Settings

store-location-layout-settings

  1. Container width – a container width of the section. If “Inherit” value is selected then the container width is based on the group ‘Layout’ settings in the Theme settings;

  2. Desktop offset top – the top indent of the section on the desktop;

  3. Desktop offset bottom – the bottom indent of the section on the desktop;

  4. Mobile offset top – the top indent of the section on the mobile;

  5. Mobile offset bottom – the bottom indent of the section on the mobile.

  6. Inner desktop offset top – the top indent of the inner container on the desktop;

  7. Inner desktop offset bottom – the bottom indent of the inner container on the desktop;

  8. Inner mobile offset top – the top indent of the inner container on the mobile;

  9. Inner mobile offset bottom – the bottom indent of the inner container on the mobile.

Blocks settings

Store information:

store-location-block-settings

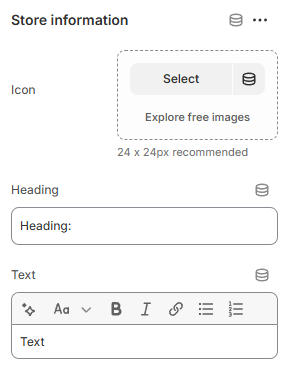
  1. Icon – the setting allows you to specify the icon of the item. 24 x 24px recommended;

  2. Heading – the setting allows you to set the title of the item;

  3. Text – the setting allows you to set the text of the item.

Store socials:

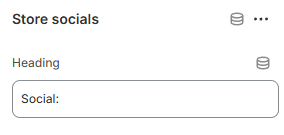
The block displays icons of social media specified in the store.

store-location-block-2-settings

  1. Heading – the setting allows you to set the title of the item.

Benefits

Sections & Snippets

Benefits

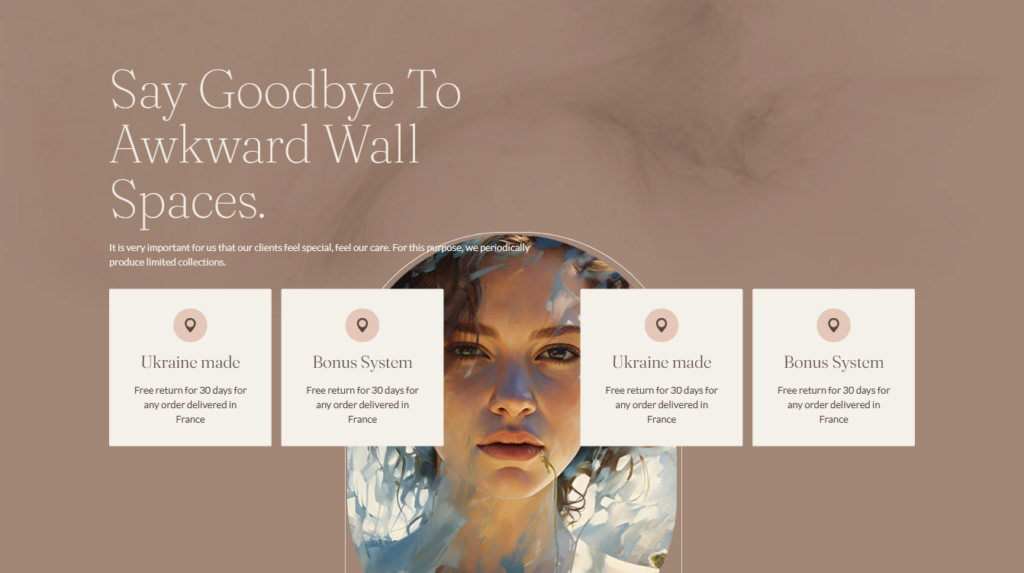
benefits

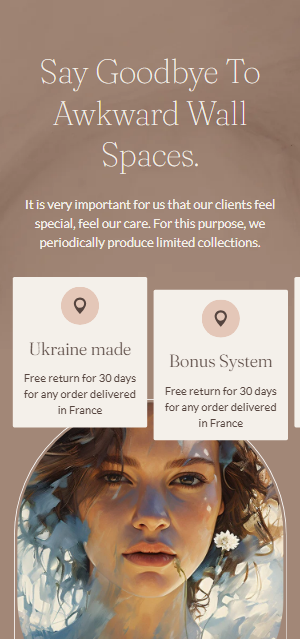
benefits-mobile

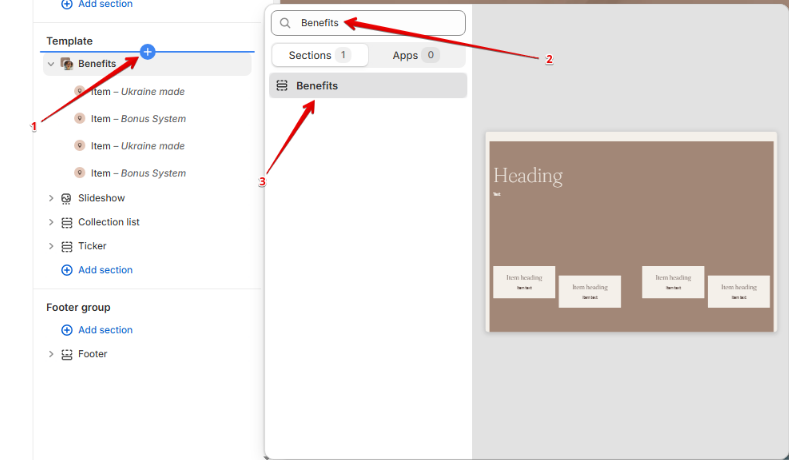
Adding a section

In order to add a section, you need to go to Customizer → Add Section → Benefits.

adding-benefits

Section settings

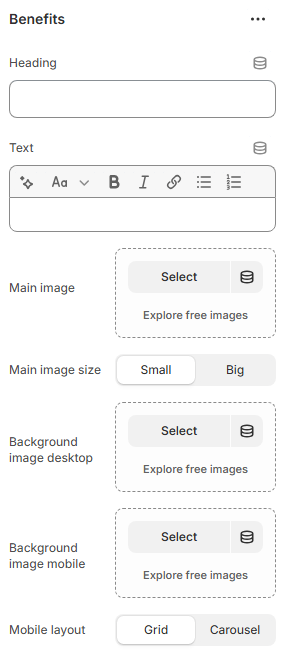
benefits-setting

General

  1. Heading – this setting allows you to set text of the heading;

  2. Text– the setting allows you to set the text of the section;

  3. Main image – the setting allows you to select the main image of the section;

  4. Main image size – the setting allows you to select the main image layout: big or small;

  5. Background image desktop – the setting allows you to select the background image for desktop resolutions;

  6. Background image mobile – the setting allows you to select the background image for mobile resolutions;

  7. Mobile layout – the setting allows you to select the layout of cards position on mobile resolutions: grid or carousel.

benefits-colors

Colors

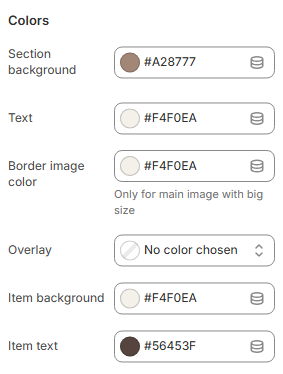
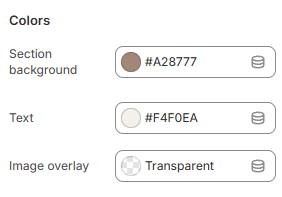
  1. Section background – the setting allows you to select a color for section background;

  2. Text – the setting allows you to select a color for the title and text;

  3. Border image color – the setting allows you to select a color of border for main image, only for main image with big size;

  4. Overlay – the setting allows you to select a color for overlay of section;

  5. Item background – the setting allows you to select a color for block background;

  6. Item text – the setting allows you to select a color for block text.

Layout

layout-benefits

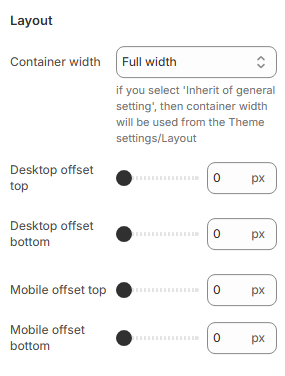
  1. Container width – section container settings;

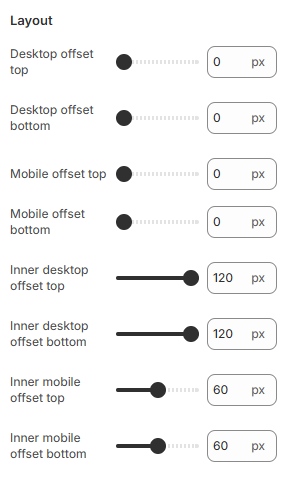
  2. Desktop offset top – the top indent of the section on the desktop;

  3. Desktop offset bottom – the bottom indent of the section on the desktop;

  4. Mobile offset top – the top indent of the section on the mobile;

  5. Mobile offset bottom – the bottom indent of the section on the mobile.

Block settings

The section has a limit on the amount of blocks. The maximum number of blocks is 4.

benefits-block-setting

General

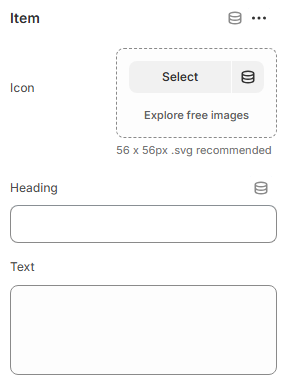
  1. Icon – the setting allows you to select the icon;

  2. Heading – this setting allows you to set text of the heading;

  3. Text – the setting allows you to set the text of the section.

Stores locator

Sections & Snippets

Stores locator

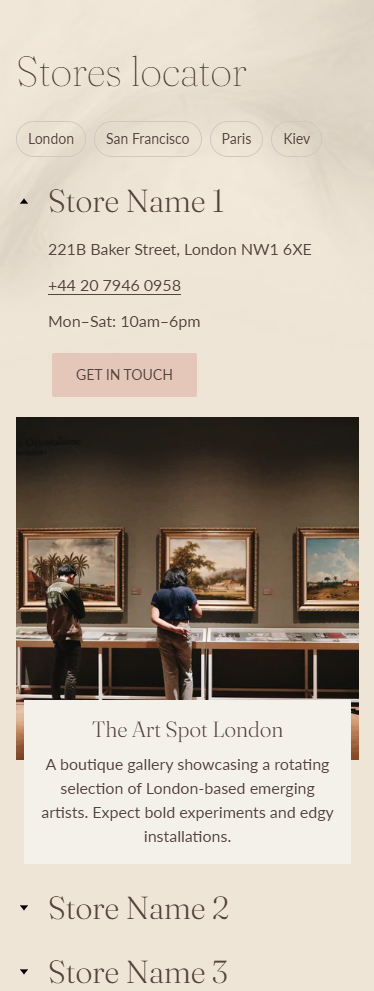
stores-locator-desktop

stores-locator-mobile

Adding a section

In order to add a section, you need to go to Customizer → Add Section → Stores locator.

Section settings

General

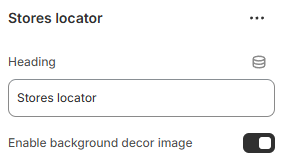
stores-locator-settings

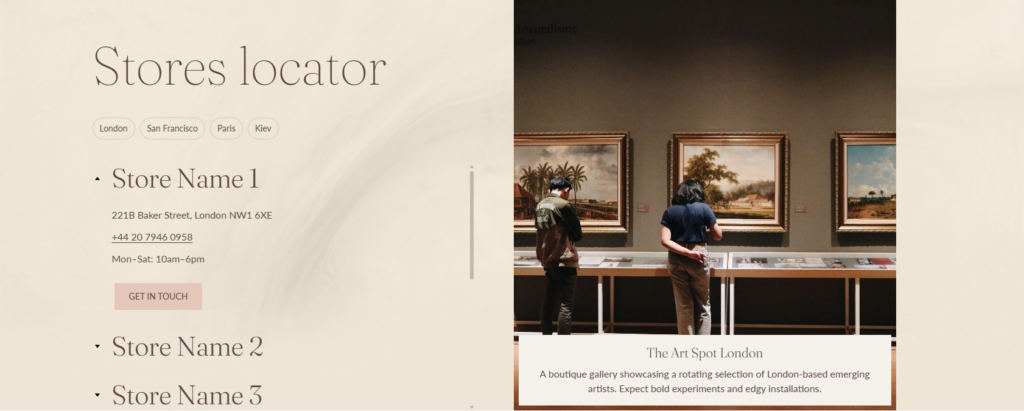
  1. Heading – the setting allows you to specify the heading of the section;

  2. Enable background decor image – the setting allows you to set the background decoration image. The background color of the section will be changed to background secondary.

Layout Settings

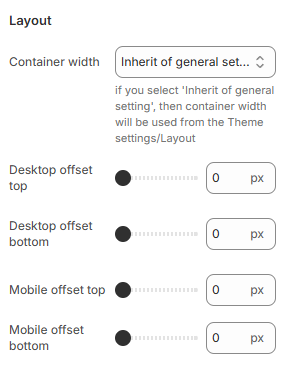
stores-locator-layout-settings

  1. Container width – a container width of the section. If “Inherit” value is selected then the container width is based on the group ‘Layout’ settings in the Theme settings;

  2. Desktop offset top – the top indent of the section on the desktop;

  3. Desktop offset bottom – the bottom indent of the section on the desktop;

  4. Mobile offset top – the top indent of the section on the mobile;

  5. Mobile offset bottom – the bottom indent of the section on the mobile.

Blocks settings

stores-locator-block-settings

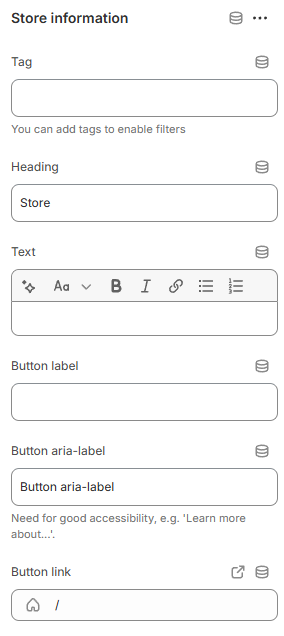
Store information:

stores-locator-block-settings-2

  1. Tag – the setting allows you to specify the tag of the block. You can add tags to enable filters.

  2. Heading – the setting allows you to specify the heading of the block;

  3. Text – the setting allows you to specify the text of the block;

  4. Button label– the setting allows you to specify the button label of the block;

  5. Button aria-label– the setting allows you to specify the button aria label of the block. Need for good accessibility, e.g. ‘Learn more about…’;

  6. Button link– the setting allows you to specify the button link of the block;

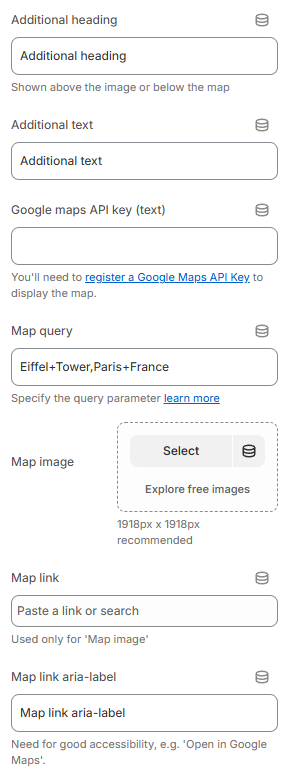
  7. Additional heading – the setting allows you to specify the additional heading of the block. Shown above the image or below the map.

  8. Additional text – the setting allows you to specify the additional text of the block. Shown above the image or below the map.

  9. Google maps API key – the setting allows you to add a Google Maps API key. Learn more about how to create an API key;

  10. Map query – the setting allows you to add a query parameter that is responsible for adding a point on the map. In our case, only the place mode has been added. You can add one point to the map in many ways. Learn more about how to add a query parameter.

  11. Map image – the setting allows you to specify the image that will be played instead of the map if the map is not added;

  12. Map link – the setting allows you to specify a link for the image of the map;

  13. Map link aria-label– the setting allows you to specify a link for the image of the map;

Specifications

Sections & Snippets

Specifications

specifications-desktop

specifications-mobile

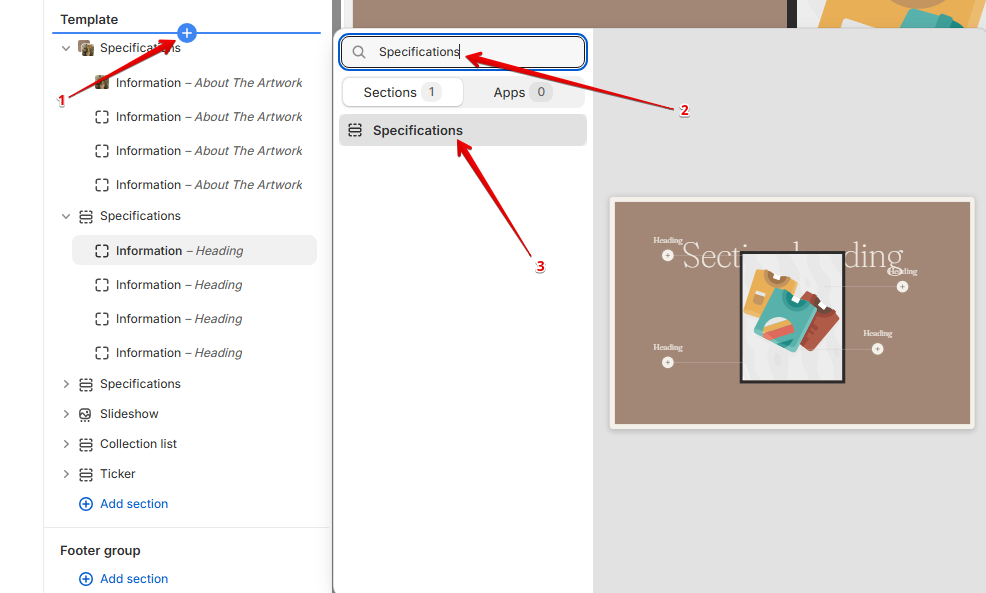
Adding a section

In order to add a section, you need to go to Customizer → Add Section → Specifications.

specifications-add

Section settings

specification-section-settings

General

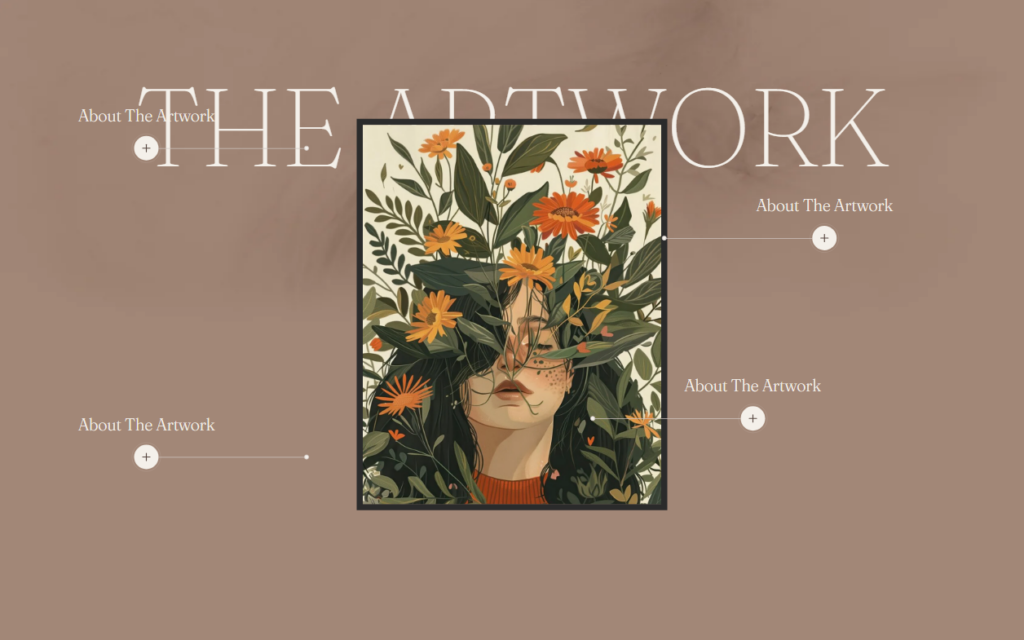
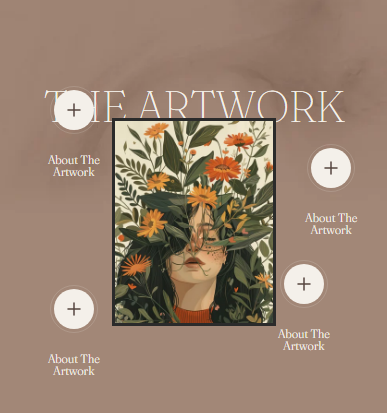
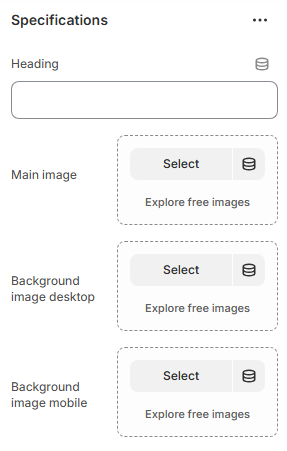
  1. Heading – this setting allows you to set text of the heading;

  2. Main image – the setting allows you to select the main image of the section;

  3. Background image desktop – the setting allows you to select the background image for desktop resolutions;

  4. Background image mobile – the setting allows you to select the background image for mobile resolutions.

specification-section-color

Colors

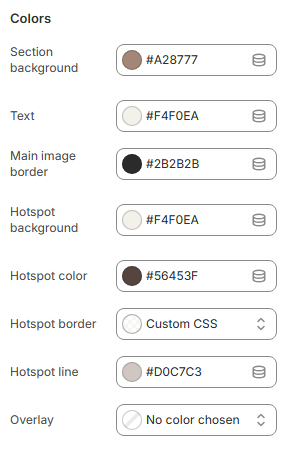
  1. Section background – the setting allows you to select a color for section background;

  2. Text – the setting allows you to select a color for the title and text;

  3. Main image border – the setting allows you to select a color of border for main image;

  4. Hotspot background – the setting allows you to select a color of border for main image;

  5. Hotspot color – the setting allows you to select a color of hotspot text or icon;

  6. Hotspot border – the setting allows you to select a color of hotspot border;

  7. Hotspot line – the setting allows you to select a color of hotspot line;

  8. Overlay – the setting allows you to select a color for overlay of section.

Layout

specification-section-layout

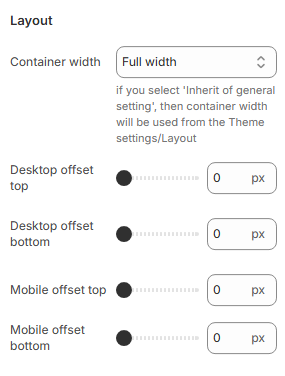
  1. Container width – section container settings;

  2. Desktop offset top – the top indent of the section on the desktop;

  3. Desktop offset bottom – the bottom indent of the section on the desktop;

  4. Mobile offset top – the top indent of the section on the mobile;

  5. Mobile offset bottom – the bottom indent of the section on the mobile.

Block settings

The section has a limit on the amount of blocks. The maximum number of blocks is 10.

specification-section-blockinfo

General

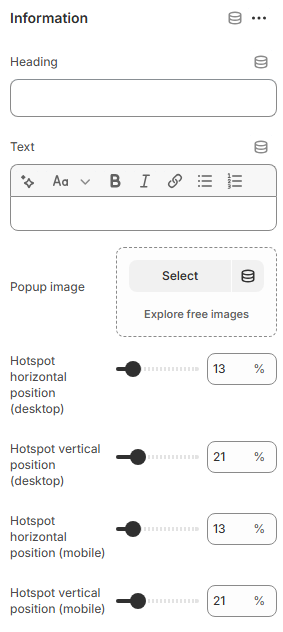
  1. Heading – this setting allows you to set text of the block heading;

  2. Text – the setting allows you to set the text of the block which will be shown in popup;

  3. Popup image – the setting allows you to select the image of the block which will be shown in popup;

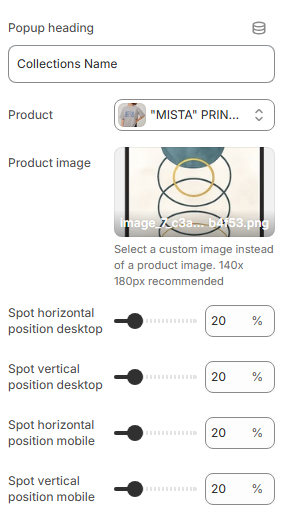
  4. Hotspot horizontal position (desktop) – the setting allows you to set the hotspot horizontal position on desktop resolutions;

  5. Hotspot vertical position (desktop) – the setting allows you to set the hotspot vertical position on desktop resolutions;

  6. Hotspot horizontal position (mobile) – the setting allows you to set the hotspot horizontal position on mobile resolutions;

  7. Hotspot vertical position (mobile) – the setting allows you to set the hotspot vertical position on mobile resolutions.

Collections Grid

Sections & Snippets

Collections Grid

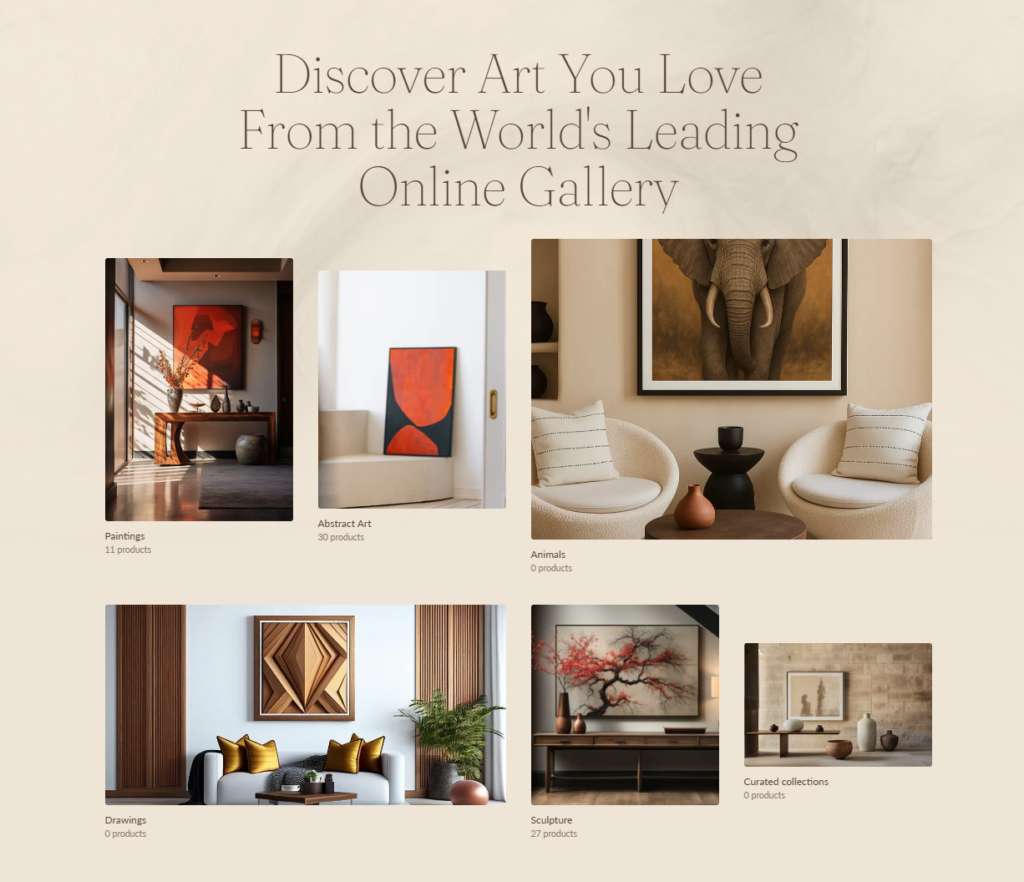
collections-grid-desktop

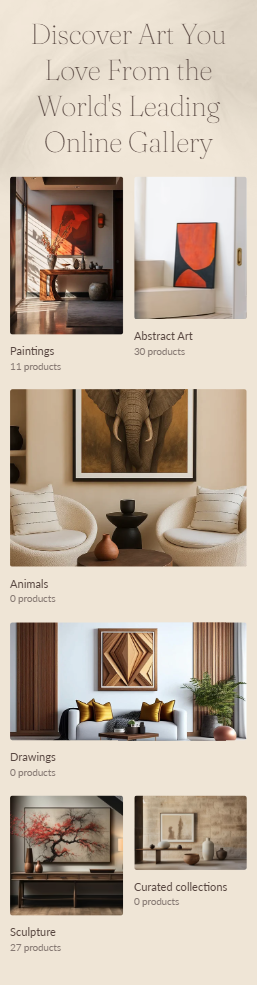
collections-grid-mobile

Adding a section

In order to add a section, you need to go to Customizer → Add Section → Collections Grid.

Section settings

General

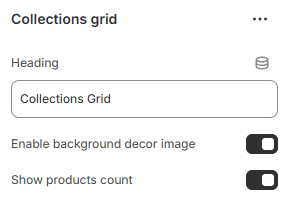
collections-grid-settings

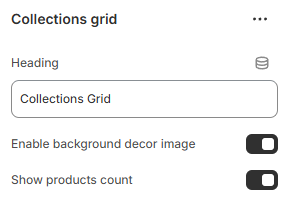
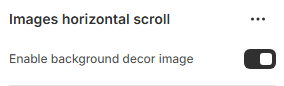
  1. Heading – the setting allows you to set the heading of the section;

  2. Enable background decor image – the setting allows you to set the background decoration image. The background color of the section will be changed to background secondary.

  3. Show products count – the setting allows you to show the product count of the collection near the title.

Layout

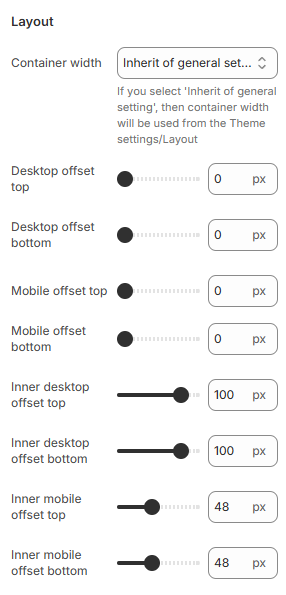
collections-grid-layout-settings

  1. Container width – a container width of the section. If “Inherit” value is selected then the container width is based on the group ‘Layout’ settings in the Theme settings;

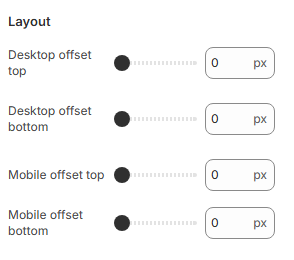
  2. Desktop offset top – the top indent of the section on the desktop;

  3. Desktop offset bottom – the bottom indent of the section on the desktop;

  4. Mobile offset top – the top indent of the section on the mobile;

  5. Mobile offset bottom – the bottom indent of the section on the mobile;

  6. Inner desktop offset top – the top indent of the inner container on the desktop;

  7. Inner desktop offset bottom – the bottom indent of the inner container on the desktop;

  8. Inner mobile offset top – the top indent of the inner container on the mobile;

  9. Inner mobile offset bottom – the bottom indent of the inner container on the mobile.

Blocks settings

Collection

collections-grid-settings

  1. Collection – the setting allows you to set the collection;

  2. Image – the setting allows you to set the image of the block instead of collection image. If the setting is empty and the collection image is empty then an image from the first product of the collection will be shown.
    Recommended sizes:

    1. 860 x 1204px recommended for the first block image;

    2. 860 x 1090px recommended for the second block image;

    3. 1800 x 1350px recommended for the third block image;

    4. 1800 x 900px recommended for the fourth block image;

    5. 860 x 918px recommended for the fifth block image;

    6. 860 x 566px recommended for the sixth block image;

Banner

Sections & Snippets

Banner

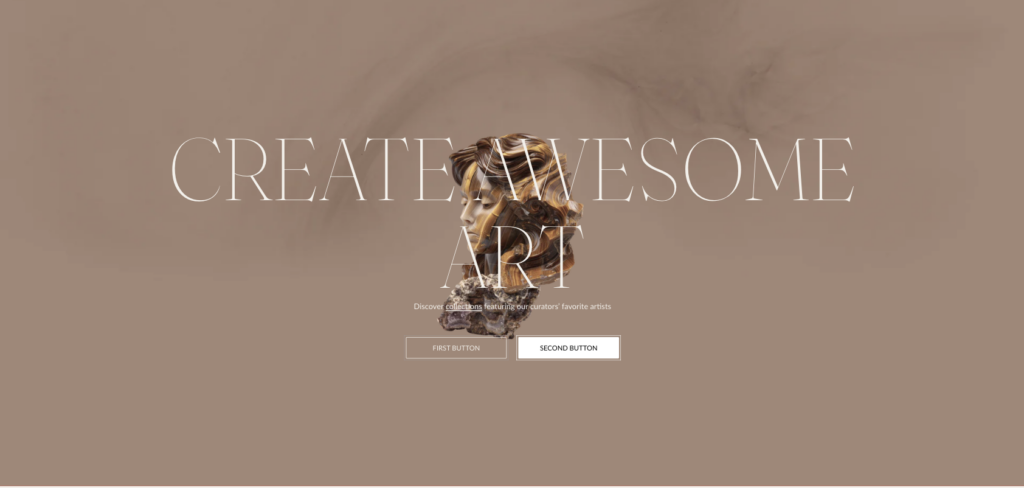
banner-desktop

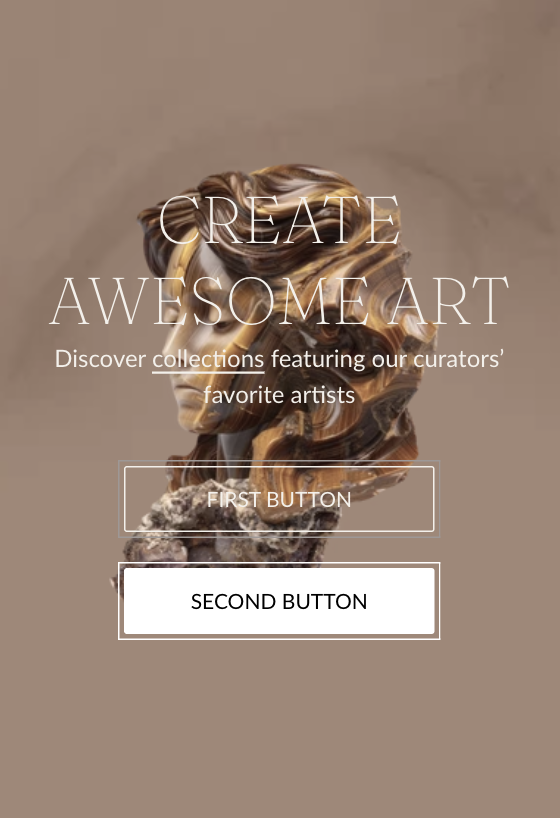
banner-mobile

Adding a section

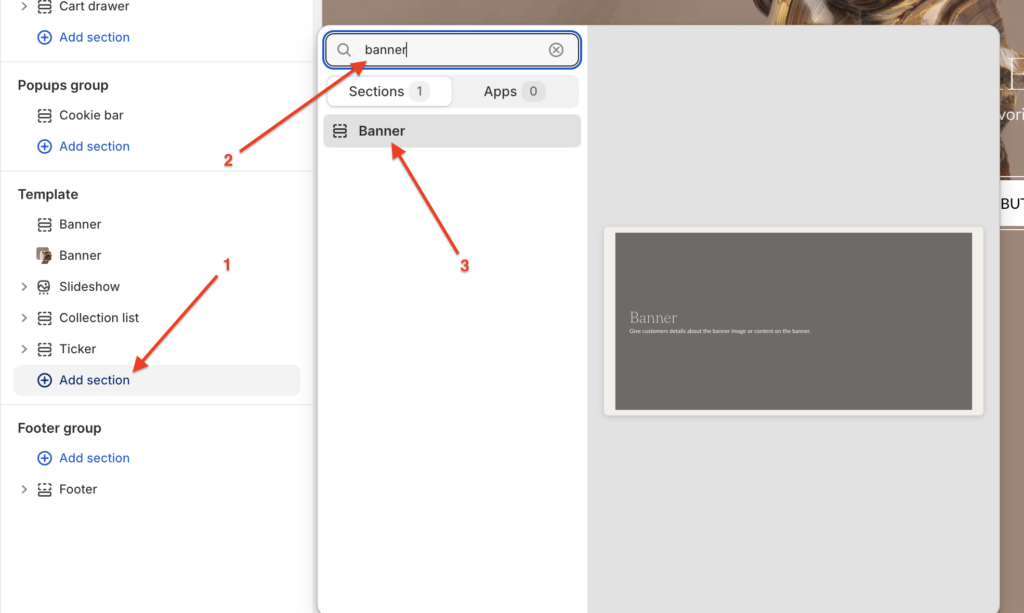
In order to add a section, you need to go to Customizer → Add Section → Banner.

banner-add

Section settings

General

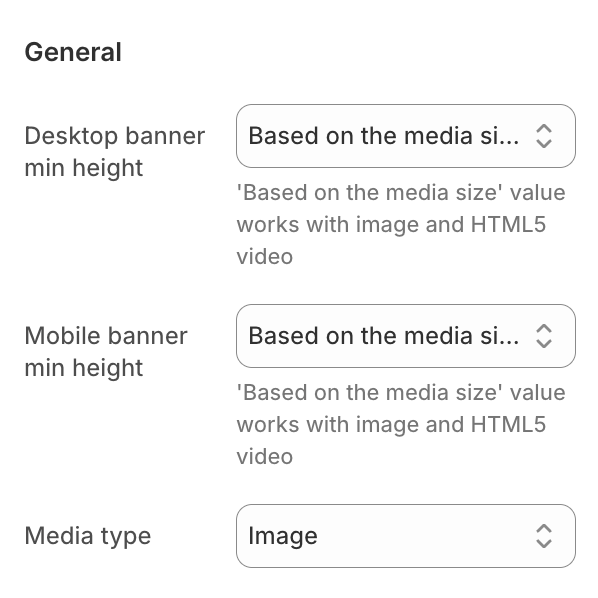
banner-general

  1. Desktop banner min height – the minimum height of the banner on desktop screens;

  2. Mobile banner min height – the minimum height of the banner on mobile screens;

  3. Media type – defines the type of media used in the banner (Image/HTML5 video/Youtube/Vimeo);

Media content

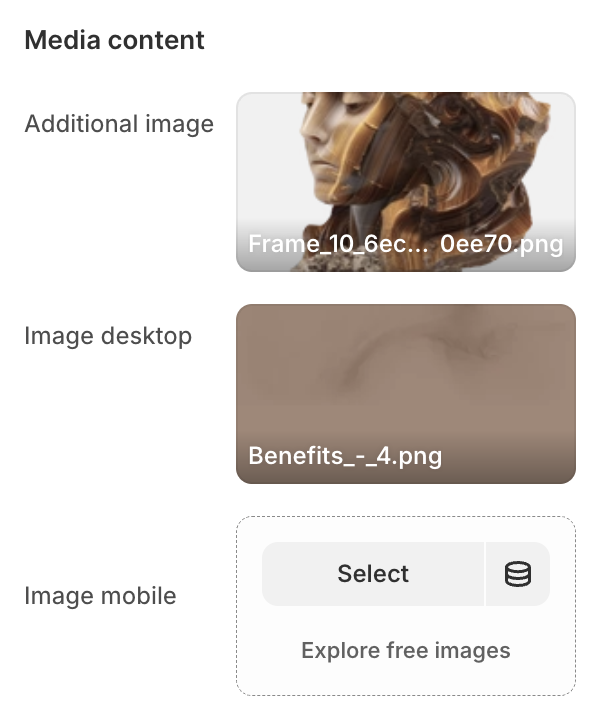
banner-media

  1. Additional image – an optional additional image that can be displayed in the banner;

  2. Image desktop/HTML5 desktop video/Youtube/Vimeo desktop video url – the media source for desktop, based on the selected media type (image, HTML5 video, YouTube/Vimeo);

  3. Image mobile/HTML5 mobile video/Youtube/Vimeo mobile video url – the media source for mobile, based on the selected media type (image, HTML5 video, YouTube/Vimeo).

Text content

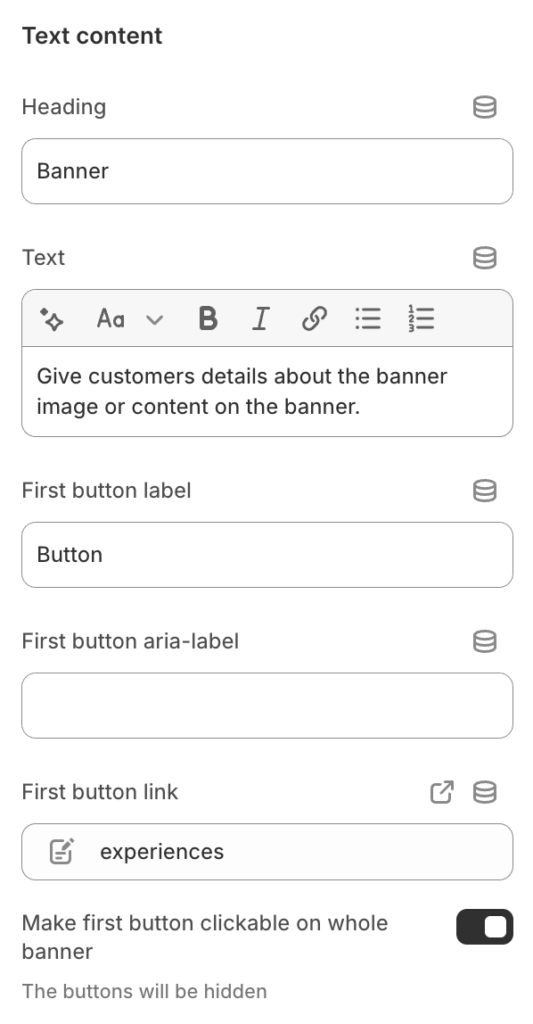
banner-text-content

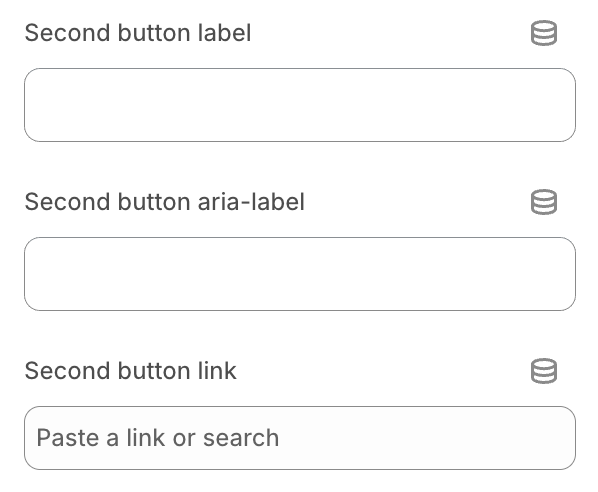
banner-text-content2

  1. Heading – the main heading text displayed on the banner;

  2. Text – the description shown under the heading;

  3. First button label – the text displayed on the primary button;

  4. First button aria-label – accessibility label for the first button, used by screen readers;

  5. First button link – the URL the first button will navigate to when clicked;

  6. Make first button clickable on whole banner – allows the entire banner area to act as a clickable link using the first button’s link;

  7. Second button label – the text displayed on the secondary button;

  8. Second button aria-label – accessibility label for the second button, used by screen readers;

  9. Second button link – the URL the second button will navigate to when clicked.

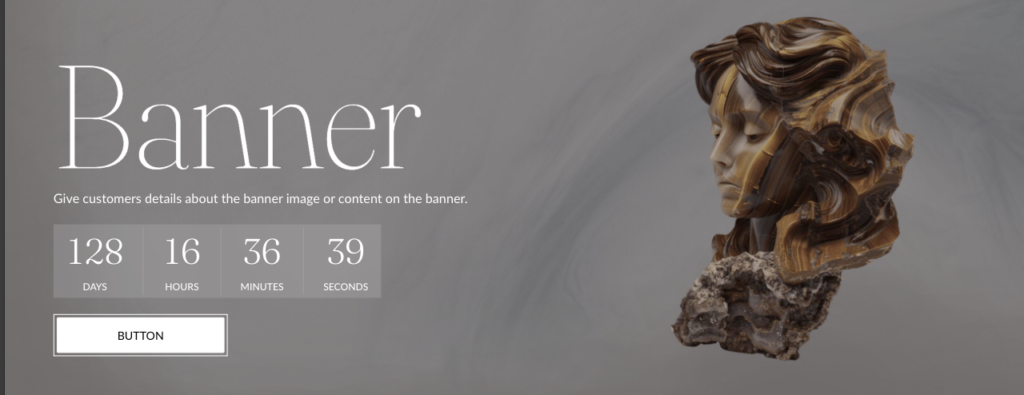
Countdown timer

banner-text-timer

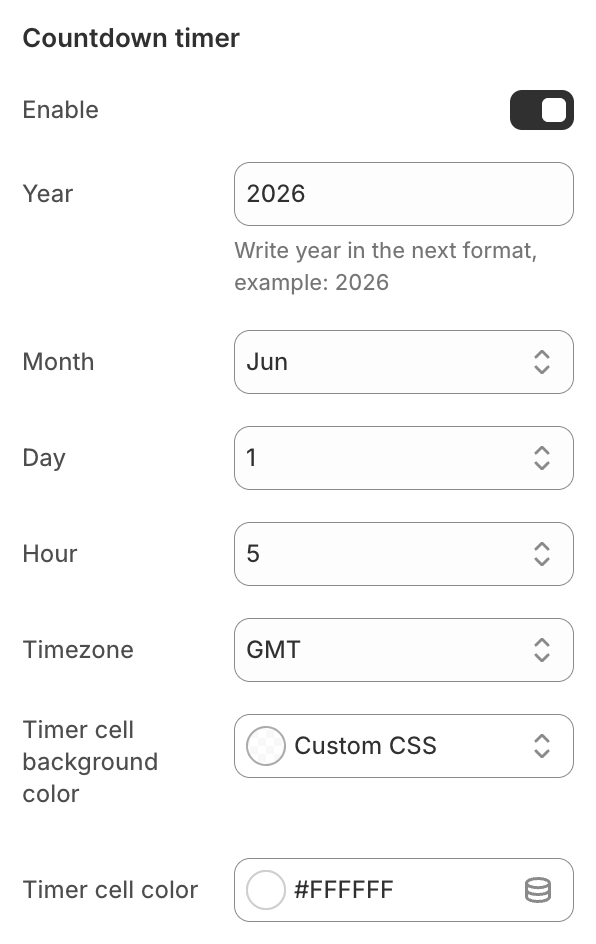
  1. Enable – the setting allows you to show or hide the countdown timer;

  2. Year – years of the end of the countdown timer;

  3. Month – month of the end of the countdown timer;

  4. Day – day of the end of the countdown timer;

  5. Hour – hour of the end of the countdown timer;

  6. Timezone – Timezone;

  7. Timer cell background color – setting the background color for the time cell;

  8. Timer cell color – setting the text color for the cells of the countdown.

banner-text-timer2

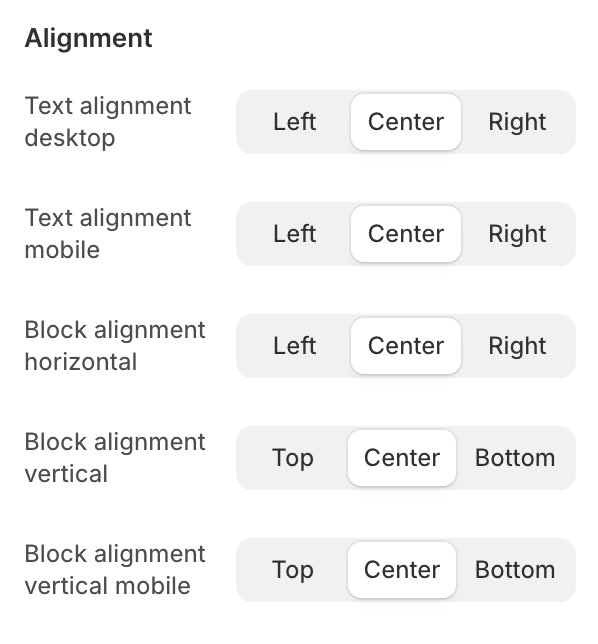
Alignment

banner-alignment

  1. Text alignment desktop – sets the horizontal alignment of the text on desktop screens;

  2. Text alignment mobile – sets the horizontal alignment of the text on mobile screens;

  3. Block alignment horizontal – sets the horizontal alignment of the entire content block within the banner;

  4. Block alignment vertical – sets the vertical alignment of the content block within the banner on desktop;

  5. Block alignment vertical mobile – sets the vertical alignment of the content block within the banner on mobile.

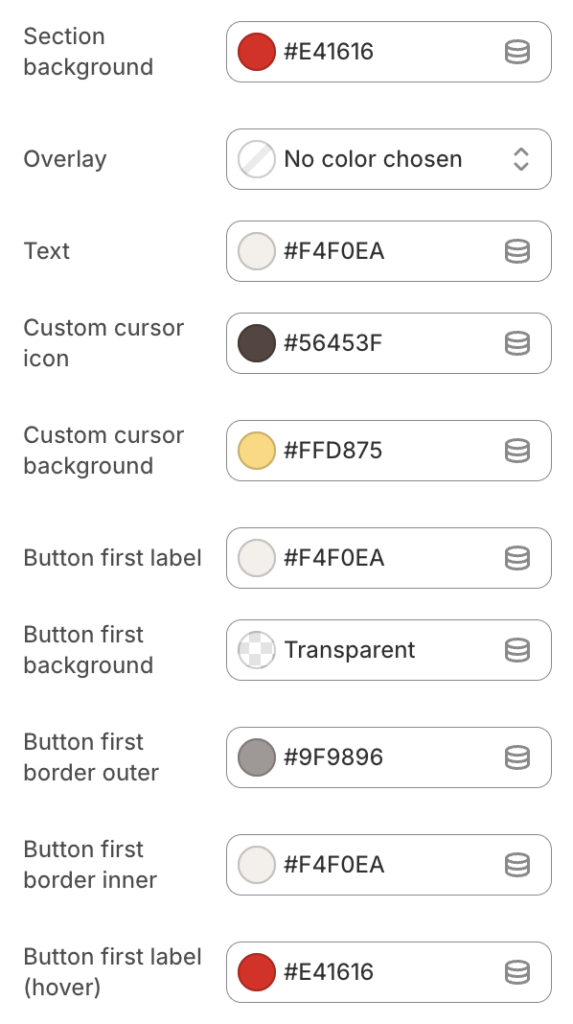
Colors

banner-colors

banner-colors2

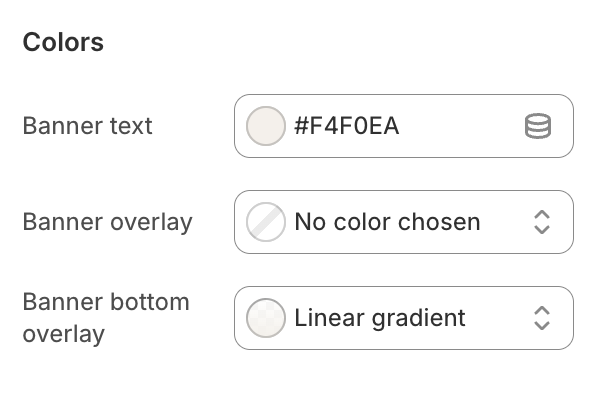
  1. Section background – sets the background color of the entire banner section;

  2. Overlay – sets the color of the overlay applied above the media, usually with opacity;

  3. Text – sets the color of the heading and text content within the banner;

  4. Custom cursor icon – sets the icon used for the custom cursor;

  5. Custom cursor background – sets the background color of the custom cursor;

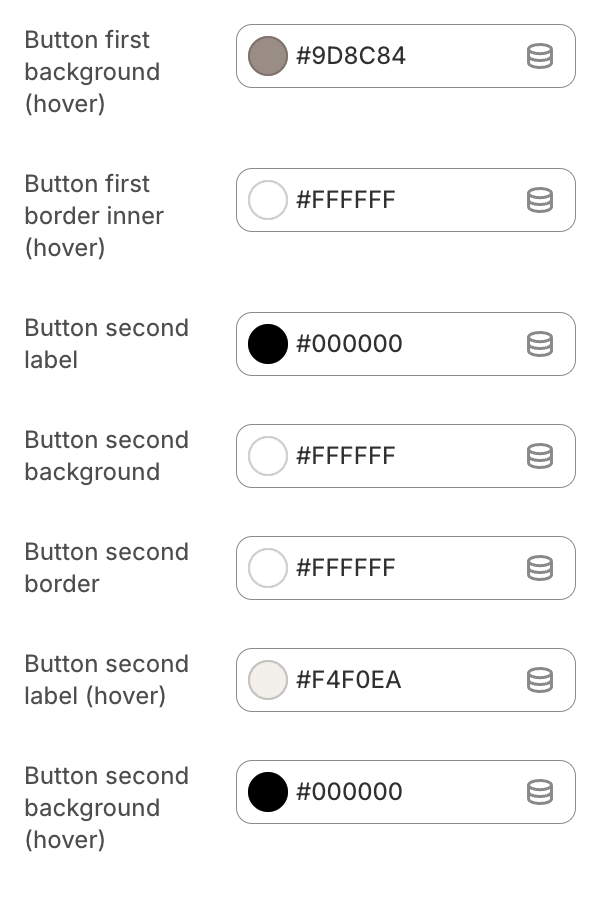
  6. Button first label – sets the text color of the first button;

  7. Button first background – sets the background color of the first button;

  8. Button first border outer – sets the outer border color of the first button;

  9. Button first border inner – sets the inner border color of the first button;

  10. Button first label (hover) – sets the text color of the first button on hover;

  11. Button first background (hover) – sets the background color of the first button on hover;

  12. Button first border inner (hover) – sets the inner border color of the first button on hover;

  13. Button second label – sets the text color of the second button;

  14. Button second background – sets the background color of the second button;

  15. Button second border – sets the border color of the second button;

  16. Button second label (hover) – sets the text color of the second button on hover;

  17. Button second background (hover) – sets the background color of the second button on hover.

Layout Settings

banner-layout

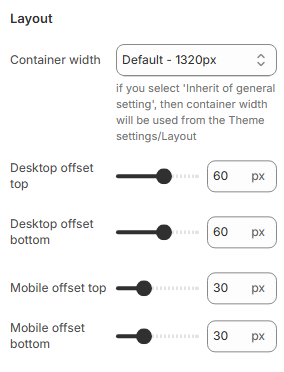
  1. Container width – section container settings.

  2. Desktop offset top – the top indent of the section on the desktop;

  3. Desktop offset bottom – the bottom indent of the section on the desktop;

  4. Mobile offset top – the top indent of the section on the mobile;

  5. Mobile offset bottom – the bottom indent of the section on the mobile.

Scroll images with text

Sections & Snippets

Scroll images with text

scroll-images-desktop

scroll-images-mobile

Adding a section

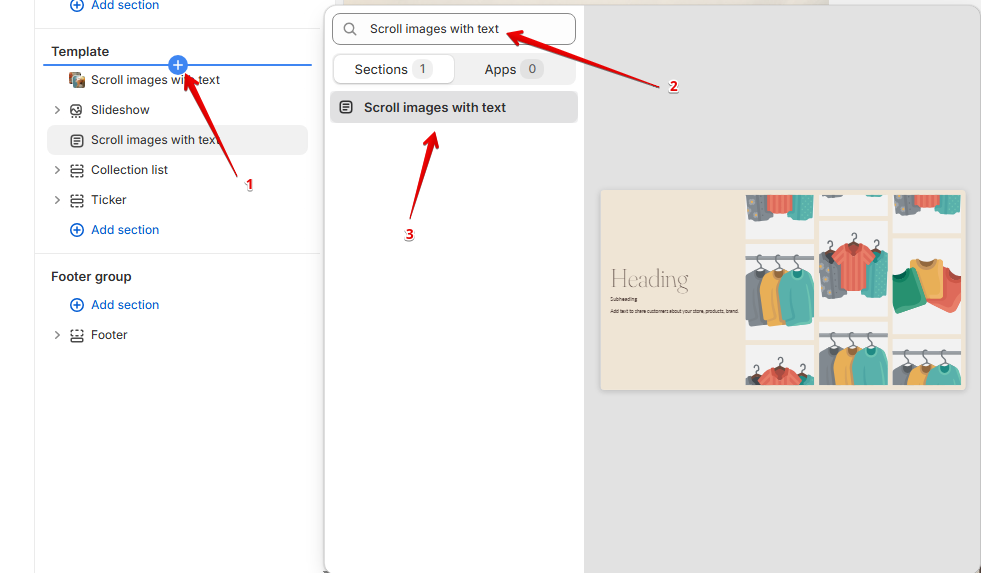
In order to add a section, you need to go to Customizer → Add Section → Scroll images with text.

scroll-images-add

Section settings

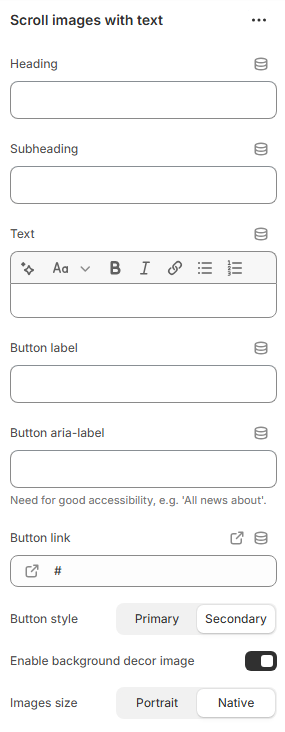
scroll-images-section-settings

General

  1. Heading – this setting allows you to set text of the heading;

  2. Subheading – this setting allows you to set text of the subheading;

  3. Text – this setting allows you to set text of the section;

  4. Button label – the setting allows you to set the label for the button;

  5. Button aria-label – the setting allows you to set the aria-label for the button. This attribute allows screen readers to better convey information to people with disabilities;

  6. Button link – the setting allows you to select a button link;

  7. Button style – the setting allows you to set the type of the button;

  8. Enable background decor image – the setting allows you to set the background decoration image;

  9. Images size – the setting allows you to set the size of the images.

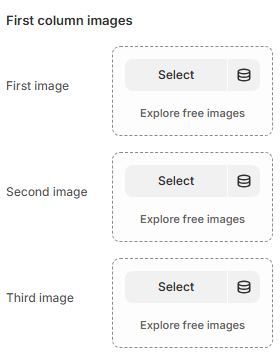
scroll-images-first-column

First column images

  1. First image – the setting allows you to select the image for first image in first column;

  2. Second image – the setting allows you to select the image for second image in first column;

  3. Third image – the setting allows you to select the image for third image in first column.

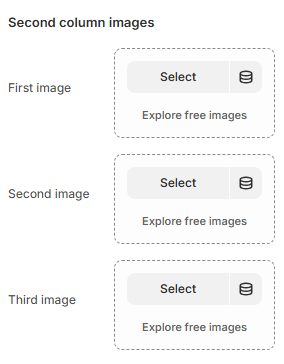
scroll-images-second-column

Second column images

  1. First image – the setting allows you to select the image for first image in second column;

  2. Second image – the setting allows you to select the image for second image in second column;

  3. Third image – the setting allows you to select the image for third image in second column.

scroll-images-third-column

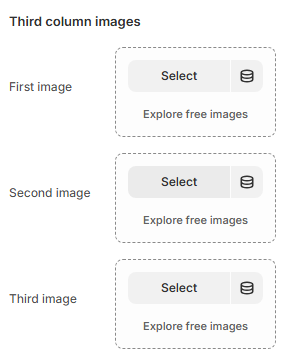
Third column images

  1. First image – the setting allows you to select the image for first image in third column;

  2. Second image – the setting allows you to select the image for second image in third column;

  3. Third image – the setting allows you to select the image for third image in third column.

Layout

scroll-images-layout

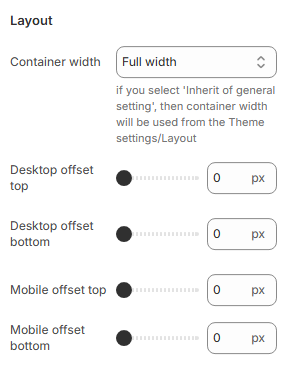
  1. Container width – section container settings;

  2. Desktop offset top – the top indent of the section on the desktop;

  3. Desktop offset bottom – the bottom indent of the section on the desktop;

  4. Mobile offset top – the top indent of the section on the mobile;

  5. Mobile offset bottom – the bottom indent of the section on the mobile.

Video

Sections & Snippets

Video

video-desktop

Adding a section

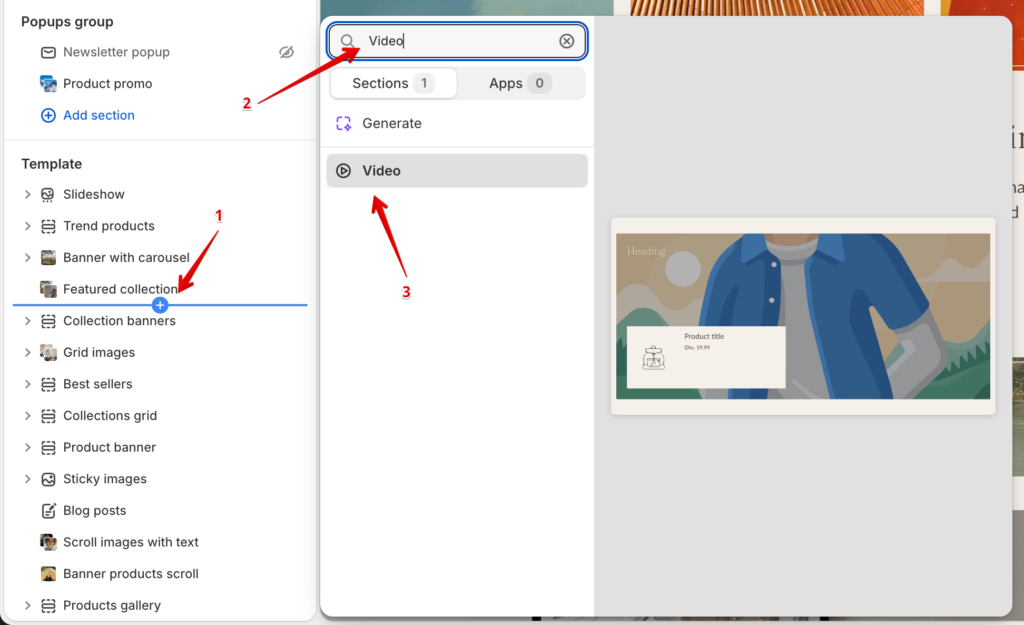
In order to add a section, you need to go to Customizer → Add Section → Video.

video-add

Section settings:

General:

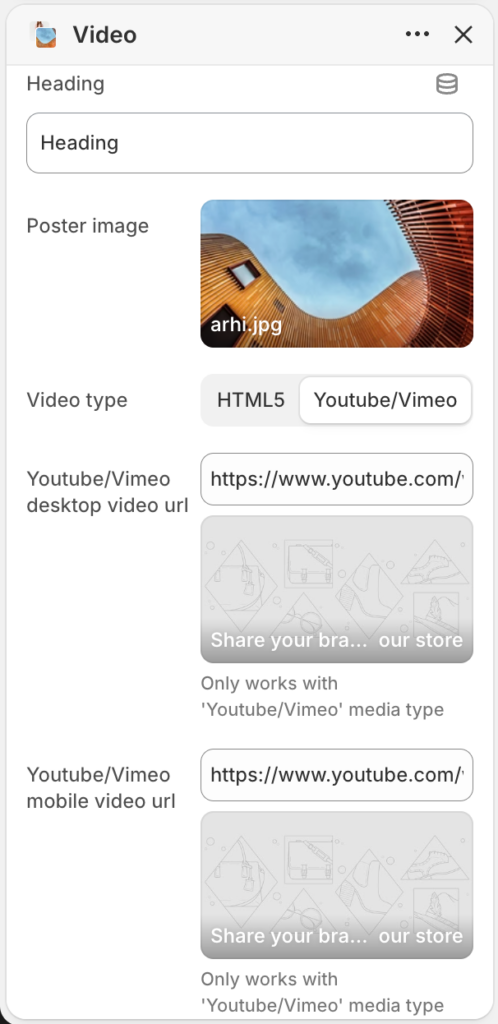
video-setting

video-setting2

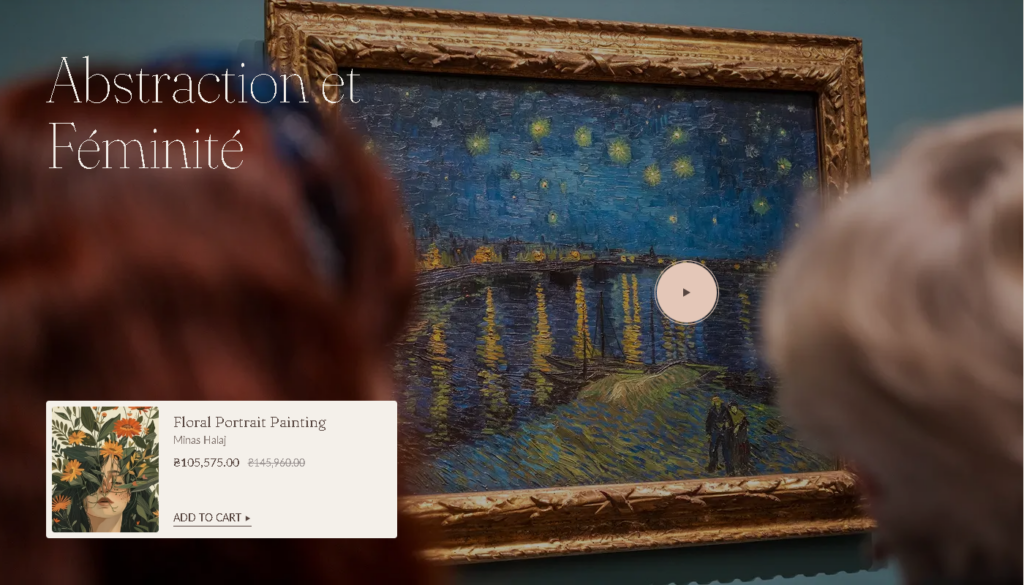
  1. Heading – the setting allows you to set the heading;

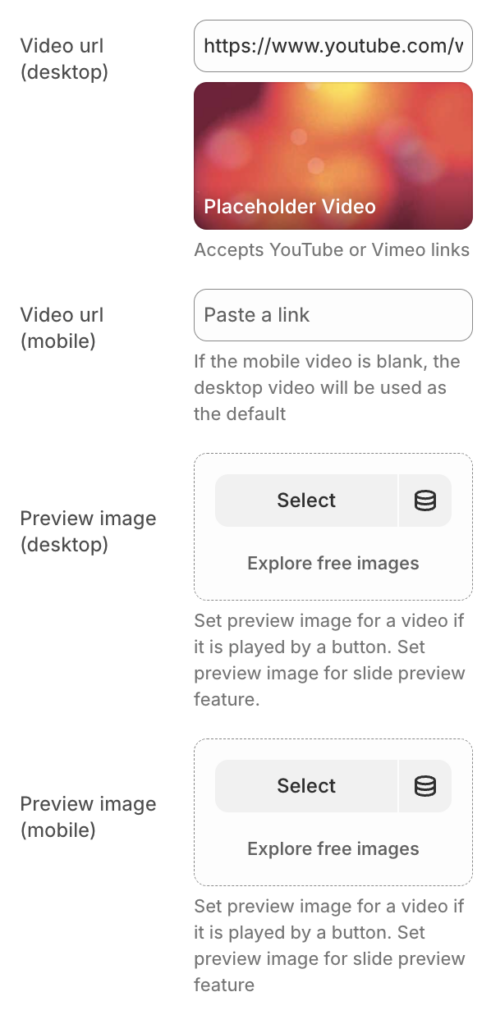
  2. Poster image – the setting allows you to set the poster image;

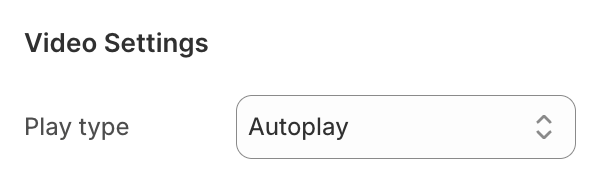
  3. Video type – the setting allows you to choose potential video type(HTML5, Youtube/Vimeo);

  4. Youtube/Vimeo desktop video url – the setting allows you to set the Youtube/Vimeo desktop video;

  5. Youtube/Vimeo mobile video url – the setting allows you to set the Youtube/Vimeo mobile video;

  6. HTML5 desktop video – the setting allows you to set the HTML5 desktop video;

  7. HTML5 mobile video – the setting allows you to set the HTML5 mobile video;

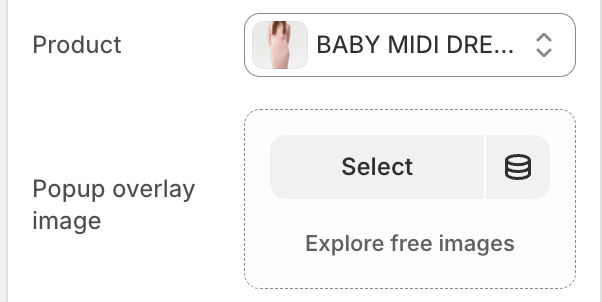
  8. Product – the setting allows you to set the product.

  9. Popup overlay image – the setting allows you to set the popup overlay image.

Colors:

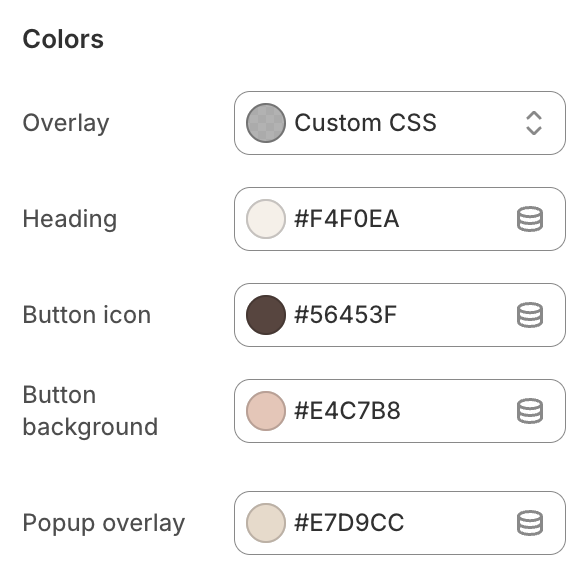
video-color

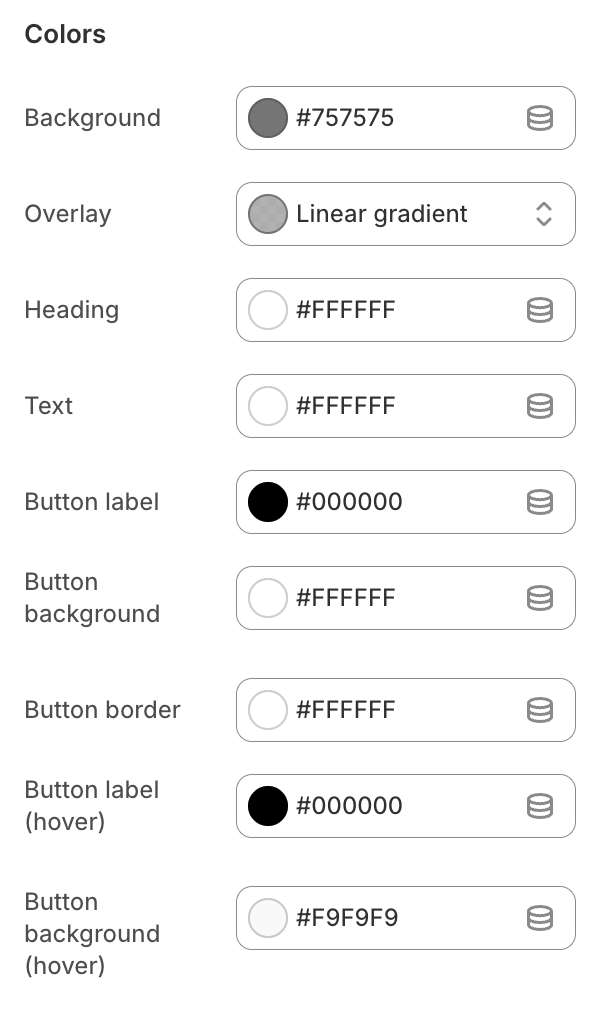
  1. Overlay – the setting allows you to set the overlay color;

  2. Heading – the setting allows you to set the heading color;

  3. Button icon – the setting allows you to set the button icon color;

  4. Button background – the setting allows you to set the button background color.

  5. Popup overlay – the setting allows you to set the overlay

Layout:

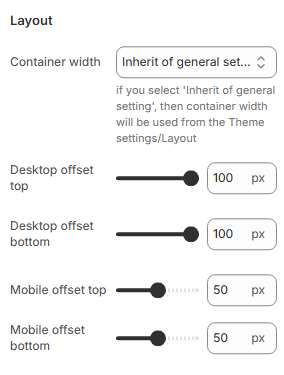
video-section-layout

  1. Container width – section container settings;

  2. Desktop offset top – the top indent of the section on the desktop;

  3. Desktop offset bottom – the bottom indent of the section on the desktop;

  4. Mobile offset top – the top indent of the section on the mobile;

  5. Mobile offset bottom – the bottom indent of the section on the mobile.

Contact form

Sections & Snippets

Contact form

contact-form-desktop

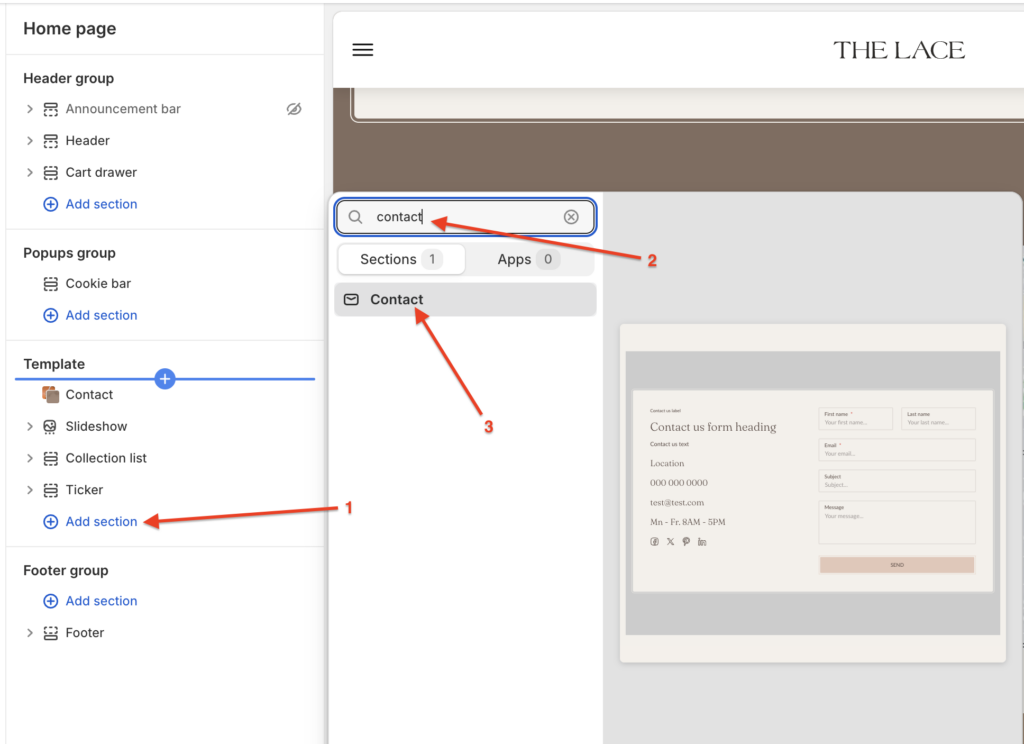
Adding a section

In order to add a section, you need to go to Customizer → Add Section → Contact.

contact-form-add

Section settings

General

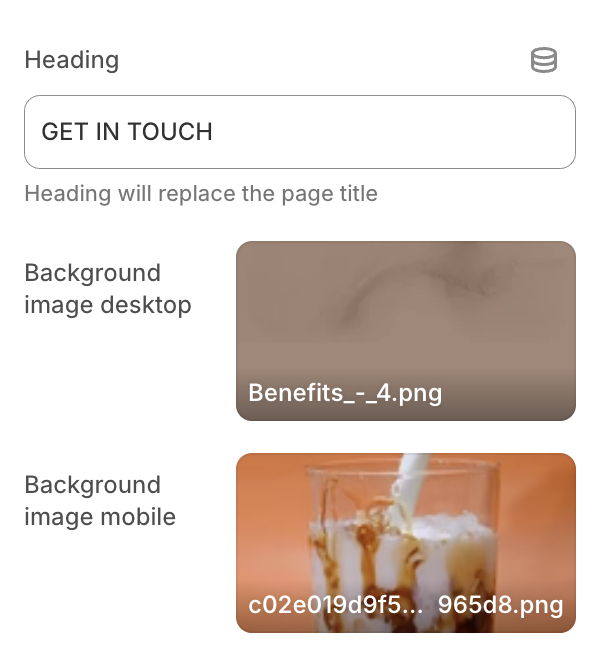
contact-form-setting

  1. Heading – this setting allows you to set text of the heading;

  2. Background image desktop – setting allows you to choose a background picture for the section on the desktop;

  3. Background image mobile – setting allows you to choose a background picture for the section on the mobile.

Additional information

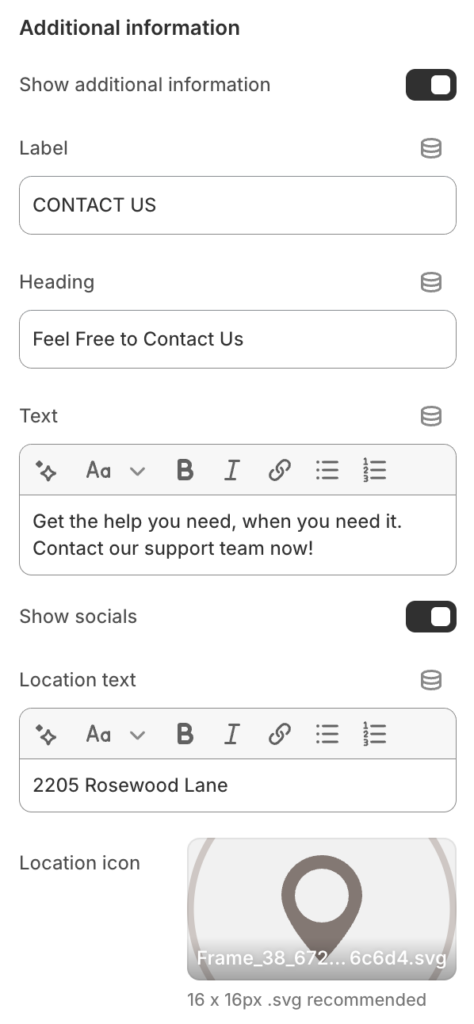
contact-form-additional

contact-form-additional2

contact-form-additional3

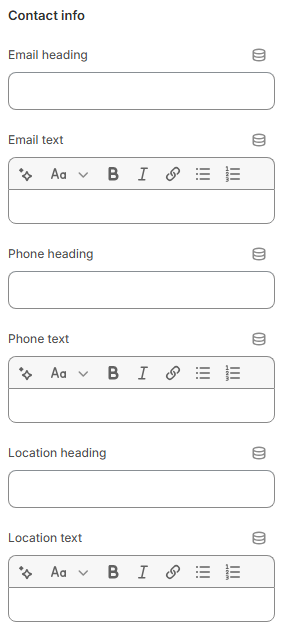
  1. Show additional information – this setting allows you to display additional information in the section;

  2. Label – this setting allows you to set a small label above the heading;

  3. Heading – this setting allows you to set text of the heading;

  4. Text – this setting allows you to set a description or paragraph under the heading;

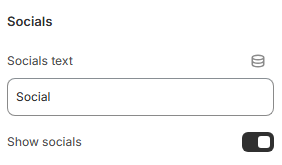
  5. Show socials – this setting allows you to display social media icons;

  6. Location text – this setting allows you to set the address;

  7. Location icon – this setting allows you to choose an icon for the location block;

  8. Phone text – this setting allows you to set the phone number text;

  9. Phone icon – this setting allows you to choose an icon for the phone block;

  10. Email text – this setting allows you to set the email address text;

  11. Email icon – this setting allows you to choose an icon for the email block;

  12. Schedule text – this setting allows you to set the working hours or schedule text;

  13. Schedule icon – this setting allows you to choose an icon for the schedule block.

Contact form

contact-form-form

contact-form-form2

contact-form-form3

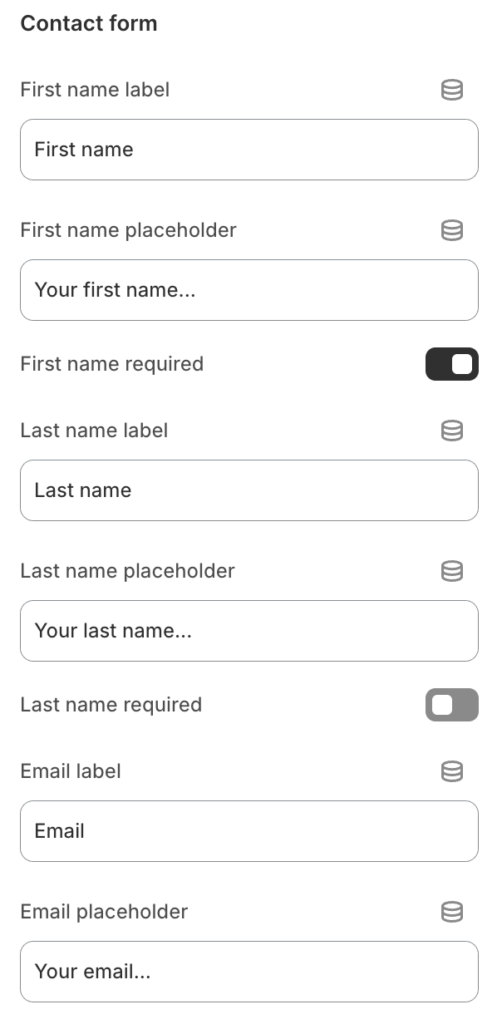
  1. First name label – this setting allows you to set the label text for the first name field;

  2. First name placeholder – this setting allows you to set placeholder text for the first name field;

  3. First name required – this setting allows you to make the first name field required;

  4. Last name label – this setting allows you to set the label text for the last name field;

  5. Last name placeholder – this setting allows you to set placeholder text for the last name field;

  6. Last name required – this setting allows you to make the last name field required;

  7. Email label – this setting allows you to set the label text for the email field;

  8. Email placeholder – this setting allows you to set placeholder text for the email field;

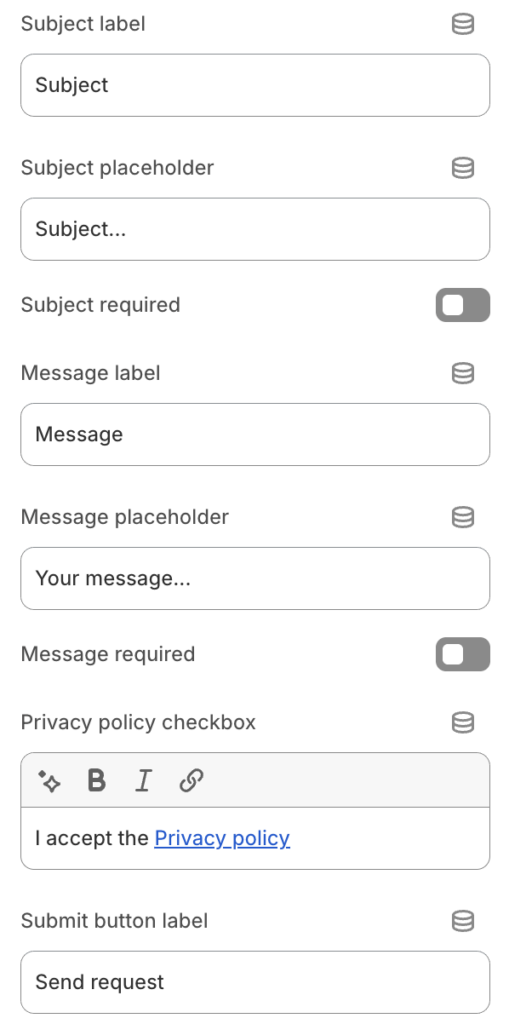
  9. Subject label – this setting allows you to set the label text for the subject field;

  10. Subject placeholder – this setting allows you to set placeholder text for the subject field;

  11. Subject required – this setting allows you to make the subject field required;

  12. Message label – this setting allows you to set the label text for the message field;

  13. Message placeholder – this setting allows you to set placeholder text for the message field;

  14. Message required – this setting allows you to make the message field required;

  15. Privacy policy checkbox – this setting allows you to set the text displayed next to the privacy policy checkbox;

  16. Submit button label – this setting allows you to set the text of the submit button;

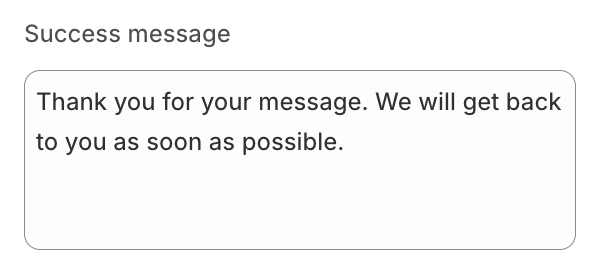
  17. Success message – this setting allows you to set the message displayed after successful form submission.

Map

contact-form-map

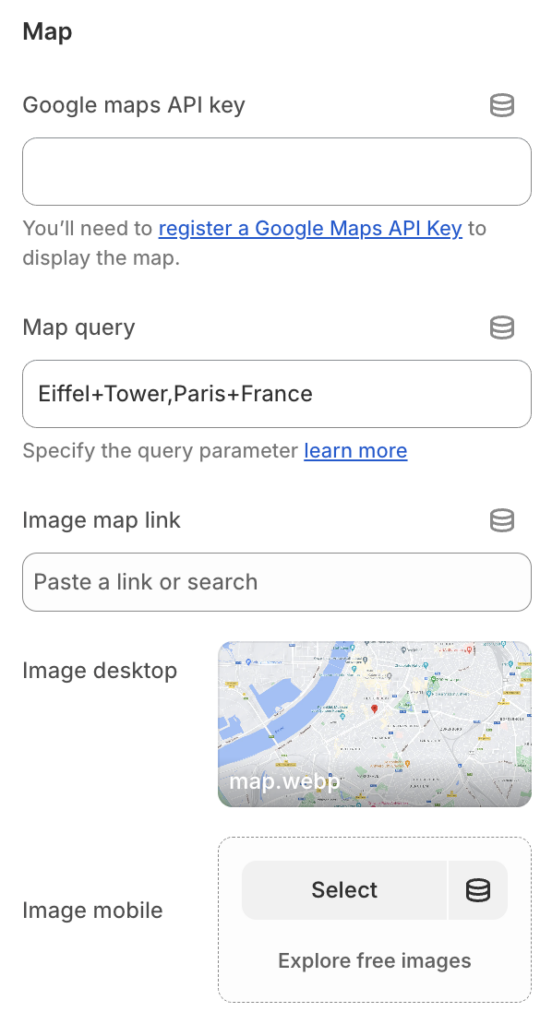
  1. Google maps API key – the setting allows you to add a Google maps API key. Learn more about how to create an API key;

  2. Map query – the setting allows you to add a query parameter that is responsible for adding a point on the map. In our case, only the place mode has been added. You can add one point to the map in many ways. Learn more about how to add a query parameter;

  3. Image map link – the setting allows you to set a link to the map;

  4. Image desktop – the setting allows you to set the map image for the desktop;

  5. Image mobile – the setting allows you to set the image for mobile.

Colors

contact-form-colors

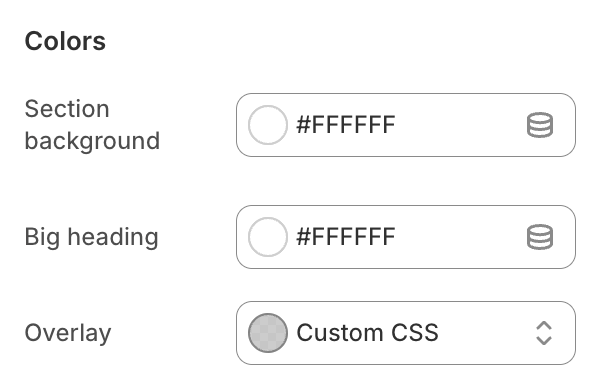
  1. Section background – this setting allows you to set the background color of the section;

  2. Big heading – this setting allows you to set the color of the big heading text;

  3. Overlay – this setting allows you to set the color of the overlay;

Layout Settings

contact-form-layout

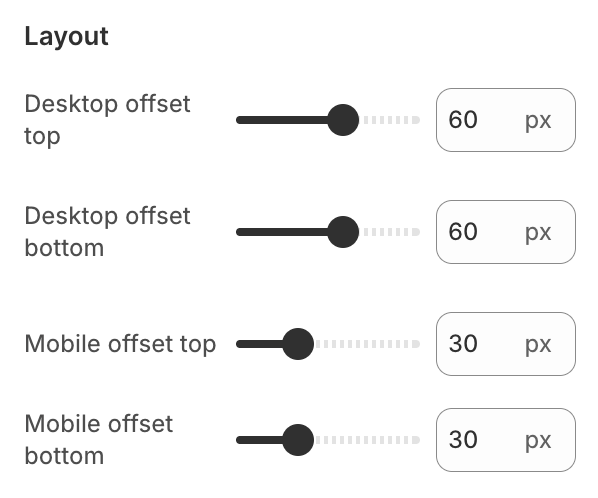
  1. Desktop offset top – the top indent of the section on the desktop;

  2. Desktop offset bottom – the bottom indent of the section on the desktop;

  3. Mobile offset top – the top indent of the section on the mobile;

  4. Mobile offset bottom – the bottom indent of the section on the mobile.

Login template

Sections & Snippets

Login template

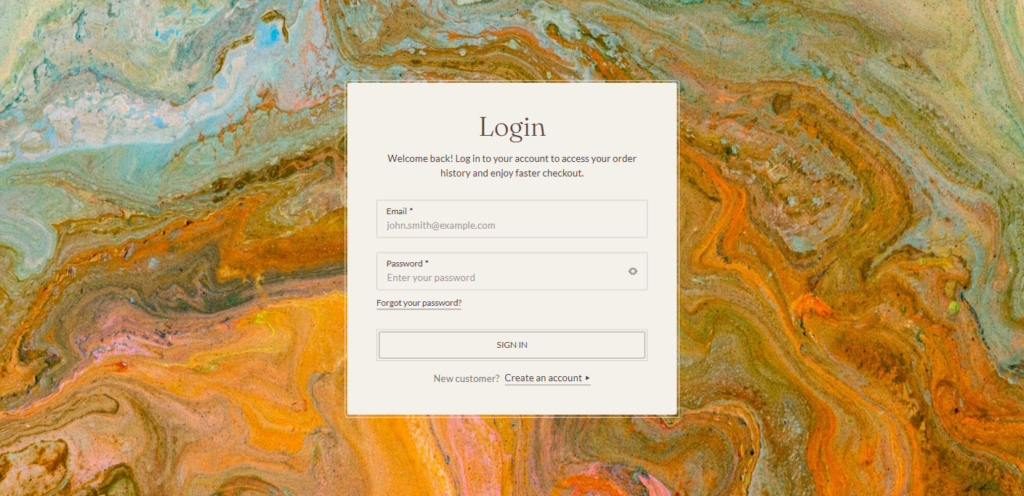
login-template-desktop

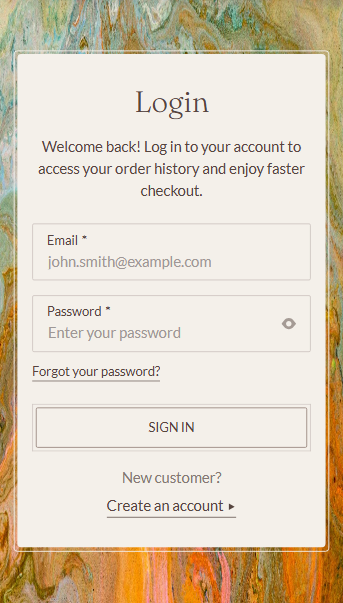
login-template-mobile

Adding a section

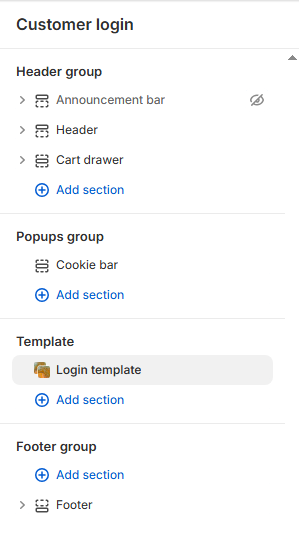
login-template-add

The section is static on a Login page template, it was added initially and cannot be removed.

Section settings

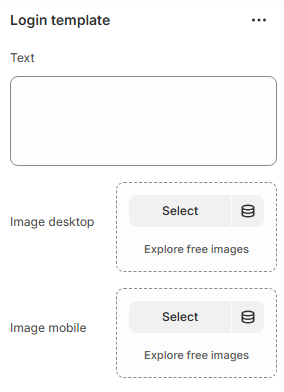
login-template-setting

General

  1. Text – this setting allows you to set text of the section;

  2. Image desktop – the setting allows you to select the image for background image on desktop resolutions;

  3. Image mobile – the setting allows you to select the image for background image on mobile resolutions.

Layout

login-template-layout

  1. Desktop offset top – the top indent of the section on the desktop;

  2. Desktop offset bottom – the bottom indent of the section on the desktop;

  3. Mobile offset top – the top indent of the section on the mobile;

  4. Mobile offset bottom – the bottom indent of the section on the mobile.

Reset template

Sections & Snippets

Reset template

reset-template-desktop

reset-template-mobile

Adding a section

reset-template-add

The section is static on a Reset page template, it was added initially and cannot be removed.

Section settings

reset-template-setting

General

  1. Image desktop – the setting allows you to select the image for background image on desktop resolutions;

  2. Image mobile – the setting allows you to select the image for background image on mobile resolutions.

Layout

login-template-layout

  1. Desktop offset top – the top indent of the section on the desktop;

  2. Desktop offset bottom – the bottom indent of the section on the desktop;

  3. Mobile offset top – the top indent of the section on the mobile;

  4. Mobile offset bottom – the bottom indent of the section on the mobile.


Activate template

Sections & Snippets

Activate template

activate-template-desktop

activate-template-desktop

Adding a section

activate-template-add

The section is static on an Activate account page template, it was added initially and cannot be removed.

Section settings

activate-template-setting

General

  1. Image desktop – the setting allows you to select the image for background image on desktop resolutions;

  2. Image mobile – the setting allows you to select the image for background image on mobile resolutions.

Layout

activate-template-layout

  1. Desktop offset top – the top indent of the section on the desktop;

  2. Desktop offset bottom – the bottom indent of the section on the desktop;

  3. Mobile offset top – the top indent of the section on the mobile;

  4. Mobile offset bottom – the bottom indent of the section on the mobile.

Newsletter popup

Sections & Snippets

Newsletter popup

newsletter-popup-desktop

newsletter-popup-mobile

Adding a section

This settings block is intended for general Newsletter popup settings on the site.

In order to get to the Newsletter popup settings block, you need to go to Customizer → Popups group → Newsletter popup.

newsletter-popup-add

Section settings

newsletter-popup-setting

General

  1. Cookie time – the setting is responsible for the time until the popup is re-displayed when the user closes it;

  2. Heading – setting allows you to set title text;

  3. Text – setting allows you to set description text;

  4. Input label – setting allows you to set input label text;

  5. Button submit label – setting allows you to set submit button text;

  6. Close button label – setting allows you to set close button text;

  7. Show socials – setting allows you to show/hide social links.

Additional information

newsletter-popup-additional

The remaining settings (texts) are taken from the translations. Newsletter popup:

  1. Label – the setting allows you to set the text for the input label;

  2. Success – message on successful subscription;

  3. Button label – setting allows you to set the label for the submit button.

Register template

Sections & Snippets

Register template

register-template-desktop

register-template-mobile

Adding a section

register-template-add

The section is static on an Register template, it was added initially and cannot be removed.

Section settings

register-template-setting

General

  1. Text – this setting allows you to set text of the section;

  2. Image desktop – the setting allows you to select the image for background image on desktop resolutions;

  3. Image mobile – the setting allows you to select the image for background image on mobile resolutions.

Layout

register-template-layout

  1. Desktop offset top – the top indent of the section on the desktop;

  2. Desktop offset bottom – the bottom indent of the section on the desktop;

  3. Mobile offset top – the top indent of the section on the mobile;

  4. Mobile offset bottom – the bottom indent of the section on the mobile.

Age check popup

Sections & Snippets

Age check popup

age-check-popup-desktop

age-check-popup-mobile

Adding a section

This block of settings is intended for general settings of the Age check popup on the site.

If the customer closes the popup – the redirect will work.

If the customer clicks on the main button – the popup will close and the customer can use a site.

In order to get to the Age check popup settings block, you need to go to Customizer → Popups group → Age check popup.

age-check-popup-add

Section settings

age-check-popup-setting

General

  1. Cookie time – the setting is responsible for the time until the popup is re-displayed when the user closes it;

  2. Heading – setting allows you to set title text;

  3. Text – setting allows you to set description text;

  4. Button label – setting allows you to set button text;

  5. Button close label – setting allows you to set close button text;

  6. Redirect link – link for redirect if the customer closes the popup. The “Google ” link is used by default.

Footer

Sections & Snippets

Footer

footer-desktop

footer-mobile

Adding a section

footer-add

The section is present by default in the Footer group.

Section settings

Ticker

footer-ticker

  1. Text – setting that allows you to set up text for ticker;

  2. Show divider – enable this setting to show the divider line in the ticker;

  3. Font size (desktop) – setting that allows you to set the font size of the ticker on desktop devices;

  4. Font size (mobile) – setting that allows you to set the font size of the ticker on mobile devices;

  5. Movement speed (desktop) – set the scrolling speed of the ticker on desktop (in seconds);

  6. Movement speed (mobile) – set the scrolling speed of the ticker on mobile (in seconds).

General

footer-settings

  1. Copyright text – customize the copyright text;

    1. Default: “Copyright © %date%.”;

    2. “%date%” will be replaced with the current year.

  2. Show back to top button – the setting allows you to enable or disable the back to top button;

  3. Quick links – select the menu to display quick links at the bottom of the footer;

  4. Show payment icons – enable this setting to show the payment icons;

  5. Background decor image (desktop) – the setting allows you to select the background image for desktop resolutions;

  6. Background decor image (mobile) – the setting allows you to select the background image for mobile resolutions.

Localization selectors

footer-localization

Country/Region Selector

  1. Show country/region selector – toggle to enable or disable the selector.

Language Selector

  1. Show language selector – toggle to enable or disable the selector.

Enter banner Settings

footer-enter-banner

  1. Enable Enter banner – the setting allows you to show the enter banner image;

  2. Enter banner type – the setting allows you to select the type of banner. You can choose either an image or a color;

  3. Enter banner image – the setting allows you to select the enter banner image;

  4. Enter banner color – the setting allows you to select the enter banner color.

Colors

  1. Section background – the setting allows you to select a color for section background;

  2. Text – the setting allows you to select a color for the text of section;

  3. Text secondary – the setting allows you to select a color for the secondary text of section;

  4. Ticker text – the setting allows you to select a color for text of ticker;

  5. Social icons – the setting allows you to select a color for the icons;

  6. Social icons (hover) – the setting allows you to select a color for the icons on hover state;

  7. Dropdown link text – the setting allows you to select a color for dropdown link text;

  8. Dropdown link background (hover) – the setting allows you to select a color for dropdown link background on hover;

  9. Dropdown background – the setting allows you to select a color for dropdown background;

  10. Copyright text – the setting allows you to select a color for text of copyright;

  11. Scroll to top button border color – the setting allows you to select a border color for the scroll to top button;

  12. Scroll to top button color – the setting allows you to select a color for the scroll to top button icon;

  13. Scroll to top button background color – the setting allows you to select a background color for the scroll to top button;

  14. Scroll to top button border color (hover) – the setting allows you to select a border color for the scroll to top button on hover;

  15. Scroll to top button color (hover) – the setting allows you to select a color for the scroll to top button icon on hover;

  16. Scroll to top button background color (hover) – the setting allows you to select a background color for the scroll to top button on hover;

  17. Input border – the setting allows you to select a color for input border;

  18. Bottom border – the setting allows you to select a color for bottom border.

Blocks settings

Block type “Contact“

Newsletter

footer-newsletter

  1. Heading – the setting allows you to select text for heading;

  2. Input label – the setting allows you to select text for input label;

  3. Success message – the setting allows you to select text for success message.

Contact info

footer-contat-info

  1. Email heading – the setting allows you to select text for heading of email block;

  2. Email text – the setting allows you to select text for email block;

  3. Phone heading – the setting allows you to select text for heading of phone block;

  4. Phone text – the setting allows you to select text for phone block;

  5. Location heading – the setting allows you to select text for heading of location block;

  6. Location text – the setting allows you to select text for location block.

Socials

footer-social

  1. Socials text – the setting allows you to select text for email block;

  2. Show socials – enable this setting to show socials.

Follow on shop

footer-shopfollow

  1. Enable Follow on Shop – enable this setting to show follow on shop button.

Block type “Menu“

footer-menu

  1. Enable Follow on Shop – select the menu to display menu links of the block.

Gallery carousel

Sections & Snippets

Gallery carousel

gallery-carousel

Adding a section

In order to add a section, you need to go to Customizer → Add Section → Gallery carousel.

gallery-carousel-add

Section settings:

General:

gallery-carousel

  1. Heading – the setting allows you to set the heading;

  2. Images layout – the setting allows you to set the media aspect ratio.

Layout:

gallery-carousel-layout

  1. Desktop offset top – the top indent of the section on the desktop;

  2. Desktop offset bottom – the bottom indent of the section on the desktop;

  3. Mobile offset top – the top indent of the section on the mobile;

  4. Mobile offset bottom – the bottom indent of the section on the mobile.

FAQ

Sections & Snippets

FAQ

faq-desktop

Adding a section

In order to add a section, you need to go to Customizer → Add Section → FAQ.

FAQ-add

Section settings:

General:

faq-setting

  1. Heading – the setting allows you to set the heading;

  2. Text – the setting allows you to set the text;

  3. Button label – the setting allows you to set the text for button;

  4. Button link – the setting allows you to set the link for button;

  5. Button aria-label – the setting allows you to set the aria-label for button;

  6. Button style – the setting allows you to set the style for button;

Enter & Exit banner Settings

faq-enter-exit-banner

  1. Enable Enter banner – the setting allows you to show the enter banner image;

  2. Enter banner type – the setting allows you to select the type of banner. You can choose either an image or a color;

  3. Enter banner image – the setting allows you to select the enter banner image;

  4. Enter banner color – the setting allows you to select the enter banner color;

  5. Enable exit banner – the setting allows you to show the exit banner image;

  6. Exit banner type – the setting allows you to select the type of banner. You can choose either an image or a color;

  7. Exit banner image – the setting allows you to select the exit banner image;

  8. Exit banner color – the setting allows you to select the exit banner color.

Layout:

faq-layout

  1. Container width – section container settings;

  2. Desktop offset top – the top indent of the section on the desktop;

  3. Desktop offset bottom – the bottom indent of the section on the desktop;

  4. Mobile offset top – the top indent of the section on the mobile;

  5. Mobile offset bottom – the bottom indent of the section on the mobile.

Block settings

faq-block-settings

  1. Category – settings allow you to set a category for the block;

  2. Question – settings allow you to set a questions for the block;

  3. Answer – settings allow you to set a answer for the block;

Trend products

Sections & Snippets

Trend products

trend-products-desktop

trend-products-mobile

Adding a section

In order to add a section, you need to go to Customizer → Add Section → Trend products.

trend-products-add

Section settings

trend-products-setting

General

  1. Heading – add a heading for the section.

trend-products-colors

Colors

  1. Thumbnail slider background – the setting allows you to select a color for the background of thumbnail slider;

  2. Thumbnail active slide border – the setting allows you to select a color for active thumbnail slide border;

  3. Hotspot background – the setting allows you to select a color for hotspot background;

  4. Hotspot color – the setting allows you to select a color for hotspot icon;

  5. Hotspot border – the setting allows you to select a color for hotspot border;

  6. Hotspot background active – the setting allows you to select a color for active hotspot background;

  7. Hotspot color active – the setting allows you to select a color for active hotspot icon;

  8. Hotspot border active – the setting allows you to select a color for active hotspot border.

trend-products-layout

Layout

  1. Container width – section container settings;

  2. Desktop offset top – the top indent of the section on the desktop;

  3. Desktop offset bottom – the bottom indent of the section on the desktop;

  4. Mobile offset top – the top indent of the section on the mobile;

  5. Mobile offset bottom – the bottom indent of the section on the mobile.

Block settings

The section has a limit on the amount of blocks. The maximum number of blocks is 4.

trend-products-item

General

  1. Background image desktop – the setting allows you to select the background image for desktop resolutions;

  2. Background image mobile – the setting allows you to select the background image for mobile resolutions.

trend-products-popup

Product (1..5)

  1. Popup heading – add a heading for popup.

  2. Product – the setting allows you to select a product for spot;

  3. Product image – the setting allows you to select a product image for spot;

  4. Spot horizontal position desktop – the setting allows you to set the horizontal position (desktop) of the hotspot;

  5. Spot vertical position desktop – the setting allows you to set the vertical position (desktop) of the hotspot;

  6. Spot horizontal position mobile – the setting allows you to set the horizontal position (mobile) of the hotspot;

  7. Spot vertical position mobile – the setting allows you to set the vertical position (mobile) of the hotspot;

Blog template

Sections & Snippets

Blog template

blog-template-desktop

Adding a section

blog-template-add

The section is static on a Blog template, it was added initially and cannot be removed.

Section settings

blog-template-banner

  1. Banner image – the setting allows you to select the image for banner on desktop;

  2. Banner image mobile – the setting allows you to select the image for for banner on mobile.

General

blog-template-general

  1. Paginate by – the setting allows you to set the number of visible articles per page;

  2. Pagination type – the setting allows you to choose pagination type(pagination/load-more/infinite-scroll);

  3. Load more button style – the settings allows you to set load more button style(first you should choose Load more in pagination type setting);

  4. Show filter by tag – the settings allows you to show all possible blog-post tags.

Colors

blog-template-color

  1. Banner overlay – the setting allows you to set the main overlay of the banner;

  2. Banner bottom overlay – the setting allows you to set the additional bottom overlay of the banner;

  3. Banner text – the setting allows you to set the color of the banner text content.

Layout

blog-template-layout

  1. Container width – a container width of the section. If “Inherit” value is selected then the container width is based on the group ‘Layout’ settings in the Theme settings;

  2. Desktop offset top – the top indent of the section on the desktop;

  3. Desktop offset bottom – the bottom indent of the section on the desktop;

  4. Mobile offset top – the top indent of the section on the mobile;

  5. Mobile offset bottom – the bottom indent of the section on the mobile.

Order Template

Sections & Snippets

Order Template

order-template-desktop

order-template-mobile

Section settings

Layout

order-template-layout

  1. Desktop offset top – the top indent of the section on the desktop;

  2. Desktop offset bottom – the bottom indent of the section on the desktop;

  3. Mobile offset top – the top indent of the section on the mobile;

  4. Mobile offset bottom – the bottom indent of the section on the mobile;

Account template

Sections & Snippets

Account template

account-template-desktop

account-template-desktop1

account-template-desktop2

account-template-mobile

Adding a section

account-template-add

The section is static on an Account page template, it was added initially and cannot be removed.

Section settings

account-template-setting

General

  1. Continue shopping link – the setting that shows link for empty orders state.

Layout

account-template-layout

  1. Desktop offset top – the top indent of the section on the desktop;

  2. Desktop offset bottom – the bottom indent of the section on the desktop;

  3. Mobile offset top – the top indent of the section on the mobile;

  4. Mobile offset bottom – the bottom indent of the section on the mobile.

Addresses template

Sections & Snippets

Addresses template

addresses-template-desktop

addresses-template-mobile

Adding a section

addresses-template-add

The section is static on an Addresses page template, it was added initially and cannot be removed.

Section settings

Layout

addresses-template-layout

  1. Desktop offset top – the top indent of the section on the desktop;

  2. Desktop offset bottom – the bottom indent of the section on the desktop;

  3. Mobile offset top – the top indent of the section on the mobile;

  4. Mobile offset bottom – the bottom indent of the section on the mobile.

Products gallery

Sections & Snippets

Products gallery

products-gallery-desktop

products-gallery-mobile

Adding a section

In order to add a section, you need to go to Customizer → Add Section → Products gallery.

Section settings

General

products-gallery-settings

  1. Heading – the setting allows you to specify the heading of the section;

  2. Products – the setting allows you to specify the products of the section. Maximum 6 products.

Enter & Exit banner Settings

enter-exit-banner-settings

  1. Enable Enter banner – the setting allows you to show the enter banner image;

  2. Enter banner type – the setting allows you to select the type of banner. You can choose either an image or a color;

  3. Enter banner image – the setting allows you to select the enter banner image;

  4. Enter banner color – the setting allows you to select the enter banner color;

  5. Enable exit banner – the setting allows you to show the exit banner image;

  6. Exit banner type – the setting allows you to select the type of banner. You can choose either an image or a color;

  7. Exit banner image – the setting allows you to select the exit banner image;

  8. Exit banner color – the setting allows you to select the exit banner color.

Layout Settings

products-gallery-settings-layout

  1. Container width – a container width of the section. If “Inherit” value is selected then the container width is based on the group ‘Layout’ settings in the Theme settings;

  2. Desktop offset top – the top indent of the section on the desktop;

  3. Desktop offset bottom – the bottom indent of the section on the desktop;

  4. Mobile offset top – the top indent of the section on the mobile;

  5. Mobile offset bottom – the bottom indent of the section on the mobile.

Blocks settings

Background image:

products-gallery-settings-block

Maximum 6 blocks.

  1. Image desktop – the setting allows you to set the background image of the section (2058 x 2058px recommended);

  2. Image desktop – the setting allows you to set the background image of the section for the mobile (1534 x 1150px recommended);

  3. Border color – the setting allows you to set the border color for the product image in the section.

Page 404

Sections & Snippets

Page 404

page-404-desktop

page-404-mobile

Adding a section

The section is static on a 404 page template, it was added initially and cannot be removed.

Section settings

General

page-404-settings

  1. Heading – the setting allows you to set the heading;

  2. Text – the setting allows you to set the text content;

  3. Link label – the setting allows you to set the label for the link;

  4. Link URL – the setting allows you to set the URL for the link;

  5. Additional links – the setting allows you to set the list of navigation items;

  6. Image behind heading – the setting allows you to set the image behind heading (770 x 770px recommended);

  7. Background image (desktop) – the setting allows you to set the background image for the desktop (3840 x 2160px recommended);

  8. Background image (mobile) – the setting allows you to set the background image for the mobile (1534 x 2048px recommended).

Colors

page-404-settings-colors

  1. Section background – the setting allows you to set the background color of the section;

  2. Text – the setting allows you to set the color of the text;

  3. Image overlay – the setting allows you to set the overlay color of the section background image.

Layout Settings

page-404-settings-layout

  1. Container width – a container width of the section. If “Inherit” value is selected then the container width is based on the group ‘Layout’ settings in the Theme settings;

  2. Desktop offset top – the top indent of the section on the desktop;

  3. Desktop offset bottom – the bottom indent of the section on the desktop;

  4. Mobile offset top – the top indent of the section on the mobile;

  5. Mobile offset bottom – the bottom indent of the section on the mobile;

  6. Desktop offset top – the top indent of the section on the desktop;

  7. Desktop offset bottom – the bottom indent of the section on the desktop;

  8. Mobile offset top – the top indent of the section on the mobile;

  9. Mobile offset bottom – the bottom indent of the section on the mobile.

Featured collection

Sections & Snippets

Featured collection

featured-collection-desktop

featured-collection-mobile

featured-collection-mobile2

Adding a section

In order to add a section, you need to go to Customizer → Add Section → Featured collection.

featured-collection-add

Section settings

General

featured-collection-setting

  1. Heading – the setting allows you to set the text for the title;

  2. Collection – the setting allows you to select a collection;

  3. Products – customization allows you to choose products. Replaces collection when selected.;

  4. Products per row desktop – the settings allow you to choose the number of products per row on the desktop.

  5. Products per row mobile – the settings allow you to choose the number of products per row on the mobile.

  6. Enable carousel on mobile – settings allow you to enable the carousel on a mobile device.

Enter & Exit banner Settings

featured-collection-enter-exit-banner-settings

  1. Enable Enter banner – the setting allows you to show the enter banner image;

  2. Enter banner type – the setting allows you to select the type of banner. You can choose either an image or a color;

  3. Enter banner image – the setting allows you to select the enter banner image;

  4. Enter banner color – the setting allows you to select the enter banner color;

  5. Enable exit banner – the setting allows you to show the exit banner image;

  6. Exit banner type – the setting allows you to select the type of banner. You can choose either an image or a color;

  7. Exit banner image – the setting allows you to select the exit banner image;

  8. Exit banner color – the setting allows you to select the exit banner color.

Layout Settings

featured-collection-layout

  1. Container width – section container settings;

  2. Desktop offset top – the top indent of the section on the desktop;

  3. Desktop offset bottom – the bottom indent of the section on the desktop;

  4. Mobile offset top – the top indent of the section on the mobile;

  5. Mobile offset bottom – the bottom indent of the section on the mobile.

Images horizontal scroll

Sections & Snippets

Images horizontal scroll

images-horizontal-scroll

images-horizontal-scroll-mobile

Adding a section

In order to add a section, you need to go to Customizer → Add Section → Images horizontal scroll.

images-horizontal-scroll-add

Section settings

images-horizontal-scroll-setting

General

  1. Enable background decor image – the setting allows you to set the background decoration image.

images-horizontal-scroll-layout

Layout

  1. Desktop offset top – the top indent of the section on the desktop;

  2. Desktop offset bottom – the bottom indent of the section on the desktop;

  3. Mobile offset top – the top indent of the section on the mobile;

  4. Mobile offset bottom – the bottom indent of the section on the mobile.

Block settings

images-horizontal-scroll-blocksetting

General

  1. Label – the setting allows you to set the text of the label;

  2. Heading – the setting allows you to set the text of the heading;

  3. Text – the setting allows you to set text content;

  4. Text alignment – the setting allows you to select the alignment of the text;

  5. Image– the setting allows you to select the image.

List collections

Sections & Snippets

List collections

This section is available on the “Collection list” template. You can see all collections from your store on this template.

list-collections-add

The section is static on a list collection page template, it was added initially and cannot be removed.

Section settings

list-collections-banner-setting

  1. Banner image – the setting allows you to select the image for banner on desktop;

  2. Banner image mobile – the setting allows you to select the image for for banner on mobile.

General

list-collections-settings

  1. Custom collections – setting allows you to select a collection list instead of the standard collection list;

  2. Sort collections by: – setting allows you to sort the list of collections. You can select: Alphabetically, A-Z / Alphabetically, Z-A / Date, new to old / Date, old to new / Product count, high to low / Product count, low to high. Works only for custom collections;

  3. Heading – setting allows you to set the text for the title;

  4. Paginate by – setting allows you to determine the number of collections to display per page. The minimum number of cards is 6, the maximum number is 24;

  5. Show products count – show the product count of the collection under the title.

list-collections-colors

  1. Banner overlay – the setting allows you to specify the color of the banner overlay;

  2. Banner text – the setting allows you to specify the text color of the banner.

Layout

list-collections-layout

  1. Container width – a container width of the section. If the “Inherit” value is selected then the container width is based on the group ‘Layout’ settings in the Theme settings;

  2. Desktop offset top – the top indent of the section on the desktop;

  3. Desktop offset bottom – the bottom indent of the section on the desktop;

  4. Mobile offset top – the top indent of the section on the mobile;

  5. Mobile offset bottom – the bottom indent of the section on the mobile.

Collection banners

Sections & Snippets

Collection banners

collection-banners

Adding a section

In order to add a section, you need to go to Customizer → Add Section → Collection banners.

Section settings

General:

collection-banners-setting

  1. Heading – setting allows you to set the text for the heading;

  2. Text – setting allows you to set the text for the text;

  3. Images size – the setting allows you to set the size of the images.

  4. Button label – the setting allows you to set the label for the button;

  5. Button link – the setting allows you to select a button link;

  6. Button aria-label – the setting allows you to set the aria-label for the button. This attribute allows screen readers to better convey information to people with disabilities.

Layout

list-collections-layout

  1. Container width – a container width of the section. If the “Inherit” value is selected then the container width is based on the group ‘Layout’ settings in the Theme settings;

  2. Desktop offset top – the top indent of the section on the desktop;

  3. Desktop offset bottom – the bottom indent of the section on the desktop;

  4. Mobile offset top – the top indent of the section on the mobile;

  5. Mobile offset bottom – the bottom indent of the section on the mobile.

Block images

block-images-setting

In the section you can add a block “Images”. You can add max 4 blocks for 4 columns. In each column you can add your images. Block settings:

  1. First image – the setting allows you to set first image in the block;

  2. Second image – the setting allows you to set second image in the block;

  3. Third image – the setting allows you to set third image in the block;

Banner products scroll

Sections & Snippets

Banner products scroll

banner-products-scroll

banner-products-scroll2

banner-products-scroll-mobile

Adding a section

In order to add a section, you need to go to Customizer → Add Section → Banner products scroll.

banner-products-scroll-add

Section settings:

General:

banner-products-scroll-settings

banner-products-scroll-settings2

banner-products-scroll-settings3

  1. Heading – the setting allows you to set the heading;

  2. Text – the setting allows you to set the text;

  3. Image desktop – the setting allows you to set an image for the background;

  4. Image mobile – the setting allows you to set an image for the background of mobile devices;

  5. Cards scroll direction – the setting allows you to set the direction of card scrolling;

  6. Products – the settings allow you to add products;

  7. Products additionaly – the settings allow you to add products, these products may be displayed with the ‘Vertical’ scroll direction.

  8. Heading additional – the setting allows you to set the heading for additional block;
    additional-block

  9. Subheading additional – the setting allows you to set the text for additional block;

  10. Link additional label – the setting allows you to insert text for the link for additional block;

  11. Link additional – the setting allows you to insert links;

Colors

banner-products-scroll-colors

  1. Image overlay – the setting allows you to choose a color for the overlay background;

  2. Text banner – the settings allow you to choose the color of the text in the banner;

Layout:

banner-products-scroll-layout

  1. Desktop offset top – the top indent of the section on the desktop;

  2. Desktop offset bottom – the bottom indent of the section on the desktop;

  3. Mobile offset top – the top indent of the section on the mobile;

  4. Mobile offset bottom – the bottom indent of the section on the mobile.

Page template

Sections & Snippets

Page template

This page is displayed as the default template for other pages

page-template

Section settings

page-template-settings

  1. Banner image – the setting allows you to specify a banner background image on desktop;
    page-template-image
  2. Banner image mobile – the setting allows you to specify a banner background image on mobile.
    page-template-image-mobile

Colors

page-template-image-color

  1. Banner text – the setting allows you to specify the text color of the banner;

  2. Banner overlay – the setting allows you to specify the color of the banner overlay;

  3. Banner bottom overlay – the setting allows you to specify the overlay color for the bottom of the background.

page-template-color1

Layout

page-template-layout

  1. Container width – a container width of the section. If the “Inherit” value is selected then the container width is based on the group ‘Layout’ settings in the Theme settings;

  2. Desktop offset top – the top indent of the section on the desktop;

  3. Desktop offset bottom – the bottom indent of the section on the desktop;

  4. Mobile offset top – the top indent of the section on the mobile;

  5. Mobile offset bottom – the bottom indent of the section on the mobile.

Announcement bar

Sections & Snippets

Announcement bar

announcement-bar-timer

announcement-bar-ticker

Adding a section

announcement-bar-add

The section is static, it is added initially and cannot be removed. This is done so that the Announcement bar in the DOM is higher than the Header.

Section settings

General

announcement-bar-setting

  1. Layout – the setting is responsible for choosing the type of display. There are three options to choose from:

    • Slideshow – the text will be displayed in the slider;

    • Ticker – a text will be displayed like a ticker.

Slideshow

announcement-bar-slideshow

  1. Enable autoplay – the setting allows you to enable autoplay for the carousel;

  2. Autoplay speed – the setting allows you to change the autoplay speed of the carousel;

Ticker

announcement-bar-ticker

  1. Text – the setting allows you to set the text of the ticker;

  2. Divider image – this setting allows you to add an image for the text;

  3. Movement speed (desktop) – the setting allows you to set the ticker animation speed on the desktop;

  4. Movement speed (mobile) – the setting allows you to set the ticker animation speed on the mobile.

Colors

announcement-bar-colors

  1. Background – the setting allows you to set the section background color;

  2. Text – the setting allows you to set the text color;

  3. Discount block background – the setting allows you to set the background color of the Discount block;

  4. Discount block text – the settings allow you to set the text color of the Discount block;

  5. Discount block border – the settings allow you to set the border color of the Discount block;

Block settings

Slide content

announcement-bar-slide-content

  1. Text – the setting allows you to set the text content;

  2. Link label – the settings allow you to add text for the link;

  3. Link URL – the setting allows you to add links;

  4. Discount code – the setting allows you to add text for the Discount code;

  5. Discount label – the setting allows you to add text for the Discount labe;
    announcement-bar-timer

  6. Year – the setting allows you to set the years until the end of the countdown;

  7. Month – the setting allows you to set the months until the end of the countdown;

  8. Day – the setting allows you to set the days until the end of the countdown;

  9. Hour – the setting allows you to set the hours until the end of the countdown;

  10. Timezone – the setting allows you to set the Timezone of the countdown;

Sticky images

Sections & Snippets

Sticky images

sticky-images

sticky-images-mobile

Adding a section

In order to add a section, you need to go to Customizer → Add Section → Sticky images.

sticky-images-add

Section settings

General

sticky-images-section

  1. Heading – the setting allows you to set the heading;

  2. Subheading – the setting allows you to set the subheading;

  3. Text – the setting allows you to set the text;

  4. Button label – the setting allows you to set the text for button;

  5. Button link – the setting allows you to set the link for button;

  6. Button style – the setting allows you to set the style for button;

  7. Enable background decor image – this option allows you to enable decor image;

Layout

banner-products-scroll-layout

  1. Desktop offset top – the top indent of the section on the desktop;

  2. Desktop offset bottom – the bottom indent of the section on the desktop;

  3. Mobile offset top – the top indent of the section on the mobile;

  4. Mobile offset bottom – the bottom indent of the section on the mobile.

Block settings

sticky-images-blocksetting

  1. Image – the settings allow you to add an image for the block;

  2. Image position – the setting allows you to choose the position from left or right;

  3. Image transparent – the setting allows you to make the image transparent;

FAQ template

Sections & Snippets

FAQ template

faq-section

With this section, you can add basic FAQ blocks to your store.

Adding a Section

faq

The section is static on an FAQ page template, it was added initially and cannot be removed.

Section settings

General

faq-heading

  1. Heading – the setting allows you to set the text for the title. If the value is not specified, the name of the page to which the template is applied is displayed.

banner-products-scroll-layout

  1. Desktop offset top – the top indent of the section on the desktop;

  2. Desktop offset bottom – the bottom indent of the section on the desktop;

  3. Mobile offset top – the top indent of the section on the mobile;

  4. Mobile offset bottom – the bottom indent of the section on the mobile.

Blocks settings

Block Question and answer

faq-block

  1. Heading – accordion title, question;

  2. Text – response, accordion content;

Block Category

The block is designed to group question-answer pairs by category. Rendered as a header separating a group of accordions. In addition, adding blocks of this type makes it possible to build section navigation in the form of a side menu (desktop), and a fixed category bar (mobile). Clicking on a menu item scrolls to the corresponding category.

faq-block-heading

Heading – title, category name.


Additional information

  1. The Question and answer block is not displayed if the settings for the Heading and Text fields are not specified;

  2. The Category block is not displayed if the settings for the Heading field are not specified;

Contact template

Sections & Snippets

Contact template

contact-template

Adding a section

contact-template-settings

The section is static on a Contact template, it was added initially and cannot be removed.


Section settings

contact-template-settings

  1. Heading – the setting allows you to set the text for the banner;

  2. Image – the setting allows you to select the image for banner on desktop;

  3. Image mobile – the setting allows you to select the image for for banner on mobile.

Colors

contact-template-colors

  1. Banner text – the setting allows you to set the color of the banner text content;

  2. Banner overlay – the setting allows you to set the main overlay of the banner;

  3. Banner bottom overlay – the setting allows you to set the additional bottom overlay of the banner.

Layout

page-template-layout

  1. Container width – a container width of the section. If “Inherit” value is selected then the container width is based on the group ‘Layout’ settings in the Theme settings;

  2. Desktop offset top – the top indent of the section on the desktop;

  3. Desktop offset bottom – the bottom indent of the section on the desktop;

  4. Mobile offset top – the top indent of the section on the mobile;

  5. Mobile offset bottom – the bottom indent of the section on the mobile.

Slideshow

Sections & Snippets

Slideshow

slideshow-desktop

slideshow-mobile

Adding a section

slideshow-add

In order to add a section, you need to go to Customizer → Add Section → Slideshow.

Section settings

slideshow-settings

  1. Enable loop – the setting is responsible for setting the infinite scrolling of the slider;

  2. Enable autoplay – the setting is responsible for setting the automatic switching of slides;

  3. Autoplay speed – the setting is responsible for the speed of automatic switching of slides;

  4. Animation speed – setting allows you to set the animation speed of switching slides;

  5. Animation type – setting allows you to set the type of animation for switching slides:

    • Fade
      slideshow-fade

    • Slide
      slideshow-slide
    • Creative
      slideshow-creative

Colors

slideshow-colors

  1. Progress bar – the setting allows you to set the color of the progress bar;

  2. Arrows – the setting allows you to set the color of the arrow buttons;

  3. Arrows (hover) – the setting allows you to set the hover color of the arrow buttons;

  4. Next slide label – the setting allows you to set the color of the next slide label;

  5. Next slide heading – the setting allows you to set the color of the next slide text.

Layout

slideshow-layout

  1. Desktop section height – the setting is responsible for the height of the section for the desktop. The height of the section also depends on the height of the slider content. If the content height is greater than the specified height in the customization, the section height will be equal to the content height;

  2. Mobile section height – the setting is responsible for the height of the section for the mobile. The height of the section also depends on the height of the slider content. If the content height is greater than the specified height in the customization, the section height will be equal to the content height;

  3. Subtract header height – the setting is responsible for subtracting the header height from the slideshow size. This will be useful when you set the slideshow size to 100% and turn on the settings, you will fit the announcement bar, header, and slideshow on one screen. The height of the section also depends on the height of the slider content. If the content height is greater than the specified height in the customization, the section height will be equal to the content height;

  4. Container width – a container width of the section. If “Inherit” value is selected then the container width is based on the group ‘Layout’ settings in the Theme settings;

  5. Desktop offset top – the top indent of the section on the desktop;

  6. Desktop offset bottom – the bottom indent of the section on the desktop;

  7. Mobile offset top – the top indent of the section on the mobile;

  8. Mobile offset bottom – the bottom indent of the section on the mobile.

Blocks settings

Block Image

slideshow-block-image

General

slideshow-image-setting

  1. Image (desktop) – the setting allows you to set the image for the desktop. Also used for thumbnail. 3776 x 2160px recommended;

  2. Image (mobile) – the setting allows you to set the image for the mobile. 1470 x 2048px recommended;

  3. Heading – the setting allows you to set the text for the title;

  4. Text – the setting allows you to set the text for the text;

  5. Button label – the setting allows you to set the label for the label;

  6. Button aria-label – the setting allows you to set the text for the aria-label attribute. The attribute is needed for accessibility;

  7. Button link – the setting allows you to set a link for the button;

  8. Open link in a new tab – the setting allows you to indicate how the link will open, in the current tab or the new;

  9. Heading font size (desktop) – the setting allows you to specify the font size on desktop.

Colors

slideshow-image-color

  1. Background – the setting allows you to set the background color of the slide;

  2. Overlay – the setting allows you to set the color for the overlay;

  3. Heading – the setting allows you to set the color for the header;

  4. Text – the setting allows you to set the color for the description;

  5. Button label – the setting allows you to set the color for the button label;

  6. Button background – the setting allows you to set the background color for the button;

  7. Button border – the setting allows you to set the border color for the button;

  8. Button label (hover) – the setting allows you to set the color for the button label on hover;

  9. Button background (hover) – the setting allows you to set the background color for the button on hover.

Block HTML Video

blockhtml-video

General

blockhtml-video-setting

blockhtml-video-setting2

  1. Video (desktop) – the setting allows you to select a video from the picker for the desktop;

  2. Video (mobile) – the setting allows you to select a video from the picker for the mobile;

  3. Preview image (desktop) – the setting allows you to set the image for the desktop;

  4. Preview image (mobile) – the setting allows you to set the image for the mobile;

  5. Heading – the setting allows you to set the text for the title;

  6. Text – the setting allows you to set the text for the text;

  7. Button label – the setting allows you to set the label for the label;

  8. Button aria-label – the setting allows you to set the text for the aria-label attribute. The attribute is needed for accessibility;

  9. Button link – the setting allows you to set a link for the button;

  10. Open link in a new tab – the setting allows you to indicate how the link will open, in the current tab or the new;

  11. Heading font size (desktop) – the setting allows you to specify the font size on desktop.

Video settings

video-setting

  1. Play type – the setting allows you to set the playback type for the video.

Colors

video-colors

  1. Background – the setting allows you to set the background color of the slide;

  2. Overlay – the setting allows you to set the color for the overlay;

  3. Heading – the setting allows you to set the color for the header;

  4. Text – the setting allows you to set the color for the description;

  5. Button label – the setting allows you to set the color for the button label;

  6. Button background – the setting allows you to set the background color for the button;

  7. Button border – the setting allows you to set the border color for the button;

  8. Button label (hover) – the setting allows you to set the color for the button label on hover;

  9. Button background (hover) – the setting allows you to set the background color for the button on hover.

Block Vimeo/Youtube Video

vimeo-youtube-video

General

vimeo-youtube-video-setting

vimeo-youtube-video-setting2

  1. Video URL (desktop) – the setting allows you to set a link to the video for the desktop;

  2. Video URL (mobile) – the setting allows you to set a link to a video for the mobile;

  3. Preview image (desktop) – the setting allows you to set the image for the desktop;

  4. Preview image (mobile) – the setting allows you to set the image for the mobile;

  5. Heading – the setting allows you to set the text for the title;

  6. Text – the setting allows you to set the text for the text;

  7. Button label – the setting allows you to set the label for the label;

  8. Button aria-label – the setting allows you to set the text for the aria-label attribute. The attribute is needed for accessibility;

  9. Button link – the setting allows you to set a link for the button;

  10. Open link in a new tab – the setting allows you to indicate how the link will open, in the current tab or the new;

  11. Heading font size (desktop) – the setting allows you to specify the font size on desktop.

Video settings

video-setting

  1. Play type – the setting allows you to set the playback type for the video.

Colors

video-colors

  1. Background – the setting allows you to set the background color of the slide;

  2. Overlay – the setting allows you to set the color for the overlay;

  3. Heading – the setting allows you to set the color for the header;

  4. Text – the setting allows you to set the color for the description;

  5. Button label – the setting allows you to set the color for the button label;

  6. Button background – the setting allows you to set the background color for the button;

  7. Button border – the setting allows you to set the border color for the button;

  8. Button label (hover) – the setting allows you to set the color for the button label on hover;

  9. Button background (hover) – the setting allows you to set the background color for the button on hover.

Gift card

Sections & Snippets

Gift card

gift-card

Adding a section

The section is static on a GIft card page template, it was added initially and cannot be removed.


Section settings

gift-card-setting

General settings

  1. Heading – a heading for the section;

  2. Logo – the setting allows you to specify a logo, otherwise the name of the store will be displayed;

  3. Logo width – setting allows you to specify the size of the logo;

  4. Start shopping button style – the setting allows you to set the style of the “Start shipping” button;

  5. Print button style – the setting allows you to set the style of the “Print” button;

  6. Image block background – the setting allows you to set background color to the image column block;

  7. Enable background decor image – the setting allows you to show section decor image;

Layout

layout

  1. Desktop offset top – the top indent of the section on the desktop;

  2. Desktop offset bottom – the bottom indent of the section on the desktop;

  3. Mobile offset top – the top indent of the section on the mobile;

  4. Mobile offset bottom – the bottom indent of the section on the mobile.

Product recommendations

Sections & Snippets

Product recommendations

product-recommendations

The section allows you to display product recommendations.


Adding a section

The section is static on a product page template, it was added initially and cannot be removed.

product-recommendations-add


Section settings

General

also-like-general

  1. Heading – the setting allows you to set the text for the title;

  2. Products to show – the setting allows you to set how many products to show;

  3. Use Shopify recommendations – the setting allows you to use the list of products that Shopify provides for recommendations. Read more here: https://shopify.dev/themes/product-merchandising/recommendations;

  4. Resourse collection – the setting allows you to use your collection as a recommendation list. Works if Shopify recommendations are disabled;

Layout Settings

product-recommendations-layout

  1. Products per row desktop – the settings allow you to choose the number of products per row on the desktop.

  2. Products per row mobile – the settings allow you to choose the number of products per row on the mobile.

  3. Enable carousel on mobile – settings allow you to enable the carousel on a mobile device.

  4. Container width – section container settings;

  5. Desktop offset top – the top indent of the section on the desktop;

  6. Desktop offset bottom – the bottom indent of the section on the desktop;

  7. Mobile offset top – the top indent of the section on the mobile;

  8. Mobile offset bottom – the bottom indent of the section on the mobile.

Recently Viewed

Sections & Snippets

Recently Viewed

recently-viewed

The section allows you to display the last-viewed products.

Adding a Section

recently-viewed-add

The section can only be added on the product page.

Section settings

General

recently-viewed-general

  1. Heading – the setting allows you to set the section title;

  2. Products to show – the setting allows you to set how many products to show.

Layout

recently-viewed-layout

  1. Products per row (desktop) – the setting allows you to select the number of cards displayed in a row on the desktop;

  2. Products per row (mobile) – the setting allows you to select the number of cards displayed in a row on the mobile;

  3. Enable carousel on mobile – the setting allows you to display cards in a carousel instead of a column;

  4. Container width – a container width of the section. If the “Inherit” value is selected then the container width is based on the group ‘Layout’ settings in the Theme settings;

  5. Desktop offset top – the top indent of the section on the desktop;

  6. Desktop offset bottom – the bottom indent of the section on the desktop;

  7. Mobile offset top – the top indent of the section on the mobile;

  8. Mobile offset bottom – the bottom indent of the section on the mobile.

Product banner

Sections & Snippets

Product banner

product-banner

product-banner

Adding a section

product-banner-add

In order to add a section, you need to go to Customizer → Add Section → Product banner.

Section settings

product-banner-setting

  1. Decor image desktop – the setting allows you to set the desktop decor image;

  2. Decor image mobile – the setting allows you to set the mobile decor image.

Colors

product-banner-color

  1. Progress bar background – the setting allows you to set the background color of the progress bar;

  2. Progress bar background fill – the setting allows you to set the background color of the progress bar fill.

Layout

product-banner-layout

  1. Container width – a container width of the section. If “Inherit” value is selected then the container width is based on the group ‘Layout’ settings in the Theme settings;

  2. Desktop offset top – the top indent of the section on the desktop;

  3. Desktop offset bottom – the bottom indent of the section on the desktop;

  4. Mobile offset top – the top indent of the section on the mobile;

  5. Mobile offset bottom – the bottom indent of the section on the mobile.

Blocks settings

General

product-banner-block-setting

  1. Label – the setting allows you to set the text for the label;

  2. First line heading – the setting allows you to set the first line text for the title;

  3. Second line heading – the setting allows you to set the second line text for the title;

  4. Media image – the setting allows you to set the media image of the block.

  5. Media heading – the setting allows you to set the heading under the image;

  6. Media subheading – the setting allows you to set the subheading under the heading;

  7. Button label – the setting allows you to set the label for the label;

  8. Button link – the setting allows you to set a link for the button.

Colors

product-banner-block-color

  1. Background – the setting allows you to set the background color of the slide;

  2. Text – the setting allows you to set the color for the text;

  3. Media subheading – the setting allows you to set the color for the subheading;

  4. Button text – the setting allows you to set the color for the button label;

  5. Button background – the setting allows you to set the background color for the button;

  6. Button border – the setting allows you to set the border color for the button;

  7. Button text (hover) – the setting allows you to set the color for the button label on hover;

  8. Button background (hover) – the setting allows you to set the background color for the button on hover.

Product template

Sections & Snippets

Product template

product-template

Adding a section

The section is static on a product page template, it was added initially and cannot be removed.

Section settings
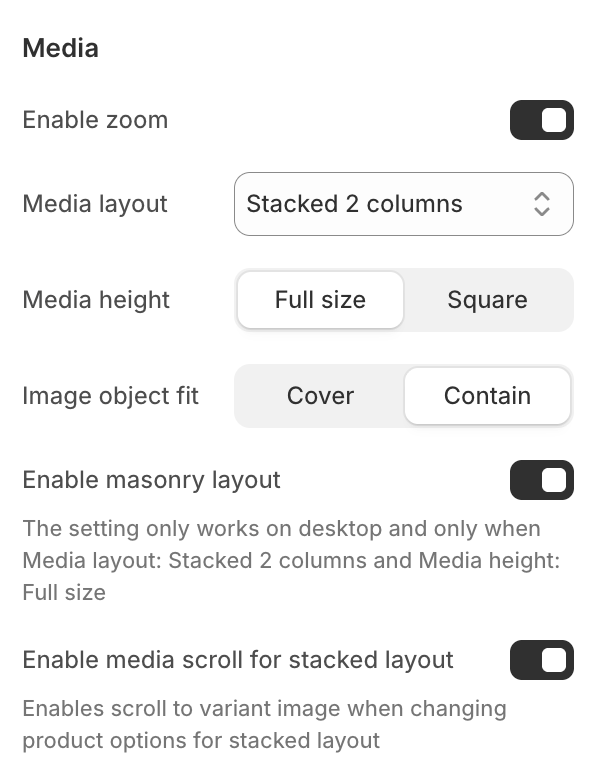
Media

product-template-media

  1. Enable zoom – the setting allows you to enable the Zoom function that appears when you click on the image;

  2. Media layout – the setting allows you to choose the appearance of the product image gallery (Carousel, Stacked, Stacked 2 columns)

  3. Media height – the setting allows you to select the size of the image. Has several options: Full size, Square, Fit to screen. Note: “Fit to screen” on the mobile will be the same as “Full size”;

  4. Image object fit – the setting allows you to select object fit variation for main media slider;

  5. Enable masonry layout – this feature eliminates vertical gaps between images of different aspect ratios by packing them into a dense, staggered grid. This setting applies to Desktop only. It requires Media layout to be set to “Stacked 2 columns” and Media height to “Full size” to function correctly;
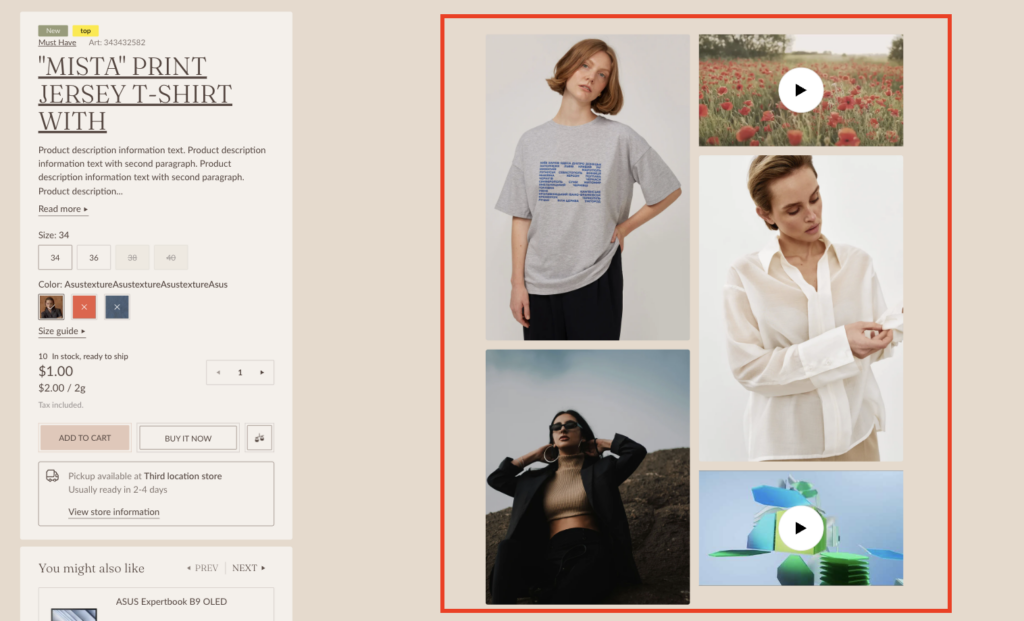
    product-template-media-layout

  6. Enable media scroll for stacked layout – the setting allows you to enable scroll to variant image when changing product options for stacked layout.

General
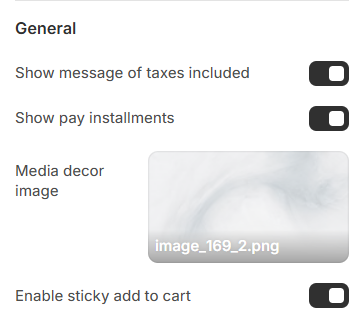
product-template-general

  1. Show messsage of taxes included – if taxes are included in the price of the product in the store, then this parameter will control the visibility of the corresponding message;

  2. Show pay installments – if the store has the right to sell by installments and this feature is enabled in the store settings, then this parameter will control the visibility of the installment block;

  3. Media decor image – the setting allows you to set decor image for the section;

  4. Enable sticky add to cart – the setting allows you to show sticky add to cart when the main add to cart is not visible.

Size guide
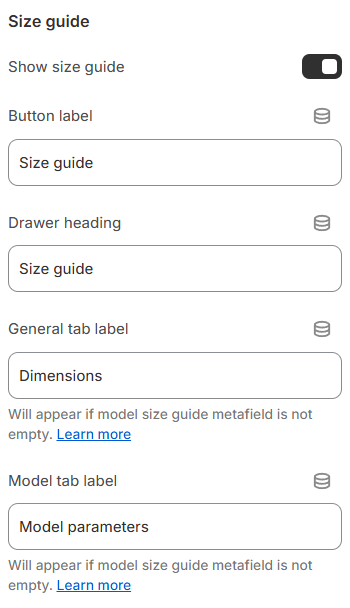
size-guide-settings

  1. Show size guide – the setting is responsible for showing/hiding the popup and the button for opening the popup;

  2. Button label – the settings allows you to set a size guide button label;

  3. Drawer heading – the setting allows you to set the title of the size guide popup;

  4. General tab label – the setting allows you to set the text for size guide general tab;
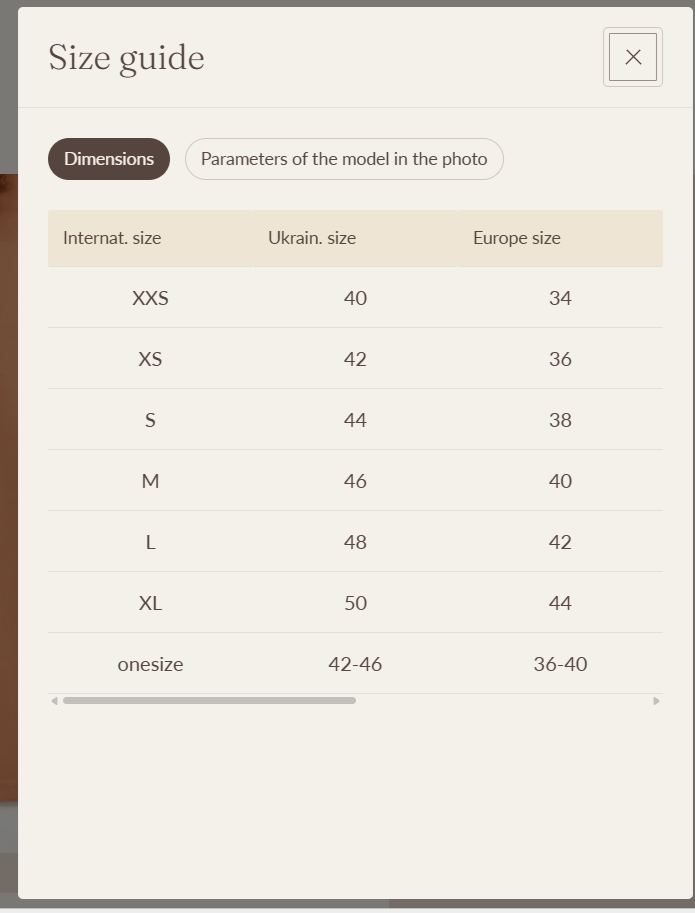
    size-guide-tab-label

  5. Model tab label – the setting allows you to setthe text for size guide mobel tab;
    size-guide-model-tab-label

To show the size guide:

  • Create product metafield with Name: “Size guide page”, Namespace and key: size_guide.page. Content type must be Page;

  • Create a page with content for a size guide (you can select a unique page with a size guide for every product. For shorts, skirts, etc):

  • Add a page in the product meta field (page content must not be empty);

In the Size guide popup you can add information about the product model information:

Follow the steps:

  1. Create product metafield with Name: “Size guide model image”, Namespace and key: custom.size_guide_model_image. The content type must be a file (images only).

  2. Create product metafield with Name: “Size guide model info”, Namespace and key:

    custom.size_guide_model_info. The content type must be Multi-line text.

  3. Go to the product in the admin and add values to these metafields. You can set both or one of these fields to see tabs in the size guide popup.

  4. Now when you open the Size guide popup on the product you will see tabs with the default size guide and size guide for the product model.

Product complementary
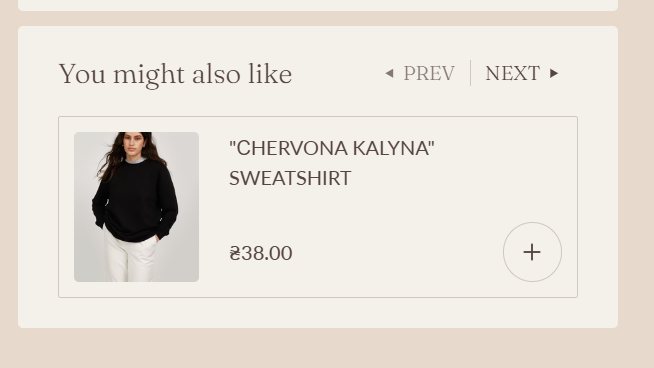
product-complementary

product-complementary-setting

  1. Enable – enable product complementary block;

  2. Heading – the setting allows you to set a title for the block.

Tabs content

This settings allows you to show additional information under the main product section in the tabs.
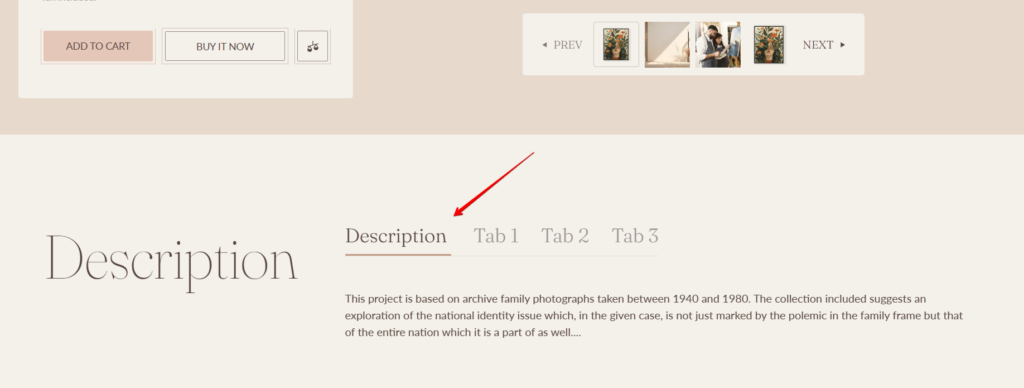
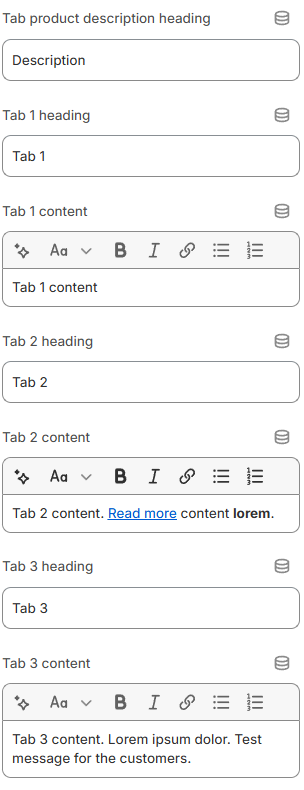
tab-content

tab-content-setting

  1. Tab product description heading – the setting allows you to set title for the description tab panel;

  2. Tab 1 heading – the setting allows you to set title for the first tab panel;

  3. Tab 1 content – the setting allows you to set text content for the first tab panel;

  4. Tab 2 heading – the setting allows you to set title for the first tab panel;

  5. Tab 2 content – the setting allows you to set text content for the first tab panel;

  6. Tab 3 heading – the setting allows you to set title for the first tab panel;

  7. Tab 3 content – the setting allows you to set text content for the first tab panel;

Colors
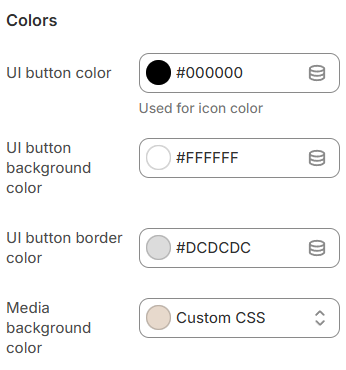
product-template-ui-colors

  1. UI button color – the setting allows you to set the UI button’s color. Will also be used for shadow color;

  2. UI button background color – the setting allows you to set the UI button’s background color;

  3. UI button border color – the setting allows you to set the UI button’s border color;

  4. Media background color – the setting allows you to set the media background color;

Layout
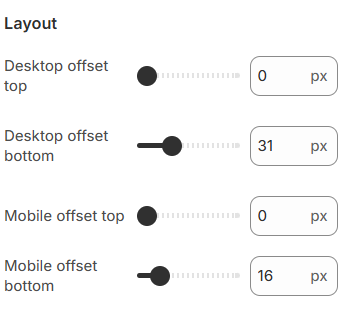
tab-content-layout

  1. Desktop offset top – the top indent of the section on the desktop;

  2. Desktop offset bottom – the bottom indent of the section on the desktop;

  3. Mobile offset top – the top indent of the section on the mobile;

  4. Mobile offset bottom – the bottom indent of the section on the mobile.

Block settings

Block “Badges”
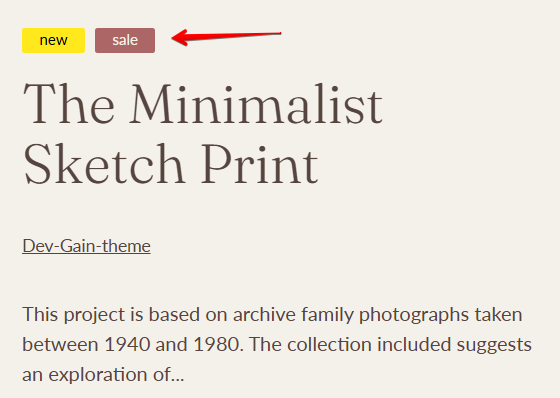
badges-block

The block has no settings, it displays product tags that are added in the product admin panel.

  1. The block displays tags added to the product according to the template – label__%tag%:modifer:

    • label__ – tag prefix by which tags are selected for output;

    • %tag% – display tag;

    • :modifer – color modifier;

  2. The modifier can have 2 values: primary and secondary or completely absent;

  3. Colors for modifiers are configured in the theme settings Customizer → Theme settings → Product → Labels.

For example, if you want to add two labels: “Sale” and “Top” with primary and secondary styles you need to add these tags for the product:

  • label__Top:secondary

  • label__Sale:primary

Layout settings allow you to select offsets of the section.

Block “Title”
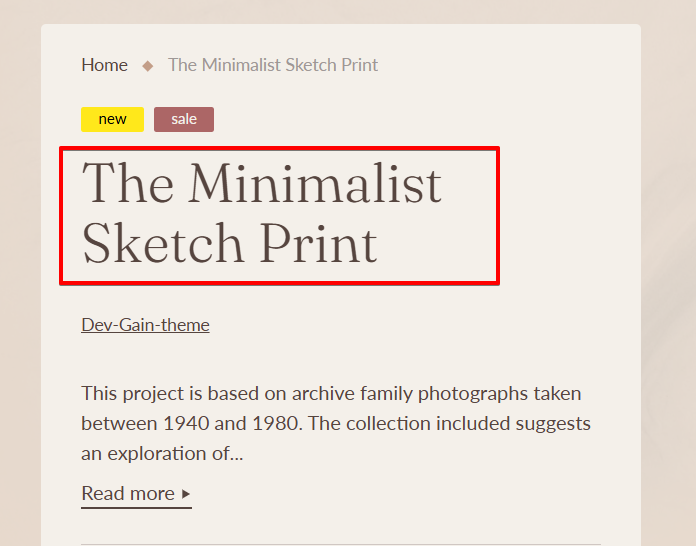
block-title

The block has no settings, it displays the title of the product, which is added to the product admin panel.

Layout settings allow you to select offsets of the section.

Block “Vendor and SKU“
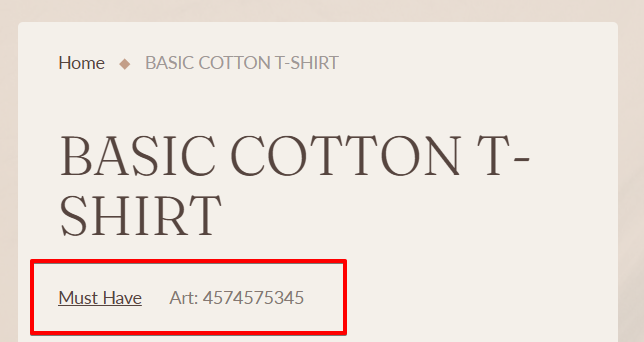
vendor-sku-block

vendor-sku-block-setting

  1. Show SKU – the setting allows you to show SKU of the product;

  2. SKU text – the setting allows you to set the text of the SKU. You need to use an {SKU} in the text field, which will be replace on the product SKU;

  3. Show vendor – the setting allows you to show a product vendor;

  4. Make vendor link to collection – the setting allows you to wrap a vendor into to link.

Layout settings allow you to select offsets of the section.

Block “Description”
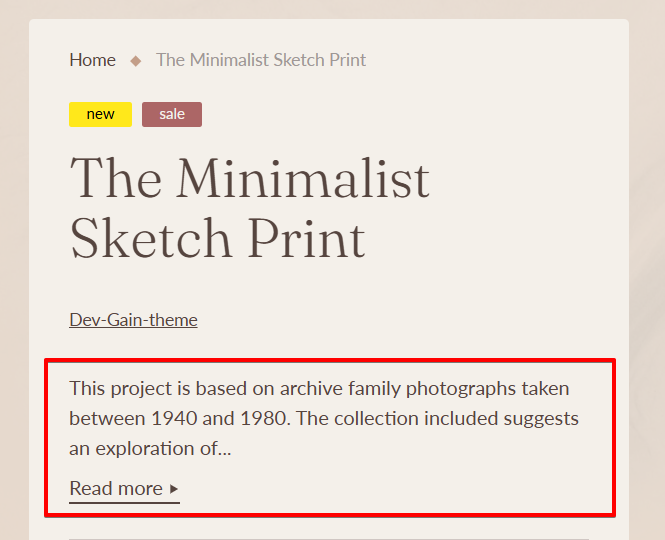
description-block

description-block

  1. Read more label -lLeave empty to show all product description in the block. Add some text, to add additional text section with full product description under the product section. The button will be shown if the product description has more than 20 words.

Block “Collapsed content”
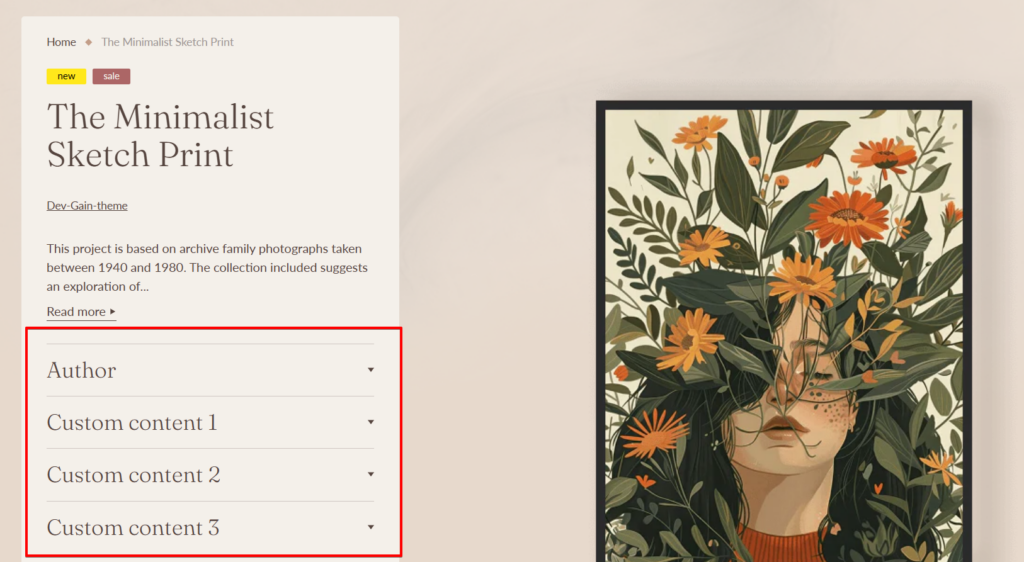
collapsed-content

Author content

collapsed-content-author

  1. Heading – the setting allows you to set title for the accordion;

  2. Author image – the setting allows you to set the image for the author;

  3. Author name label – the setting allows you to set the text for the label (“Author:”);

  4. Author name – the setting allows you to set the author name;

  5. Text – the setting allows you to set text content about the author;

  6. Button label – the setting allows you to set text for the author link;

  7. Button link – the setting allows you to set URL for the author link;

Custom content 1..3

  1. Heading – the setting allows you to set title for the accordion;

  2. Text – the setting allows you to set text content for the accordion;

  3. Button label – the setting allows you to set text for custom link;

  4. Button link – the setting allows you to set URL for the custom link;

Block “Options”
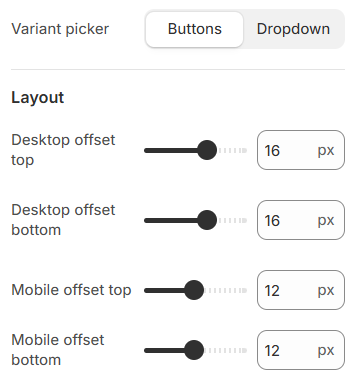
block-options

Variant picker – the setting allows you to select a view of variant options type. Note: if you have enabled a color swatch option then the option that is related to color swatch will always be a button. You can select “Buttons” or “Dropdown”;
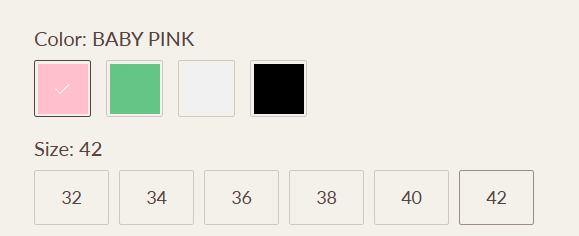
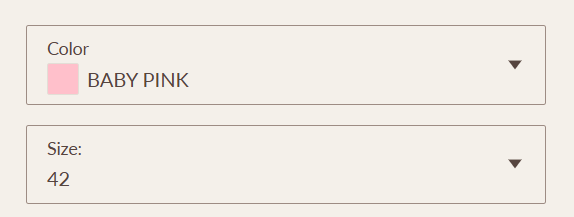
variant-buttons

variant-dropdown

Layout settings allow you to select offsets of the section.

Block Product combination

In Shopify, you can add variants to create different options for the product. Product variants are very useful, but they can be too limited if you want to create vastly different pages for each variant.

For instance, you may want to create products where colors of the product must be a linked products with each other like products, not a color variant.

If you select a color variation (on the bottom image), you are redirected to a different product page. The image of the swatch – is a product featured (main) image.

INFO: While this feature allows you to emulate variations on a given product page, internally, each product will still be an individual product. Each variation will appear as an individual product on the collection and search pages. Showing swatches in collection pages won’t be possible, either.
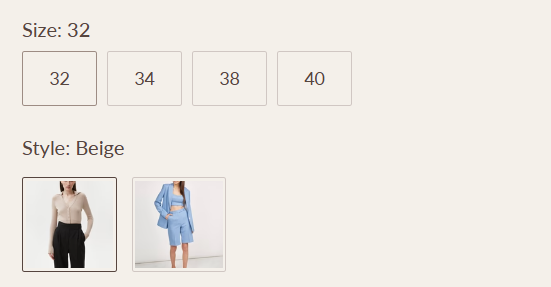
product-combination

To add product combination, please follow the instructions below:

  1. Create one product for each variation in your Shopify admin. If you want to create one product page per color, create one product for every color variation.

  2. You will now need to create two product metafields: one for the actual value for the option (for instance, “Red,” “Blue,”…). And one metafield for the list of products to show.

  3. Open “Metafields” settings (Admin/Settings/Custom data)) and click “Products”
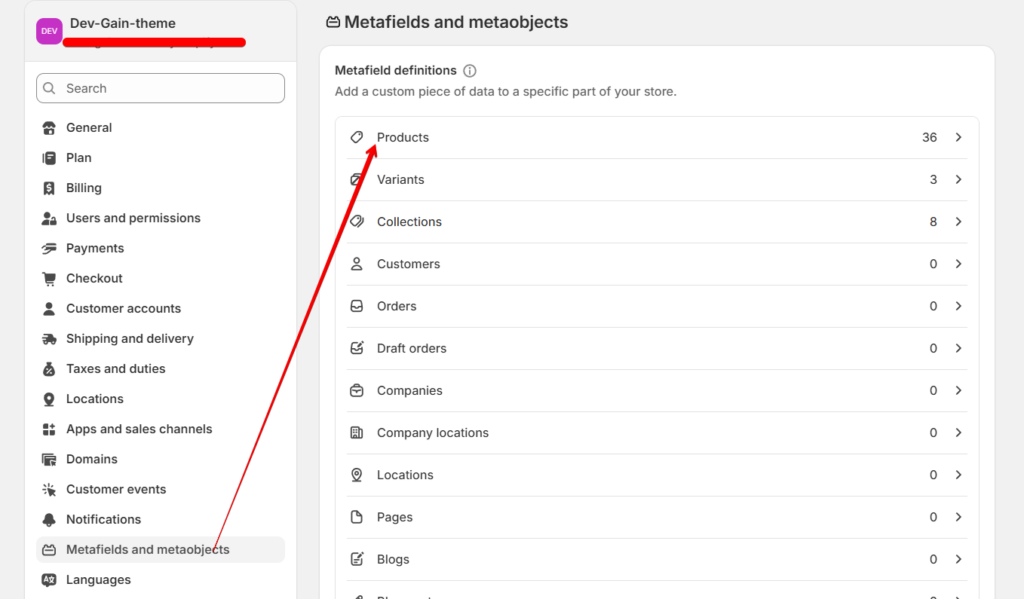
    product-combination-metafields

  4. Click “Add definition”
    add-definition-metafields
  5. In the name field, write something Variation value. Select the Single-line-text metafield type, and make sure that “One value” is checked:
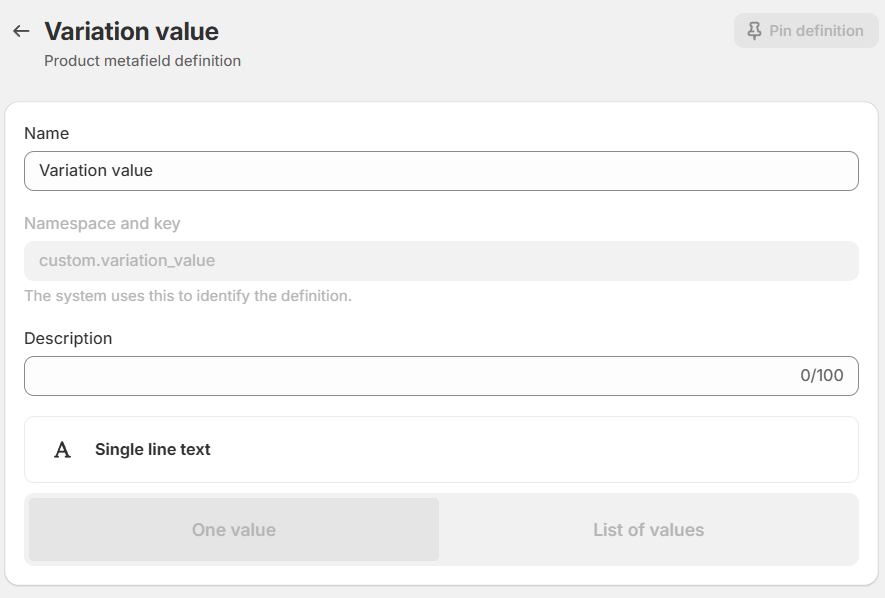
    variation-value-metafields
  6. Click “Add definition” again to create a second product metafield. In the name field, write Variation products, select “Product reference” as metafield type, and select “List of products“. It should look like this:
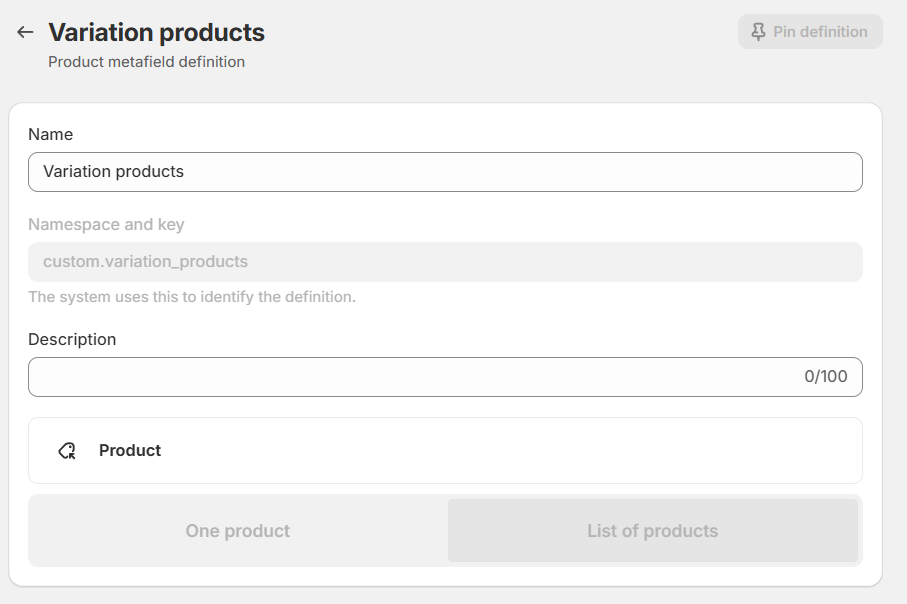
    variation-products-metafields
  7. Once the meta fields are created, you need to add the “Product combination” block to the “Product template” section.
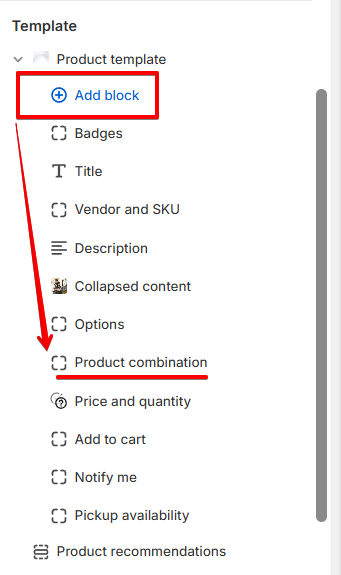
    product-combination-add-block
    product-combination-block-setting
    Option name – text label for the product variations. If you create different products grouped by colors, you can set “Color” value;
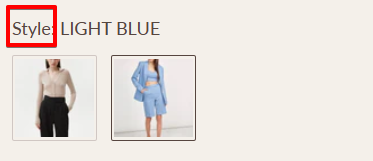
    option-name

Option value metafield – in this setting you need add a dynamic source from your product metafield “Variation value” that you added in the 5 step;
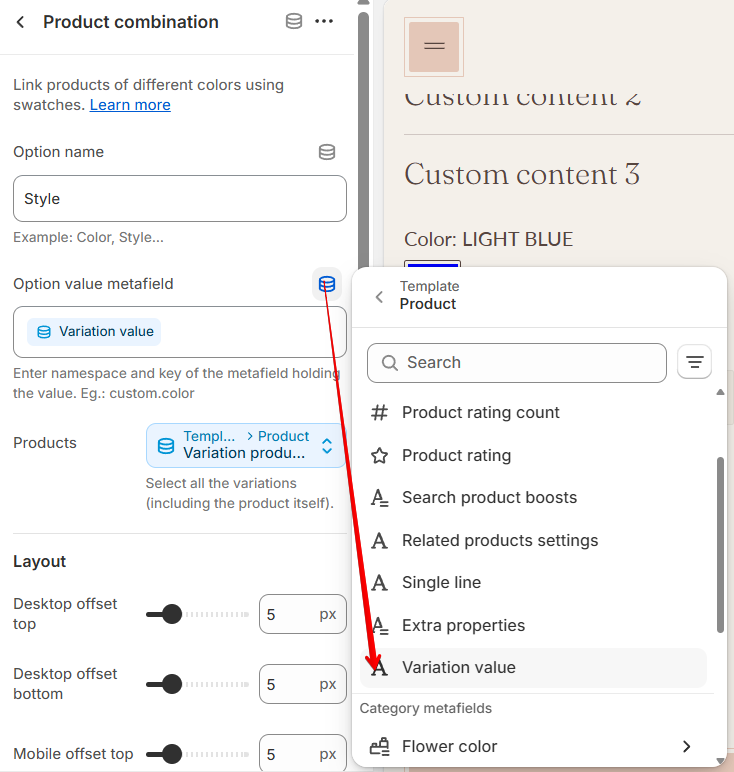
option-value-metafield
Products – in this setting you need add a dynamic source from your product metafield “Variation products” that you added in the 6 step;

  • You need filling in the information for all your products to create the link between them. To do that, in your Shopify admin, open the first product you want to link and scroll down to the “Metafields” section:
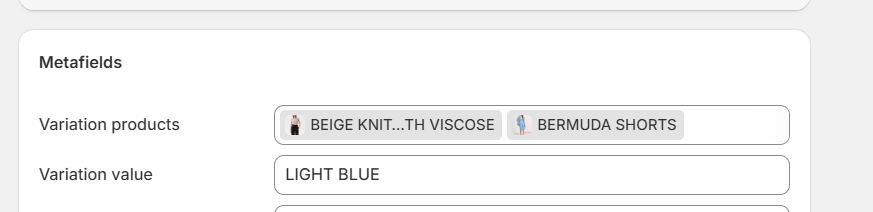
    variation-products-add
    For “Variation value,” enter the option value for the variation (if you want to create variations based on the color, then the variation value should hold the actual color value for this product, such as “Red,” “Blue,” “Green” etc). For the “Variation products” metafields, select all the product variations that should appear in this product (make sure to include the product itself as well).


Finally, repeat the same process for every variation product by adjusting the variation value for each product (the “Variation products” metafields, on the other hand, should contain the same list of products for every product within a group).

Block “Price and quantity“
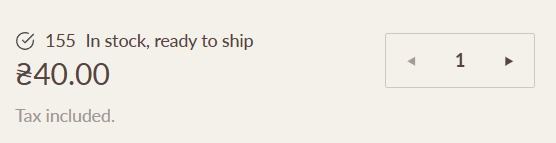
price-quantity-block

Enable inventory status – with this setting, you can show a message about product variant inventory status.

You can help customers detect which product variant has a low/high stock inventory.
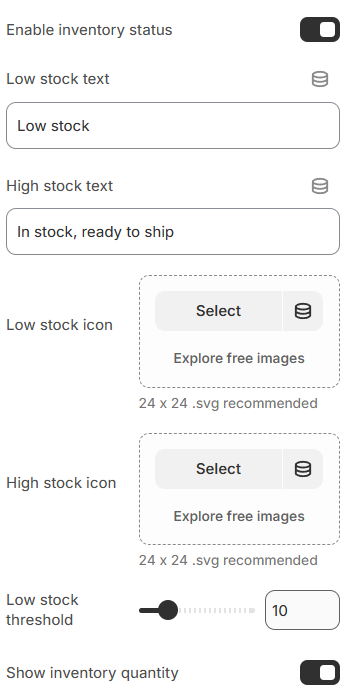
price-quantity-block-setting

  1. Enable inventory status – with this setting, you can show a message about product variant inventory status.

  2. Low stock text – the setting allows you to set the text that appears when variant inventory quantity is less or equal “Low stock threshold” value;

  3. High stock text – the setting allows you to set the text that appears when variant inventory quantity is more than the “Low stock threshold” value;

  4. Low stock icon – the setting allows you to set the icon of the “Low stock text”;

  5. High stock icon – the setting allows you to set the icon of the “High stock text”;

  6. Low stock threshold – the setting that allows you to select the minimum number of variant inventory quantities to show a “Low stock text” message. If the variant inventory quantity is more than the value of the setting, then “High stock text” will appear.

  7. Show inventory count – setting shows the number of products

Layout settings allow you to select offsets of the section.

Block “Add to cart”
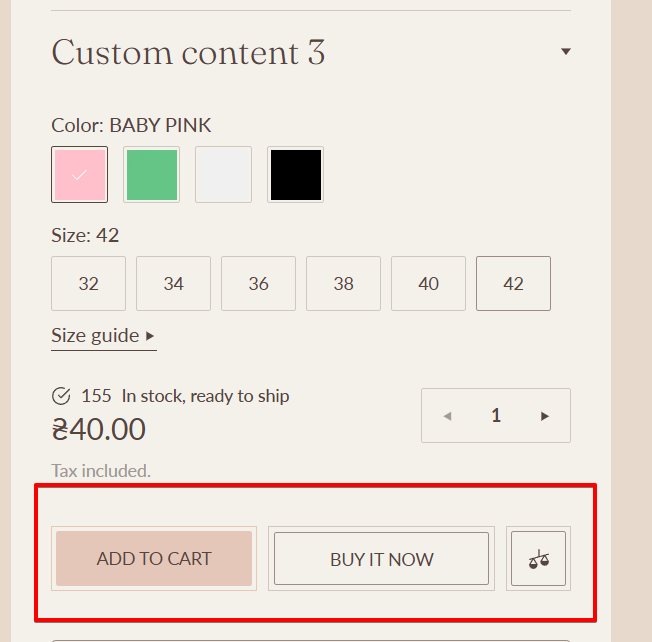
add-to-cart

add-to-cart-setting

  1. Button style – the setting allows you to add to cart button style;

  2. Button ‘Buy it now’ button – the setting allows you to set the ‘Buy it now’ button style;

  3. Show additional payment buttons – the setting allows you to add the “Buy it now” buttons;

  4. Show recipient information form for gift cards – the setting allows customers to send gift cards on a scheduled date along with a personal message (works only on a gift product).
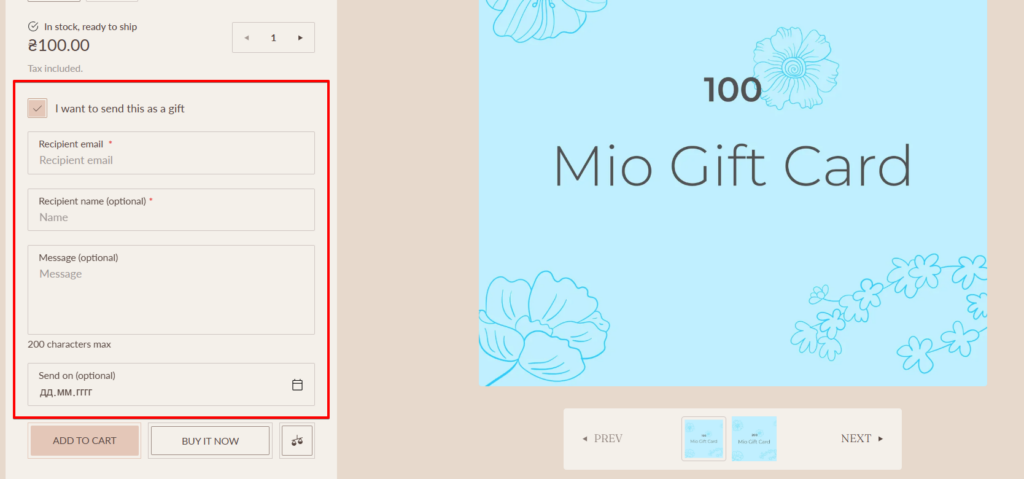
    gift-product-recipient-information

Block “Notify me”

notify-me-block

notify-me-popup

notify-me-setting

Button settings

  1. Button label – the setting allows you to set the text for the button. Required field;

Form settings

  1. Heading – the setting allows you to set the popup title text field;

  2. Email label – the setting allows you to set the label for the input;

  3. Email placeholder – the setting allows you to set the placeholder for the input;

  4. Button label – the setting allows you to set the label for the submit button;

  5. Success message – the setting allows you to set a message that the form was sent successfully.

Layout settings allow you to select offsets of the section.

Notify me logic:

  • The “Notify me” button is displayed when the product is “Sold out”;

  • When clicking on the “Notify me” button, a popup with a form will be displayed;

  • The user can enter the “Email” form;

  • The form has two hidden fields. Message – contains the message that is specified in the translations in the “Product notify me message” field. ProductURL – contains a link to the variant of the current, selected “Sold out” product;

  • If the form is sent successfully, the email will be sent and a “Success message” will be displayed;

  • If the form is sent unsuccessfully, an “Error message” will be shown.


Block “Pickup availability”

The block has no settings, it reflects the addresses where the product is available for pickup.
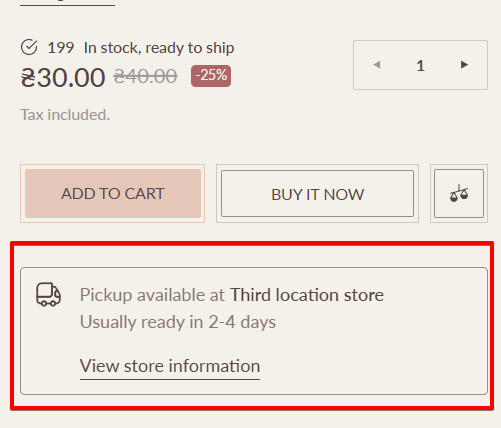
pickup-availability

pickup-availability-popup

Layout settings allow you to select offsets of the section.

Block “Custom field”
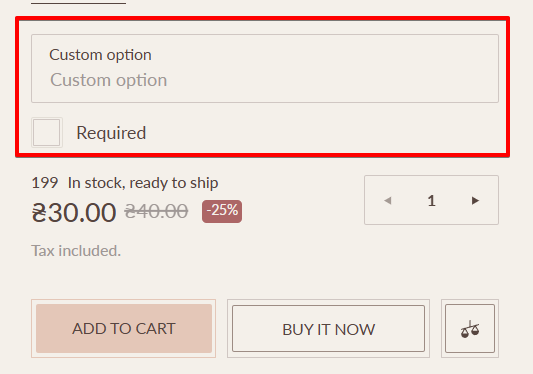
custom-field

custom-field-setting

  1. Field label – the setting is responsible for the label text for the input;

  2. Required text – the setting is responsible for the label text for the checkbox.

Custom field logic:

If the Required text is not filled in, only the text input will be displayed. In this case, if the field is filled – the user information will be added to the order.

If Required text is filled in, a checkbox will be displayed under the Custom field with a message from that field. If the checkbox is not clicked OR the Custom field is empty, the product cannot be added to the cart, and the corresponding error is displayed.

Block “Custom liquid”

With this block, you can display a text field (input type='text‘), which will represent the line_item

property of the product. When a product is added to a cart with a filled field, the value of this field will be added to the cart, checkout, and order.

  1. Custom liquid – the setting allows you to add your liquid code.

Layout settings allow you to select offsets of the section.

You can learn more about liquid here – https://shopify.dev/api/liquid.
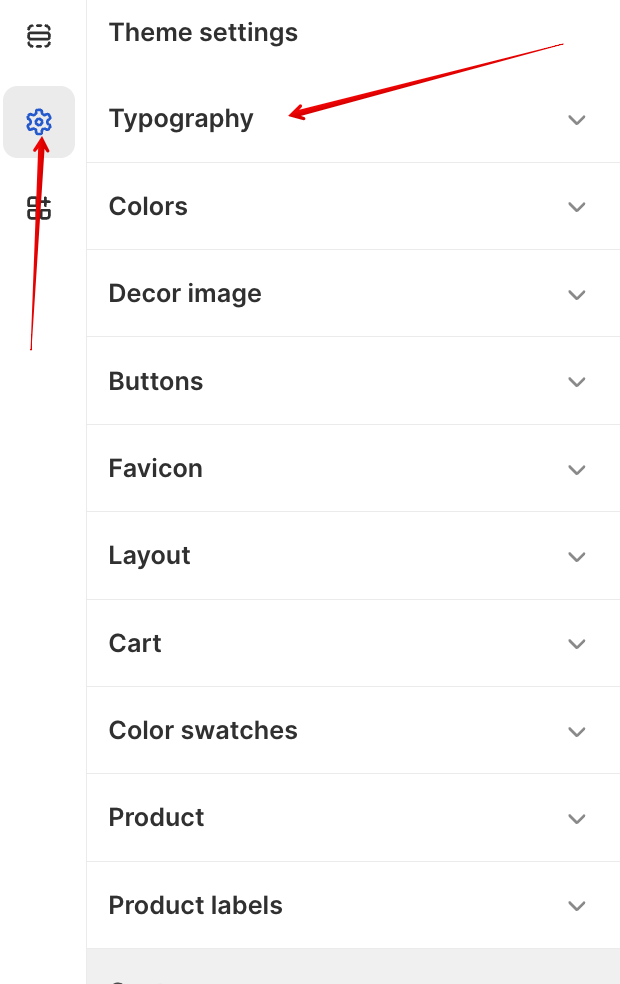
Search template

Sections & Snippets

Search template

search-template

Adding a Section

search-template-add

The section is static on a Search page template, it was added initially and cannot be removed.
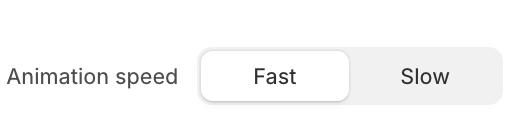
Section settings

General

search-template-settings

  1. Heading – the setting allows you to set heading;
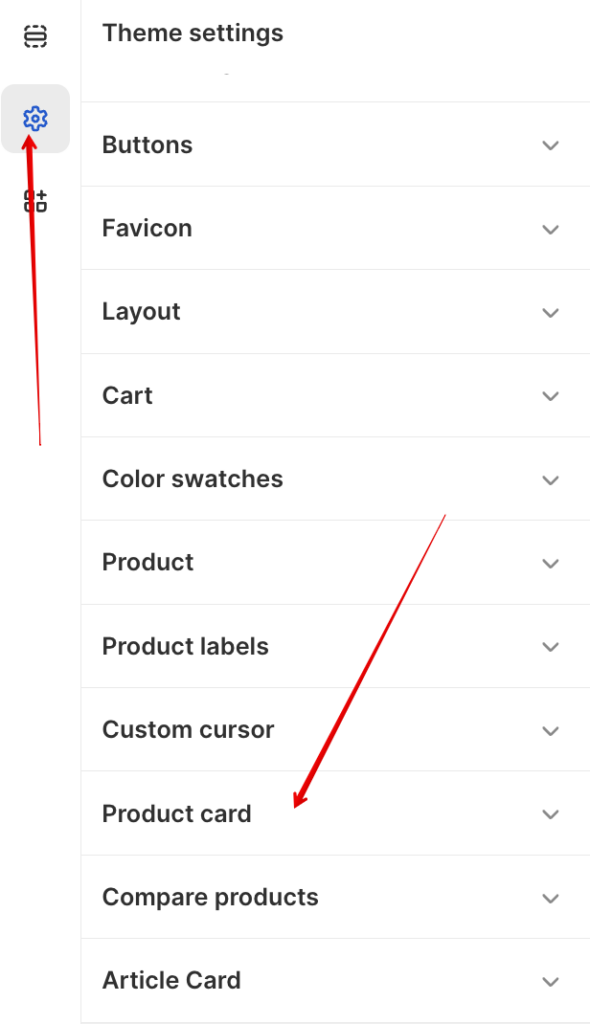
  2. Show color swatch in filters – setting allows you to show or hide color swatch in filters;

  3. Show grid button – the setting allows you to show the user grid selection buttons where they can choose to display 3 or 4 cards in a row;

  4. Filters type – the setting allows you to choose the location of filters on the search page, there are two options in the sidebar or in the drawer;

  5. Paginate by – setting allows to specify the number of results in the search sidebar;

  6. Pagination type – setting allows to select the type of pagination. Has several meanings:

    • Pagination – default pagination of elements;

    • Load more – loading a group of elements on button click;

    • Infinite scrolling – loading elements on scroll.

Colors

search-template-color

  1. Grid button color – this parameter is responsible for selecting the color of the button grid;

  2. Grid button border – this parameter is responsible for selecting the color of the button grid border;

  3. Grid button color active – this parameter is responsible for selecting the active color of the button grid;

  4. Grid button background active – this parameter is responsible for selecting the active background color of the button grid;

Layout

search-template-layout

  1. Container width – a container width of the section. If “Inherit” value is selected then the container width is based on the group ‘Layout’ settings in the Theme settings;

  2. Desktop offset top – the top indent of the section on the desktop;

  3. Desktop offset bottom – the bottom indent of the section on the desktop;

  4. Mobile offset top – the top indent of the section on the mobile;

  5. Mobile offset bottom – the bottom indent of the section on the mobile.

Collection template

Sections & Snippets

Collection template

collection-template

collection-template2

collection-template3

On this section (based on the Collection page) cuctomers can see products from the collection. Customers can use filters to show the products they are looking for.

Adding a Section

collection-template-add

The section is static on a collection page template, it was added initially and cannot be removed.
Section settings

General

collection-template-setting

collection-template-setting

  1. Show collection image – the setting is responsible for displaying the image of the collection;
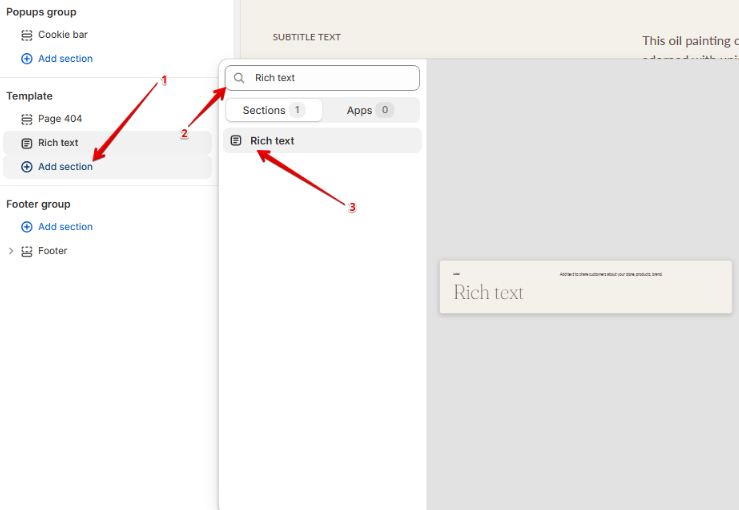
  2. Show collection description – the setting is responsible for displaying the description of the collection;

  3. Custom image – the setting allows you to set custom image for the banner;

  4. Heading and description position – the setting is responsible for changing the collection title, and description position. Can be under the image or inside the image;

  5. Show grid buttons – the setting is responsible for showing buttons that allow customers to change product grid view (3 or 4 on the desktop, 1 or 2 on the mobile);

  6. Show color swatch in filters – the setting allows you to set, if checked, the filter group with name, specified in the Theme settings / Product / Swatch option (“Color” by default) will show a checkbox like color swatch;
    collection-template-swatches

  7. Filters type – the setting allows selecting view of filters: “Drawer” or “Sidebar” or “Top bar”. Setting works only for desktop resolution. On the mobile filters will be always in the “Drawer” view;

  8. Paginate by – the setting is responsible for displaying a certain number of cards per page. The minimum number is 12, the maximum number is 50;

  9. Pagination type – the setting is responsible for the type of loading product cards. Can be “Pagination”, “Load more”, or “Infinity scrolling”;

  10. Promo collections – the setting allows you to select the list of the collections.
    promo-collections

  11. Layout – the setting allows you to set the layout of the section. Can be “Simple” or “Classic”;

  12. Enable animation – the settings allow you to enable card animations.

Colors

collection-template-color

  1. Banner background – the settings allow you to change the banner background.

  2. Banner text – the setting is responsible for selecting a text color when the collection title and description are placed inside the image.

  3. Banner overlay – the setting is responsible for selecting an overlay color for the collection image;

  4. Grid button color – this parameter is responsible for selecting the color of the button grid;

  5. Grid button border – this parameter is responsible for selecting the color of the button grid border;

  6. Grid button color active – this parameter is responsible for selecting the active color of the button grid;

  7. Grid button background active – this parameter is responsible for selecting the active background color of the button grid;

Layout

collection-template-layout

  1. Container width – a container width of the section. If the “Inherit” value is selected then the container width is based on the group ‘Layout’ settings in the Theme settings;

  2. Desktop offset top – the top indent of the section on the desktop;

  3. Desktop offset bottom – the bottom indent of the section on the desktop;

  4. Mobile offset top – the top indent of the section on the mobile;

  5. Mobile offset bottom – the bottom indent of the section on the mobile.

Product promo

Sections & Snippets

Product promo

product-promo

product-promo-mobile

This settings block is intended for general Product promo settings on the site.

In order to get to the Product promo settings block, you need to go to Customizer → Popups group → Product promo.

product-promo-add

Settings

General

product-promo-general-settings

  1. Layout – the setting lets you choose either to show the popup as text: image, promo text, and a button, or as a product: choose a specific product you want to promote;

  2. Cookie time – the setting is responsible for the time until the popup is re-displayed when the user closes it.

Text

product-promo-general-settings2

  1. Image desktop – setting allows you to set desktop image;

  2. Image mobile – setting allows you to set mobile image;

  3. Heading – setting allows you to set title text;

  4. Text – setting allows you to set description text;

  5. Link label – setting allows you to set accept link label;

  6. Link url – setting allows you to set accept link label url.

Product

product-promo-productset

  1. Product – setting allows you to set the product to open quick view on click.

Product tabs

Sections & Snippets

Product tabs

product-tabs

Adding a section

In order to add a section, you need to go to Customizer → Add Section → Product tabs.

product-tabs-add

Section settings:

General:

product-tabs-section-setting

  1. Heading – the setting allows you to set the text for the title;

  2. Products per row desktop – the settings allow you to choose the number of products per row on the desktop.

  3. Products per row mobile – the settings allow you to choose the number of products per row on the mobile.

Layout Settings

product-tabs-layout

  1. Container width – section container settings;

  2. Desktop offset top – the top indent of the section on the desktop;

  3. Desktop offset bottom – the bottom indent of the section on the desktop;

  4. Mobile offset top – the top indent of the section on the mobile;

  5. Mobile offset bottom – the bottom indent of the section on the mobile.

Image comparison

Sections & Snippets

Image comparison

image-comparison

For customers

Adding a section

In order to add a section, you need to go to Customizer → Add Section → Image comparison.

image-comparison-add

Section settings

image-comparison-setting

General

  1. Heading – section heading;

  2. Text – section richtext;

  3. First image – the image that will be displayed as a “before image”;

  4. Second image – the image that will be displayed as an “after image”. Use an image with the same dimensions as the first image for the best view of the section;

  5. Desktop image height – the height of the images in the section. The setting has options from 200px to 800px in increments of 50px. There is also an option for full size – the image occupies 100% of the width and height of the section;

  6. Mobile image height – mobile image height. The setting has the same options as the desktop.

Colors

image-comparison-color

  1. Drag cursor background – the color of the separating line and the icon background;

  2. Drag cursor color – icon color;

  3. Drag cursor border color – icon border color.

Layout

image-comparison-layout

  1. Container width – a container width of the section. If the “Inherit” value is selected then the container width is based on the group ‘Layout’ settings in the Theme settings;

  2. Desktop offset top – the top indent of the section on the desktop;

  3. Desktop offset bottom – the bottom indent of the section on the desktop;

  4. Mobile offset top – the top indent of the section on the mobile;

  5. Mobile offset bottom – the bottom indent of the section on the mobile.

Header

Sections & Snippets

Header

header

The section is static; it is added initially and cannot be removed.

Section settings

Genera

general-header

  1. Type – Setting allows you to choose the type of header. It can be Static, Sticky, and Sticky (hide, on scroll down)
    Static:

    Sticky:

    Sticky (hide on scroll down):

  2. Show Transparent Header for Homepage – Setting enables a transparent header for the homepage. The header will be transparent only in the top position; when the mega menu is opened and scrolling the page down, the header will have a background color.

  3. Show Transparent Header for Collection page – Setting enables a transparent header for the collection page. The header will be transparent only in the top position; when the mega menu is opened and scrolling the page down, the header will have a background color.

  4. Show language selector – Enables the language selector in the header and mobile menu.

  5. Show country/region selector – enables the currency selector in the header and mobile menu.

header-logo

  1. Image – logo image picker, if not specified, the store name will be displayed; The file in .svg format is recommended.

  2. Image (transparent header) – logo image picker for transparent header; if not specified, the Image will be displayed. We recommend using a logo of the same size as for the non-transparent header.

  3. Logo width – specifies the logo width. Minimum 20px, maximum 250px on the Desktop.

header-menu

  1. Main menu – option to connect the navigation menu to the header;

  2. Type – The setting is responsible for how the submenus are displayed:

    • Both – Both the Dropdown and Megamenu will be displayed.

    • Dropdown – Only the Dropdowns will be displayed. If the megamenu blocks are connected to the menu items, they will not be displayed.

    • Mega menu – Only the Mega menus will be displayed. If the main menu item has sub-menus, they will not be displayed.

  3. Open by – The setting controls how the submenu will open: By hover, or By click.

  4. Make 1st-level menu clickable – The setting allows you to make the 1st-level menu clickable if it has a submenu. Only works with open on hover for desktop.

  5. Make 1st-level menu uppercase – The setting makes the 1st-level menu items in the header uppercase.

Burger menu

header-burger-menu

  1. Menu – The setting allows you to add the Burger menu to the desktop.

  2. Additional menu – The setting allows you to add an additional Burger menu.

  3. Additional information – Text content that will be displayed in the burger menu.

  4. Show socials – The settings allow you to display the social links.

  5. Show collection thumbnails in second lvl menu – The setting allows you to display the collection image on the second-level menu items.

Colors

header-colors1

header-colors2

header-colors3

header-colors4

  1. Background – Header background color.

  2. Background (transparent header) – color gradient for transparent header.

  3. Text – Text color of main menu items.

  4. Text (header transparent) – Text color of main menu items for transparent header.

  5. Menu text color – Burger menu and submenus text color (dropdowns and mega menus)

  6. Menu active text color – Burger menu text color on hover.

  7. Main mega-menu text background color – Mega menu background color.

  8. Main mega-menu devider color – Menu divider text color.

  9. Dropdown active item background – Dropdown menus background color on hover.

  10. Icon – Icon color (Search, Account).

  11. Icon (header transparent) – Icon color for transparent header (Search, Account).

  12. Burger button background – Burger menu button background color.

  13. Burger button icon – Burger menu button icon color.

  14. Burger button border – Burger menu button outer border color.

  15. Burger button close outer border – Burger menu close button outer border color.

  16. Burger button close inner border – Burger menu close button inner border color.

  17. Burger button close icon – Burger menu close button icon color.

  18. Cart count text – Cart button text color.

  19. Cart count text (header transparent) – Cart button text color for transparent header.

  20. Cart count number – Cart items count number text color.

  21. Cart count number (header transparent) – Cart items count number text color for transparent header.

  22. Cart count number background – Cart items count background color.

  23. Cart number background (header transparent) – Cart items count background color for transparent header.

  24. Cart count border – Cart button border color.

  25. Cart count border (header transparent) – Cart button border color for transparent header.

Banner with carousel

Sections & Snippets

Banner with carousel

banner-with-carousel-desktop

banner-with-carousel-mobile

Adding section

banner-with-carousel-add

In order to add the section, go to the Customizer → Add Section → Product banner.

Section settings

banner-with-carousel-setting

  1. Heading first line – Texi field for the first line of the heading.

  2. Heading second line – Texi field for the second line of the heading.

  3. Heading third line – Texi field for the third line of the heading.

  4. Button label – The label of the CTA button.

  5. Button link – The link of the button.

  6. Image desktop – The setting to upload a banner image for the desktop.

  7. Image mobile – The setting to upload a banner image for the mobile. If not specified, the desktop image will be displayed.

  8. Images layout – The setting allows you to choose the image carousel aspect ratio. Can be Square, Portrait, Mix, or Natural.

Allignment

banner-with-carousel-allignment

  1. Heading first line – The horizontal alignment of the heading first line (Only on the desktop).

  2. Heading second line – The horizontal alignment of the heading second line (Only on the desktop).

  3. Heading third line – The horizontal alignment of the heading third line (Only on the desktop).

Colors

banner-with-carousel-colors

  1. Text – Headings text color.

  2. Overlay – Color overlay of the banner image.

Layout

banner-with-carousel-layout

  1. Desktop offset top – the top indent of the section on the desktop.

  2. Desktop offset bottom – the bottom indent of the section on the desktop.

  3. Mobile offset top – the top indent of the section on the mobile.

  4. Mobile offset bottom – the bottom indent of the section on the mobile.

Blocks settings

Limit – 50.

Image block

  1. Image – The setting to upload an image.

Custom liquid

Sections & Snippets

Custom liquid

Adding section

custom-liquid-add

In order to add a section, you need to go to Customizer → Add Section → Custom liquid

Section settings

custom-liquid-setting

  1. Custom liquid – the text field allows you to add your custom code.

Layout

banner-with-carousel-layout

  1. Desktop offset top – the top indent of the section on the desktop;

  2. Desktop offset bottom – the bottom indent of the section on the desktop;

  3. Mobile offset top – the top indent of the section on the mobile;

  4. Mobile offset bottom – the bottom indent of the section on the mobile.


Additional information

  1. You can learn more about liquid here – Liquid reference .

Buy the look

Sections & Snippets

Buy the look

buy-the-look-desktop

Adding section

In order to add a section, you need to go to Customizer → Add Section → Buy the look.

buy-the-look-add

Section settings

buy-the-look-setting

  1. Heading – Section heading. Also appears as a heading in the pop-up window when previewing the product.

  2. Buy look button label – The setting to add a button label. Appears in the pop-up window when previewing the product.

  3. Media decor image – The setting to add a background decorative image.

Colors

buy-the-look-colors

  1. Text – Section heading text color.

  2. Background – Section background color overlay.

Layout

buy-the-look-layout

  1. Container width – a container width of the section. If the “Inherit” value is selected, then the container width will be set based on the ‘Layout’ settings in the Theme settings.

  2. Desktop offset top – the top indent of the section on the desktop.

  3. Desktop offset bottom – the bottom indent of the section on the desktop.

  4. Mobile offset top – the top indent of the section on the mobile.

  5. Mobile offset bottom – the bottom indent of the section on the mobile.

  6. Inner desktop offset top – the top inner indent of the section on the desktop.

  7. Inner desktop offset bottom – the bottom inner indent of the section on the desktop.

  8. Inner mobile offset top – the top inner indent of the section on the mobile.

  9. Inner mobile offset bottom – the bottom inner indent of the section on the mobile.

Block setting

Look

Block limit – 2.

buy-the-look-card-block

  1. Card image – The setting allows you to upload a card image.

  2. Card heading – The setting allows you to add a card title

  3. Look heading – The setting allows you to add a heading to the “Look” button on the card.

  4. Product – The setting allows you to add a product to the “Look” card.

Ticker content

Block limit – 1.

buy-the-look-ticker

  1. Text – Option to add text to the block.

  2. Font – Option to set the font family for the text.

  3. Font size (Desktop) – Option to set the text font size for the desktop. Min – 20px; Max – 200px.

  4. Font size (Mobile) – Option to set the text font size for the mobile. Min – 16px; Max – 100px.

  5. Show divider – Option to enable the divider between scrolling text.

  6. Direction – Option to set the direction of the ticker. Can be left-to-right or right-to-left.

  7. Movement speed (Desktop) – Text scrolling speed for desktop.

  8. Movement speed (Mobile) – Text scrolling speed for mobile.

Quiz

Sections & Snippets

Quiz

Each quiz requires a ‘Collection’ and at least one ‘Question’, one ‘Submit’ and ‘Results’ block in order to function correctly. The ‘Start screen’, ‘Personalize’ blocks are optional.

Adding section

quiz-add

In order to add a section, you need to go to Customizer → Add Section → Quiz.

Section settings

quiz-setting

  1. Collection – Option to add a specific collection to the section. The quiz results will be restricted to products within this collection.

  2. Logic – Option allows you to choose the logic the quiz will follow.

    • AND – displays results that match all selected answers.

    • OR – displays results that match at least one selected answer.

  3. Back button label – Back button label to get back to the previous quiz screen.

Layout

layout

  1. Container width – a container width of the section. If the “Inherit” value is selected, then the container width will be set based on the ‘Layout’ settings in the Theme settings.

  2. Desktop offset top – the top indent of the section on the desktop.

  3. Desktop offset bottom – the bottom indent of the section on the desktop.

  4. Mobile offset top – the top indent of the section on the mobile.

  5. Mobile offset bottom – the bottom indent of the section on the mobile.

Block settings

Start screen

Block limit – 1.

quiz-start-screen

  1. Label – The setting to add a label above the title.

  2. Heading – The setting to add a title of the screen.

  3. Text – The setting to add short description.

  4. Button label – The setting to add a label for the button to start quiz.

  5. Image – The setting to add an image for the start screen. Use a square image.

Personalize

Block limit – 1.

quiz-personalize

  1. Label – The setting to add a label above the title.

  2. Heading – The setting to add a title of the screen.

  3. Text – The setting to add a short description.

  4. Customer name preview – The preview name that will be displayed until the customer enters their name.

  5. Input label – The label of the input field.

  6. Input placeholder – The placeholder of the input field

  7. Button label – Button label to go to the next step of the quiz.

Quistion

Block limit – 10.

  1. Heading – The setting to add a heading to the question screen.

  2. Text – The setting to add text of the current question.

  3. Button label – The setting to add a button label to the next screen.

  4. Multiple choice – The setting allows you to enable multiple choice among answers.


Anwers

Each answer must include a ‘Text’, ‘Small text’ or ‘Image’ to be displayed. Additionally, Product tags in the ‘Tags’ block of the product are required in order to function correctly.

Answer 1-8

quiz-block-answer

  1. Enable Answer 1...8 – The setting allows you to add an answer variant to the question.

  2. Text – The text of the answer variant.

  3. Small text – A short subtitle below the answer variant.

  4. Image – The image for the answer variant.

  5. Image aspect ratio – The setting to choose the image aspect ratio. Can be: Square, Landscape, and Portrait.

  6. Image object fit – The setting to choose image object fit. Can be: Cover or Contain.

  7. Tags – A text field to specify a tag name of the product related to the specific answer variant.
    If you specify multiple tags and ‘AND’ logic, then the product must contain all tags. Tags are not case sensitive.

Submit

Block limit – 1.

quiz-submit

  1. Heading – The setting to add a title of the screen.

  2. Text – The setting to add a short description of the

  3. Button label – The setting to add a label of the button to submit the quiz and go to the next screen.

Image

  1. Image – The setting to add an image of the screen.

  2. Maximum image width – The setting to specify the maximum width of the image. Min – 100px; Max – 1000px.

  3. Image aspect ratio – The setting to specify the aspect ratio of the image. Can be: Native, Square, Landscape, or Portrait.

Results

Block limit – 1.

quiz-results

  1. Heading – The setting to add a title of the screen.

  2. Text – The setting to add a short description of the screen.

  3. Button label – The setting to add a button label to retry the quiz.

No results

  1. Text – The setting to add a description in case the quiz ended up with no results.

Password header

Sections & Snippets

Password header

password-header

Adding section

The section is added initially to the template and cannot be hidden or removed. It is added to only the Password page and cannot be used elsewhere in the store.

Section settings

password-header-setting

  1. Button label – Enter with password button label.

  2. Logo – Store logo.

  3. Logo width – Store logo width settings. Min – 20px; Max – 250px.

password-popup-setting

  1. Heading – Enter with password popup heading.

  2. Input label – Enter with password input label.

  3. Input placeholder – Enter with password input placeholder.

  4. Button label – Enter with password submit form button label.


Colors

password-header-colors

password-header-colors2

  1. Section background – Password header background color.

  2. Section text – Enter with password button text color.

  3. Popup background – Enter with password popup background color.

  4. Popup text – Enter with password popup title color.

  5. Popup attention text – Wrong password message text color.

  6. Input text – Enter with password popup input text color.

  7. Input label – Enter with password popup input label text color.

  8. Input placeholder – Enter with password popup input placeholder text color.

  9. Input border – Enter with password popup input border color.

  10. Input border (active) – Enter with password popup active (focus) input border color.

  11. Button text – Enter with password popup submit form button label color.

  12. Button background – Enter with password popup submit button background color.

  13. Button border – Enter with password popup submit button border color.

  14. Button text (hover) – Enter with password popup submit button label color on hover.

  15. Button background (hover) – Enter with password popup submit button background color on hover.

Password content

Sections & Snippets

Password content

password-content

Adding section

The section is added initially to the template and cannot be hidden or removed. It is added to only the Password page and cannot be used elsewhere in the store.

Section settings

password-content-setting

password-content-setting2

  1. Heading – Section heading.

  2. Text – Section subheading.

  3. Success message – The message after the form is submitted successfully.

  4. Show form – The toggle to display or hide the subscription form.

  5. Input label – Email input label.

  6. Input placeholder – Email input placeholder.

  7. Button label – Email form submit button label.

  8. Background image – Section background image.

  9. Background image mobile – Section background image for mobile.

Colors

password-content-color

password-content-color2

  1. Overlay – Page color overlay. Visible only if the background image is added.

  2. Background – Page background color.

  3. Heading – Page title color.

  4. Text – Page text color.

  5. Input text – Input text color

  6. Input Label – Input label color.

  7. Input Placeholder – Input placeholder color.

  8. Input Border – Input border color.

  9. Input Border (active) – Active input border color.

  10. Attention text – Error message text color.

  11. Success text – Success message text color after a form submission.

  12. Button text – Submit button label text color.

  13. Button background – Submit button background color.

  14. Button border – Submit button border color.

  15. Button text (hover) – Submit button label text color on hover.

  16. Button background (hover) – Submit button background color on hover.

Password footer

Sections & Snippets

Password footer

footer

Adding section

The section is added initially to the template and cannot be hidden or removed. It is added to only the Password page and cannot be used elsewhere in the store.

Section settings

password-footer-settings

  1. Text – Footer text.

  2. Login link label – Footer login link label

  3. Login link url – Footer login link URL. The ‘/admin’ value is set by default.


Colors

password-footer-color

  1. Text – Footer text color.

  2. Background – Footer background color.

  3. Top border – Footer top border color.

Article main (blog post page)

Sections & Snippets

Article main (blog post page)

article main

Adding section

The section is static; it is added initially and cannot be removed.

Section settings

article-main

  1. Show author – The setting allows you either to show or hide a blog post author.

  2. Show date – The setting allows you either to show or hide a publishing date.

  3. Image desktop height – The setting allows you to set the image height on the desktop.

  4. Image mobile height – The setting allows you to set the image height on the mobile.

Layout

layout

  1. Desktop offset top – the top indent of the section on the desktop.

  2. Desktop offset bottom – the bottom indent of the section on the desktop.

  3. Mobile offset top – the top indent of the section on the mobile.

  4. Mobile offset bottom – the bottom indent of the section on the mobile.

How to set up the Size Guide

FAQ

How to set up the Size Guide

To display the Size guide on the Product page, you need to do the following:

Step 1: Create a product metafield

Navigate to the Shopify Admin -> Settings -> Metafields and metaobjects -> Products and click on the “Add definition” button.

metafields

Create a metafield with the following parameters:

Name: Any preferred name (e.g., Size guide)

Namespace and key: size_guide.page – click the row under the “Name” field and rename it.

Type: One / Page.

Step 2: Create a page with the Size Guide chart

Navigate to the Shopify Admin -> Online store -> Pages and create a page with the necessary content. Make sure you have chosen visibility as Visible.

Note: You can create as many unique pages as you require.

create page

Step 3: Connect the Size Guide page to the metafield in the Product settings

Navigate to the Product in your Shopify admin, scroll down to the metafields block, find the metafield you created earlier, and select the needed page for the metafield.

Note: Please repeat this step for each of your products where the size chart should be displayed. The size guide button will not be shown for products that have an empty metafield.

add-page-on-pdp

Step 4: Enable the Size guide button in the Product template

Navigate to the Theme editor -> Product template, and enable the “Show size guide” option.

turn-on-size-guide

Add model image (Optional)

Step 1: Create a product metafield

Navigate to the Product metafields and create a metafield to store the model image with the following parameters.

Name: Size guide model image

Napespace and key: custom.size_guide_model_image

Type: One / Image (File)

add-model-image

Step 2: Add an image to the metafield

Navigate to the Product in your Shopify admin, scroll down to the metafields block, find the metafield you created earlier, and add the needed model image for the metafield.

add-image-metafield

Note: Please repeat this step for each product where the model image should be displayed.

Add model description (optional).

Step 1: Create a product metafield

Navigate to the Product metafields and create a metafield to store the model image with the following parameters.

Name: Size guide model info.

Namespace and key: custom.size_guide_model_info

Type: One / Multi-line text.

model-info

Step 2: Add the model description to the metafield

Navigate to the Product in your Shopify admin, scroll down to the metafields block, find the metafield you created earlier, and add the text description.

model-description

Note: Please repeat this step for each product where the model description should be displayed.

Contact Us

Support

Contact Us

Gain Theme Support.

If you need any help with your Gain Theme, feel free to reach out to us by email. Please note that we can help you with your theme, provided that it is updated to the latest version.

We typically reply during business hours 8 am – 5 pm (Brussels, GMT +02:00), Monday-Friday (excluding holidays). 

Reach out via the contact form below, or send us a direct email at support@utdweb.team.

Contact us

App support.

If you need help with a 3-rd party app, or have questions regarding it, please contact App Support directly. Keep in mind, that app developers are expected to have their apps compatible with Shopify Themes.
Please note that we can only support you with the Gain Theme Code, developed by us. 

All Shopify App Developers offer support assistance, feel free to reach out to them.

Shopify support.

If you need help with the Admin Panel or Shopify platform in general, the Shopify Support team is available 24/7. 

If you need help with the checkout page, always contact the Shopify Support team directly, as this page is not part of the theme code, it is a Shopify page. 

Feel free to contact Shopify support here: https://help.shopify.com/questions

Custom changes.

If you need anything custom-developed for your store, then please note that this is now part of the theme support. If you need anything custom-added to your store, please note that we have a team of developers who can implement new features at an additional cost.
Feel free to learn more about our services by clicking the button below or contact us directly via support@utdweb.team and let us know the details of your request.

Paid Services